Author: dev@revnix.com

  • Step-by-Step Guide to WordPress CMS Integration for Beginners

    WordPress CMS integration is easiest when you treat it like plumbing: get the basics right first, then add the fancy fixtures.

    I’m Mobeen Abdullah. I’ve spent the last decade building and shipping full-stack products, and I’ve watched WordPress go from “blog tool” to “default CMS” for teams that just want publishing to work without hiring a platform squad.

    In this guide, you’ll integrate WordPress as your CMS in a way that’s beginner-friendly but not hand-wavy. You’ll set up hosting, install WordPress, pick a theme, lock in the right settings, and add the plugins that actually matter (while avoiding the ones that quietly wreck performance).

    By the end, you’ll have a clean, stable WordPress setup you can maintain without fear—plus you’ll know what usually breaks in the real world, how to spot it early, and what I’d do differently if you’re building for a business instead of a hobby site.
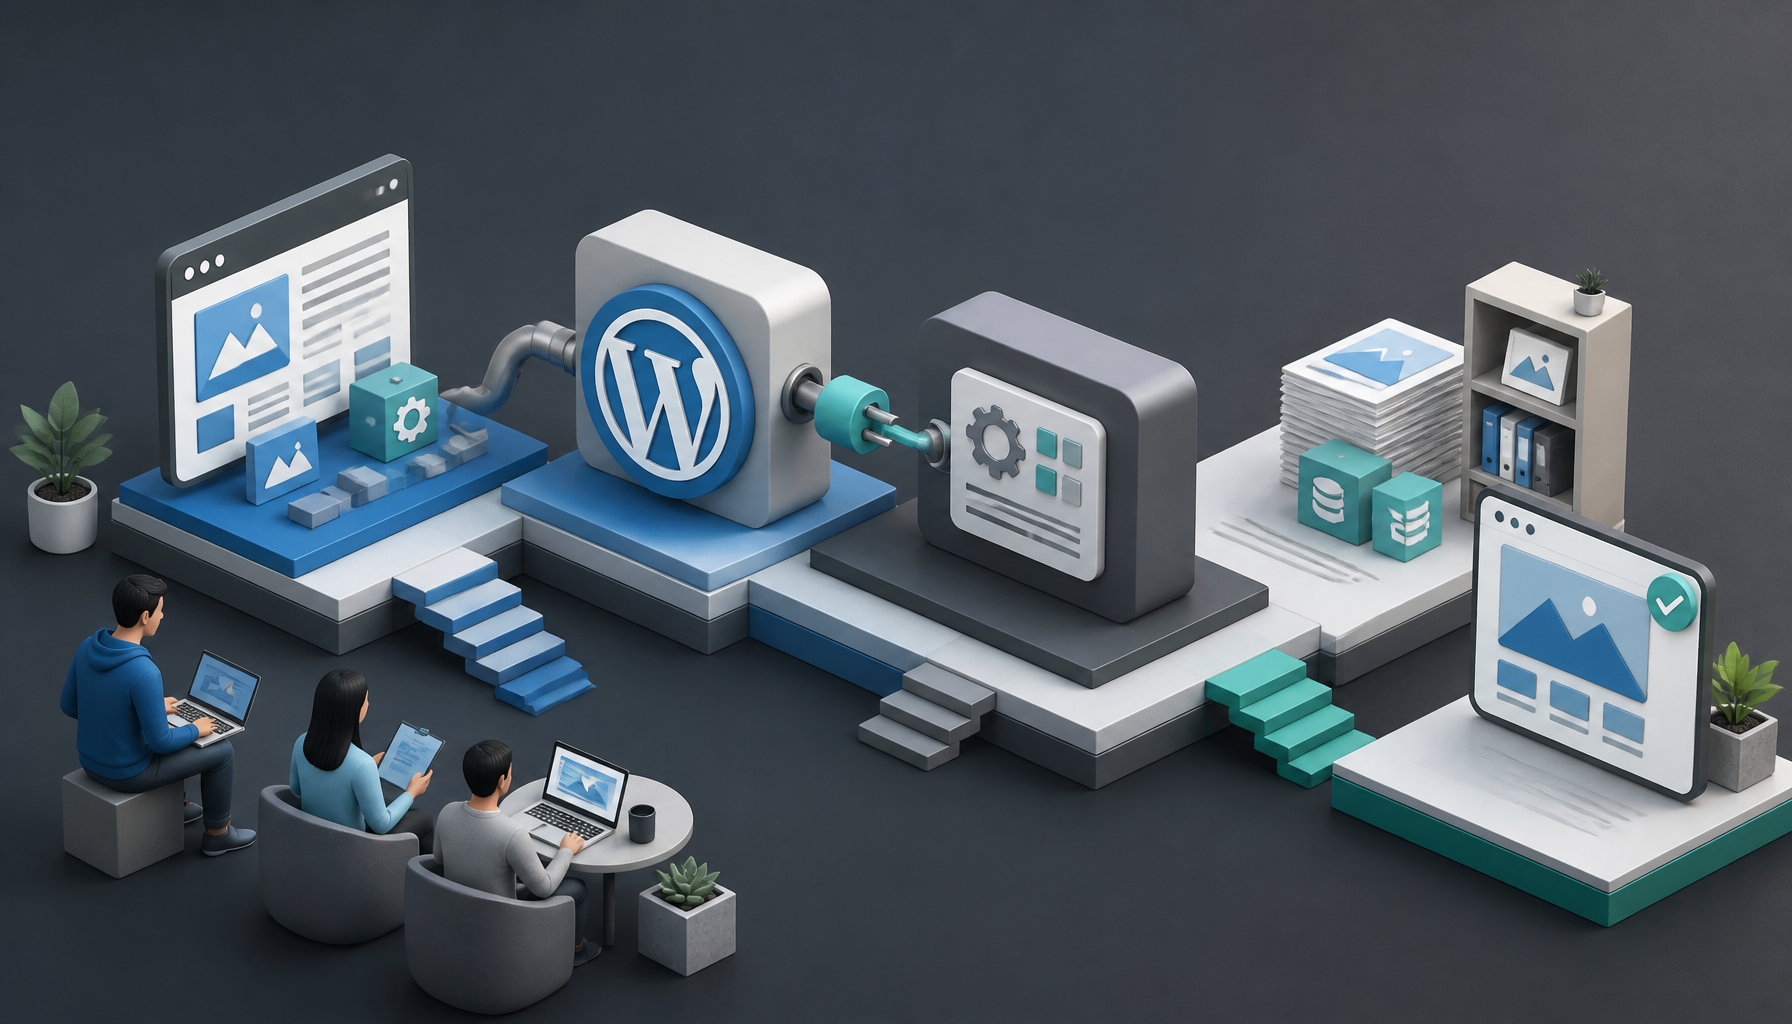
    Featured image for Step-by-Step Guide to WordPress CMS Integration for Beginners

    Comprehensive Guide to WordPress CMS Integration

    Integrating WordPress as your content management system (CMS) can be smooth, but only if you do it in the right order. If you jump straight to themes and plugins, you’ll end up debugging weird stuff later (usually at the worst time).

    What is WordPress?

    WordPress is a content management system that lets you create, edit, and publish content without rebuilding your whole site every time you tweak a headline. It started as a blogging platform, but in practice it’s a full CMS with users, roles, media handling, menus, page templates, and an ecosystem that can cover everything from portfolios to e-commerce.

    As of 2026, approximately 41.2% of all websites are powered by WordPress, making it the most widely used CMS globally (source). That number matters because it explains why you can almost always find a theme, plugin, tutorial, or contractor when you’re stuck.

    Here’s the beginner-friendly mental model I use:

    • WordPress Core = the engine (posts, pages, users, editor)
    • Theme = the skin + layout system
    • Plugins = bolt-on features (forms, SEO, caching, security)
    • Hosting = where the whole thing runs, and where most performance issues actually come from

    Why Choose WordPress as Your CMS?

    WordPress is a solid choice when you need publishing, flexibility, and a reasonable learning curve.

    • Extensive Customization: Thousands of themes and plugins let you shape the site without custom code.
    • SEO Friendly: Out of the box it’s decent, and with the right setup it can rank well.
    • Community Support: You’ll find answers fast because other people have already hit the same wall.
    • Security Updates: Core and reputable plugins ship frequent patches—if you actually apply them.

    That said, the tradeoff is you’re now the “site mechanic.” Even on managed hosting, you’re responsible for updates, plugin choices, and basic hygiene.

    Step-by-Step Guide to WordPress CMS Integration

    This is the sequence I’d use for a beginner build, and it’s the same order I use on client projects because it prevents rework.

    1. Set Up Your Hosting Environment

    Pick hosting before you think about design. If the foundation is shaky, every later step gets more painful.

    Here’s what I look for:

    • One-click WordPress install (saves you from manual DB config)
    • Free SSL (your login should never be on HTTP)
    • Daily backups or at least easy backup hooks
    • Decent support that can explain errors, not just paste KB links

    Many beginners do fine on WordPress-focused hosts like SiteGround or Bluehost because the onboarding is straightforward. But even then, check the plan limits—cheap tiers often throttle CPU, which shows up as random slowness when you add plugins.

    Real example: I once helped a friend whose “brand new” site took 6–8 seconds to load. It wasn’t the theme. It was the host cramming too many accounts onto the same box. Moving hosts fixed 80% of it before we touched a single optimization.

    2. Install WordPress

    Most hosts offer a wizard. Use it.

    • Log into your hosting account.
    • Find the WordPress installer (often under “Website” or “Software”).
    • Follow the prompts to complete the installation.

    While you’re filling the form, slow down on two fields:

    • Admin username: don’t use admin.
    • Admin email: use an inbox you control long-term (not a temporary project email).

    If you get asked about the database, the installer usually creates it automatically. If you’re doing it manually, name your DB and user clearly (wp_site1_db, wp_site1_user). Later, when you’re staring at phpMyAdmin at 2am, you’ll thank yourself.

    3. Choose a Theme

    A theme is your layout system, not just “how it looks.” So, pick for structure first, aesthetics second.

    • Go to Appearance → Themes → Add New.
    • Browse free themes or upload a premium theme.
    • Install and activate.

    My opinionated rule: avoid themes that require 15 companion plugins to look like the demo. That’s how you end up with a site that breaks when one vendor stops updating.

    If you want a fast sanity check, preview these:

    • Does the theme look acceptable without the demo content?
    • Is it updated recently?
    • Are there clear docs for menus, header, and homepage?

    Drop an image into a test post to confirm the typography doesn’t collapse on mobile.

    4. Customize Your Settings

    Settings are boring—until they’re wrong. Lock these in early so you don’t fight them later.

    • Go to Settings → General to set site title, tagline, and timezone.
    • Go to Settings → Permalinks and pick a clean structure (usually “Post name”).
    • Go to Settings → Reading to choose your homepage behavior.

    A common beginner mistake: changing permalinks after you’ve already shared links publicly. It’s not fatal, but it can create 404s unless you add redirects.

    Practical checklist I use on day one:

    • Timezone correct (scheduled posts depend on it)
    • Site language correct (affects date formats and some plugins)
    • Permalinks set before publishing anything

    5. Install Essential Plugins

    Plugins are where beginners either unlock WordPress—or accidentally bury it.

    • Go to Plugins → Add New.
    • Search, install, and activate what you actually need.

    A decent starter set for many sites:

    • Yoast SEO (basic SEO control)
    • WPForms (forms that don’t feel like a science project)
    • WooCommerce (only if you’re selling)

    Now the caution: every plugin is code running on every request. So, if you install 25 plugins “just in case,” you’ll eventually run into conflicts, slow admin pages, or security issues.

    If security is your concern (it should be), don’t guess. I’d read a comparison like choose the right security plugin for your WordPress site and then follow up with a tighter selection process like learn how to select the best security plugin before you install anything.

    6. Add Content

    Content creation is where WordPress finally feels “real.”

    • Go to Posts → Add New for blog content.
    • Go to Pages → Add New for static pages (Home, About, Contact).
    • Use the block editor to add headings, images, and lists.

    Here’s the workflow I teach beginners because it prevents messy navigation:

    1. Create core pages: Home, About, Contact, Privacy Policy.
    2. Create your main menu and add only those pages.
    3. Publish 2–3 starter posts (even short ones) so your blog doesn’t look empty.
    4. Add categories only when you have at least 2–3 posts that belong in each.

    One small but important move: write your About page early. It forces you to clarify what the site is for, which makes every later content decision easier.

    7. Regular Updates

    Updates are non-negotiable. Most WordPress “mystery hacks” I’ve seen came down to ignored updates plus a weak admin password.

    What I recommend:

    • Update WordPress core monthly (or sooner if it’s a security release).
    • Update plugins/themes weekly, but do it with a backup.
    • Keep at least one off-site backup (not just “on the same server”).

    If you’re using UpdraftPlus or a host backup, do a restore test once. Seriously. Backups you can’t restore are just comforting stories.

    Common Challenges and Solutions

    You’ll hit bumps. That’s normal. The trick is recognizing whether it’s a “WordPress issue” or a “you installed three overlapping tools” issue.

    Compatibility issues

    Compatibility problems usually show up as:

    • White screen
    • Broken editor
    • Random layout glitches

    Fix it like a grown-up:

    1. Disable the last plugin you installed.
    2. Switch to a default theme temporarily.
    3. Check PHP version requirements in the plugin docs.

    If you can’t access wp-admin, use your host’s file manager and rename the plugin folder in wp-content/plugins/ to force-disable it.

    Page speed problems

    Most slow sites I’ve fixed had one (or more) of these:

    • Huge images straight from a phone
    • Too many page builder widgets
    • No caching
    • A “free” theme loading five font families

    Start with images: resize them and compress them. Then look at plugin bloat. Only after that should you touch advanced caching.

    If you’re integrating WordPress with other platforms, speed issues can hide in sync jobs too—especially if you’re pulling content from multiple systems. When you get there, a guide like sync content effectively between WordPress and other CMSs helps you avoid the classic mistake of re-importing the same media library over and over.

    Security vulnerabilities

    Security isn’t one plugin. It’s habits.

    • Use a password manager.
    • Limit admin accounts.
    • Turn on 2FA if your security plugin supports it.
    • Remove plugins you’re not using (deactivated isn’t the same as removed).

    And yes, updates matter, but so does exposure. If you install a plugin from a random zip file someone emailed you, you’re gambling.

    Conclusion

    Integrating WordPress as your CMS looks big at first, but it gets manageable once you follow a strict order: hosting, install, theme, settings, plugins, content, then maintenance. The real win is repeatability—when something breaks, you know where to look and what to roll back.

    If you are looking for custom solutions tailored to your business needs, consider Revnix, which specializes in AI agents and open-source web applications for complete ownership and flexibility.

    One last practical next step: block 60 minutes on your calendar this week, do your first update + backup + restore test, and write down what you learned. That’s the difference between “I have a site” and “I can run a site.”

    FAQs

    Q: Does WordPress have a CMS?

    Yes—WordPress is a CMS.

    Where beginners get tripped up is the wording. People sometimes say “WordPress + a CMS” as if WordPress needs a separate CMS layer. It doesn’t. Core WordPress already gives you the CMS basics: a database-backed content model (posts/pages), a media library, user roles, menus, revisions, and an editor.

    Here’s a simple way to confirm you’re using it like a CMS (not just a blog):

    1. Create a Page called “Services” (Pages → Add New).
    2. Create child pages like “Web Design” and “Maintenance.”
    3. Add them to your menu under Services.
    4. Assign a homepage (Settings → Reading).

    That flow—structured pages, navigation, and controlled publishing—is CMS behavior.

    Quick real example: I helped a local clinic site that had everything as blog posts because “posts are what WordPress uses.” The result was messy URLs, broken menus, and no clear hierarchy. We moved core content into pages, left articles as posts, and the site immediately became easier to manage.

    Common mistake: treating categories like “site sections” for static content. Categories are fine for blog organization, but they’re a weird crutch for evergreen pages.

    Q: Why are people moving away from WordPress?

    Some people leave WordPress because they outgrow it. Others leave because they set it up poorly and blame the tool.

    The legit reasons I see:

    • They want a locked-down platform with fewer moving parts (less maintenance).
    • Their team wants a fully hosted drag-and-drop builder with no plugin decisions.
    • They need enterprise workflows (complex approvals, multi-brand governance) and don’t want to build that on top.

    But, honestly, a big chunk of “we’re leaving WordPress” stories start like this: someone installed 40 plugins, used an abandoned theme, never updated, then got hit with a malware redirect.

    If you’re considering a move, do this mini-audit first:

    1. List every plugin and whether you still need it.
    2. Check update frequency (anything stale for 12+ months is a red flag).
    3. Measure performance with a baseline test (before you rip the platform out).
    4. Look at editorial needs—how many people publish, how often, and with what review steps.

    Persona anecdote: one small e-commerce brand I worked with swore WordPress was “too slow.” After we removed two overlapping page builders and fixed image sizes, their product pages loaded in about half the time. They didn’t need a replatform. They needed less clutter.

    Q: Is WordPress outdated in 2026?

    No. It’s not outdated—but it can feel outdated if you’re using it like it’s 2014.

    Modern WordPress in 2026 is about:

    • Block-based editing (cleaner content structure)
    • Better hosting stacks (server-side caching, CDN, modern PHP)
    • Leaner themes that don’t ship a kitchen sink

    Where it still frustrates people is the plugin ecosystem: it’s powerful, but it’s also uneven. So, you have to be picky.

    If you want to “modernize” an existing WordPress setup without rebuilding everything, here’s a practical, low-risk path:

    1. Update core + plugins on a staging site.
    2. Replace abandoned plugins with actively maintained alternatives.
    3. Switch to a lightweight theme if your current one is bloated.
    4. Clean media (compress oversized images).
    5. Add caching (plugin or host-level) after you’ve reduced weight.

    Common mistake: doing performance work before content/media cleanup. Caching can mask problems, but it won’t fix a 6MB hero image.

    Q: Can WordPress be used as a CMS?

    Absolutely. In fact, that’s what it’s best at for a lot of teams: predictable publishing, a huge ecosystem, and control over your data.

    If you’re integrating it into a bigger stack (say, WordPress + another CMS + email platform), the trick is defining a “source of truth.” Decide where each content type lives.

    A practical integration approach looks like this:

    1. Define content ownership: blog posts in WordPress, product data elsewhere, for example.
    2. Decide sync direction: one-way or two-way (two-way is harder than it sounds).
    3. Pick identifiers: slugs, IDs, or custom fields you won’t change later.
    4. Test with 10 items first: don’t sync your whole library as a first run.
    5. Monitor and log: you need visibility when imports fail.

    If email marketing is part of your CMS workflow (it usually is), don’t pick tools blindly. I’d compare options using something like discover effective email marketing software and then narrow it down with a shortlist like explore top email marketing tools so you don’t end up migrating lists a month later.

    Common mistakes I see in CMS integrations:

    • Syncing images repeatedly (media libraries explode in size fast)
    • Not mapping authors properly (everything becomes “admin”)
    • Forgetting redirects when URLs change

    If you fix those three early, your integration will feel boring—in the best way.

    sync content effectively between WordPress and other CMSs
    choose the right security plugin for your WordPress site
    learn how to select the best security plugin
    discover effective email marketing software
    explore top email marketing tools
    check out sustainable living tips for 2026

  • Top Email Marketing Tools for Small Businesses

    Discover the best email marketing tools for small businesses in 2026, featuring affordable options and automation features.

    Featured image for Top Email Marketing Tools for Small Businesses in 2026

    Why Email Marketing Matters for Small Businesses

    Email is the closest thing most small businesses get to an “owned channel.” Social algorithms change, ads get expensive, and search takes time, but your list is still yours—if you treat it well.

    The ROI argument is real, too. Studies often cite email marketing returning $42 for every $1 spent (VerticalResponse). That number won’t land the same for every niche, but I’ve seen small teams beat paid social simply because they kept showing up consistently and segmented their list like adults.

    A real scenario I’ve seen

    One of the simplest wins: a local service business (think cleaning or home repair) that only emailed “monthly promos.” Opens were fine, bookings were not.

    We changed two things:

    1) We added a post-job follow-up email asking one question (“How did we do?”) and a review link.

    2) We added a seasonal reminder automation (“It’s been 6 months since your last service—want to get back on the schedule?”).

    No rebrand. No fancy design. Just timing.

    The result was boring in the best way: repeat bookings went up, and referrals started showing up in replies. That happened because email lets you talk to customers after the first purchase, which is where small businesses usually leak money.

    Step-by-step: the small-business email system

    If you’re starting from scratch (or you’ve got a list that’s basically a junk drawer), I’d set up email in this order:

    1) Capture: one signup offer that doesn’t stink (discount, checklist, waitlist, “get quotes fast,” whatever fits).

    2) Welcome: 2–3 emails over 5–7 days that explain what you do, who you’re for, and what to do next.

    3) One core automation: abandoned cart for eCommerce, or “request a quote” follow-up for services.

    4) Broadcast rhythm: weekly or biweekly is plenty, but don’t disappear for 3 months and then “SURPRISE.”

    5) Retention: reorder reminders, review requests, renewal nudges, win-back.

    Once those exist, then you can play with fancy segmentation, A/B tests, and personalization tokens.

    Common mistakes (that cost real money)

    • Buying a list and then blaming the tool when deliverability tanks.
    • One list, one message forever. If you can’t separate “prospects” from “customers,” you’ll spam one of them.
    • Only sending promos. People stop caring because you trained them to expect noise.
    • No tracking discipline. If your links aren’t tagged and your goals aren’t defined, your “ROI” is vibes.

    Evaluating the Best Email Marketing Tools

    Most tools look similar on the pricing page. The differences show up 30 days later, when you’re trying to automate something slightly annoying and you hit a wall.

    What I check first (before features)

    1) Deliverability controls

    Can you authenticate your domain (SPF/DKIM/DMARC)? Can you see bounces, spam complaints, and engagement trends? If a platform hides the “ugly numbers,” that’s not a perk.

    2) Automation builder ergonomics

    You’ll spend more time here than in the template editor. So I look for:

    • clear triggers (tag added, purchase made, page visited)
    • branches that make sense (if/else)
    • easy testing (previewing paths without sending live)

    3) Segmentation that doesn’t require a PhD

    If building a segment feels like writing SQL, you’ll never do it, and you’ll default to blasting the whole list.

    The shortlist criteria (practical, not romantic)

    • User-Friendliness: You should be able to build a clean campaign in an hour, even if you’re tired.
    • Automation Features: Autopilot matters, because small teams get interrupted constantly.
    • Integration Capabilities: Your email tool has to play nice with your CRM, store, booking app, forms, and analytics.
    • Pricing Plans: Watch how pricing scales with subscribers and sends, not just the entry plan.

    A quick scoring method you can actually use

    If you’re stuck comparing tools, do this mini “bake-off” in one afternoon:

    1) Build the same welcome automation in each tool (3 emails, one split based on a click).

    2) Create two segments: “customers” and “non-customers” (or your closest equivalent).

    3) Connect one integration you care about (Shopify, WordPress form, Calendly, whatever).

    4) Send a test campaign to yourself and a coworker, then check rendering on mobile.

    If a tool fails any of those steps, it will absolutely frustrate you at scale. That’s how I know—this is where teams burn days.

    Top Email Marketing Tools in 2026

    These are the tools I see small businesses stick with, mostly because they cover the basics and they don’t implode when you try to get slightly advanced.

    1. Mailchimp

    Mailchimp is still the “default” for a reason: it’s easy to start, the UI is approachable, and you can get a campaign out the door without a specialist.

    Where it shines:

    • Automation: Solid for welcome series, reminders, follow-ups.
    • Segmentation: Good enough for most small businesses, especially early.
    • Analytics: Clear reporting so you can answer “did it work?” quickly.

    Tradeoff (the part people hate later): pricing can jump as your list grows, and you’ll feel that jump right when your business is finally getting momentum.

    Who I’d put on Mailchimp: a local business or early-stage startup that needs to ship emails this week, not run a 14-branch lifecycle map.

    2. ActiveCampaign

    ActiveCampaign is what I reach for when a business says, “We need automation that feels like a system.” It’s strong for behavior-based campaigns and it doesn’t fall apart when you add complexity.

    What it’s great at:

    • Email Segmentation: Behavioral tracking and tagging that supports real personalization.
    • Automated Campaigns: Workflows that trigger off actions (opens, clicks, purchases, visits).
    • Integrations: Typically plugs into the usual stack without duct tape.

    Where teams mess up: they build a monster automation too early. Start with one lifecycle flow, prove it works, then expand.

    3. Brevo (formerly Sendinblue)

    Brevo is the value pick I’ve seen succeed for small businesses that want multi-channel options without paying “enterprise tax.”

    Strong points:

    • Free Plan: 300 emails/day with unlimited contacts.
    • SMS Marketing: Useful for appointment reminders or urgent promos (use sparingly).
    • A/B Testing: Enough testing capability to improve subject lines and offers.

    The practical caution: SMS is powerful, so you can annoy customers faster. Put clear frequency limits in place.

    4. Klaviyo

    If you run eCommerce and you’re serious about lifecycle marketing, Klaviyo is hard to beat. I’ve watched it turn “random promo blasts” into predictable revenue because it’s built around store data.

    Why it works for stores:

    • Predictive Analytics: Helps prioritize who to message (and when).
    • Product Recommendations: Personalization that’s actually tied to purchase behavior.
    • Integrations: Especially strong with Shopify and other eCommerce tooling.

    Tradeoff: it can get pricey as you scale, so you need to use the features that justify the cost (segmentation, flows, personalization). If you only send newsletters, it’s overkill.

    5. Constant Contact

    Constant Contact is the tool I associate with small businesses that want support and guardrails. The education and hand-holding can be worth it if you’re not trying to become an email nerd.

    Notable features:

    • Event Marketing Tools: Helpful for workshops, local events, webinars.
    • List Segmentation: Straightforward targeting.
    • Email Templates: Lots of options, decent customization.

    Who it’s best for: community-oriented businesses, nonprofits, and service providers who want reliability and support more than bleeding-edge automation.

    Conclusion

    Pick the tool that matches how you actually work. If you’re a solo operator, you need simplicity and speed. If you’ve got products, repeat purchases, and a growing catalog, you need segmentation and automation that won’t box you in.

    Here’s the decision I’d make in a typical week:

    • If you want quick setup and a familiar interface, start with Mailchimp.
    • If automation is the strategy (not a nice-to-have), lean ActiveCampaign.
    • If budget is tight but you still want solid features, Brevo is a serious contender.
    • If you’re eCommerce and retention is the game, Klaviyo pays for itself when you use flows properly.
    • If you want guidance and solid support, Constant Contact is calm and dependable.

    Before you commit, I’d also skim a broader roundup like Top Email Marketing Tools for 2026 and compare it with 2026’s Most Effective Email Marketing Software. Not because lists are gospel, but because you’ll notice patterns—especially around pricing gotchas and who each platform is really built for.

    My bias after a decade of this: set up one clean welcome series, one revenue-driving automation, and one consistent send cadence. Do that for 60 days, then switch tools only if the tool is truly the bottleneck.

    FAQ

    Q: What are the best email marketing tools for small businesses?
    A: The top tools include Mailchimp, Constant Contact, and ActiveCampaign due to their features and pricing.

    Q: How much do email marketing tools typically cost?
    A: Pricing can range from free plans to upwards of $30/month depending on feature sets and email volumes.

    Q: Are there free email marketing tools?
    A: Yes, tools like Mailchimp and MailerLite offer free plans with basic features.

    Q: Which email marketing tool is best for automation?
    A: ActiveCampaign is highly recommended for its advanced automation functionalities.

    Q: Can I integrate email marketing tools with my website?
    A: Most email marketing tools offer integrations with popular website platforms.

    Q: How can I measure the success of my email campaigns?
    A: You can track metrics such as open rates, click-through rates, and conversion rates.

  • Step-by-Step Guide to WordPress CMS Integration for Beginners

    WordPress CMS integration is easiest when you treat it like plumbing: get the basics right first, then add the fancy fixtures.

    I’m Mobeen Abdullah. I’ve spent the last decade building and shipping full-stack products, and I’ve watched WordPress go from “blog tool” to “default CMS” for teams that just want publishing to work without hiring a platform squad.

    In this guide, you’ll integrate WordPress as your CMS in a way that’s beginner-friendly but not hand-wavy. You’ll set up hosting, install WordPress, pick a theme, lock in the right settings, and add the plugins that actually matter (while avoiding the ones that quietly wreck performance).

    By the end, you’ll have a clean, stable WordPress setup you can maintain without fear—plus you’ll know what usually breaks in the real world, how to spot it early, and what I’d do differently if you’re building for a business instead of a hobby site.

    Featured image for Step-by-Step Guide to WordPress CMS Integration for Beginners

    Comprehensive Guide to WordPress CMS Integration

    Integrating WordPress as your content management system (CMS) can be smooth, but only if you do it in the right order. If you jump straight to themes and plugins, you’ll end up debugging weird stuff later (usually at the worst time).

    What is WordPress?

    WordPress is a content management system that lets you create, edit, and publish content without rebuilding your whole site every time you tweak a headline. It started as a blogging platform, but in practice it’s a full CMS with users, roles, media handling, menus, page templates, and an ecosystem that can cover everything from portfolios to e-commerce.

    As of 2026, approximately 41.2% of all websites are powered by WordPress, making it the most widely used CMS globally (source). That number matters because it explains why you can almost always find a theme, plugin, tutorial, or contractor when you’re stuck.

    Here’s the beginner-friendly mental model I use:

    • WordPress Core = the engine (posts, pages, users, editor)
    • Theme = the skin + layout system
    • Plugins = bolt-on features (forms, SEO, caching, security)
    • Hosting = where the whole thing runs, and where most performance issues actually come from

    Why Choose WordPress as Your CMS?

    WordPress is a solid choice when you need publishing, flexibility, and a reasonable learning curve.

    • Extensive Customization: Thousands of themes and plugins let you shape the site without custom code.
    • SEO Friendly: Out of the box it’s decent, and with the right setup it can rank well.
    • Community Support: You’ll find answers fast because other people have already hit the same wall.
    • Security Updates: Core and reputable plugins ship frequent patches—if you actually apply them.

    That said, the tradeoff is you’re now the “site mechanic.” Even on managed hosting, you’re responsible for updates, plugin choices, and basic hygiene.

    Step-by-Step Guide to WordPress CMS Integration

    This is the sequence I’d use for a beginner build, and it’s the same order I use on client projects because it prevents rework.

    1. Set Up Your Hosting Environment

    Pick hosting before you think about design. If the foundation is shaky, every later step gets more painful.

    Here’s what I look for:

    • One-click WordPress install (saves you from manual DB config)
    • Free SSL (your login should never be on HTTP)
    • Daily backups or at least easy backup hooks
    • Decent support that can explain errors, not just paste KB links

    Many beginners do fine on WordPress-focused hosts like SiteGround or Bluehost because the onboarding is straightforward. But even then, check the plan limits—cheap tiers often throttle CPU, which shows up as random slowness when you add plugins.

    Real example: I once helped a friend whose “brand new” site took 6–8 seconds to load. It wasn’t the theme. It was the host cramming too many accounts onto the same box. Moving hosts fixed 80% of it before we touched a single optimization.

    2. Install WordPress

    Most hosts offer a wizard. Use it.

    • Log into your hosting account.
    • Find the WordPress installer (often under “Website” or “Software”).
    • Follow the prompts to complete the installation.

    While you’re filling the form, slow down on two fields:

    • Admin username: don’t use admin.
    • Admin email: use an inbox you control long-term (not a temporary project email).

    If you get asked about the database, the installer usually creates it automatically. If you’re doing it manually, name your DB and user clearly (wp_site1_db, wp_site1_user). Later, when you’re staring at phpMyAdmin at 2am, you’ll thank yourself.

    3. Choose a Theme

    A theme is your layout system, not just “how it looks.” So, pick for structure first, aesthetics second.

    • Go to Appearance → Themes → Add New.
    • Browse free themes or upload a premium theme.
    • Install and activate.

    My opinionated rule: avoid themes that require 15 companion plugins to look like the demo. That’s how you end up with a site that breaks when one vendor stops updating.

    If you want a fast sanity check, preview these:

    • Does the theme look acceptable without the demo content?
    • Is it updated recently?
    • Are there clear docs for menus, header, and homepage?

    Drop an image into a test post to confirm the typography doesn’t collapse on mobile.

    4. Customize Your Settings

    Settings are boring—until they’re wrong. Lock these in early so you don’t fight them later.

    • Go to Settings → General to set site title, tagline, and timezone.
    • Go to Settings → Permalinks and pick a clean structure (usually “Post name”).
    • Go to Settings → Reading to choose your homepage behavior.

    A common beginner mistake: changing permalinks after you’ve already shared links publicly. It’s not fatal, but it can create 404s unless you add redirects.

    Practical checklist I use on day one:

    • Timezone correct (scheduled posts depend on it)
    • Site language correct (affects date formats and some plugins)
    • Permalinks set before publishing anything

    5. Install Essential Plugins

    Plugins are where beginners either unlock WordPress—or accidentally bury it.

    • Go to Plugins → Add New.
    • Search, install, and activate what you actually need.

    A decent starter set for many sites:

    • Yoast SEO (basic SEO control)
    • WPForms (forms that don’t feel like a science project)
    • WooCommerce (only if you’re selling)

    Now the caution: every plugin is code running on every request. So, if you install 25 plugins “just in case,” you’ll eventually run into conflicts, slow admin pages, or security issues.

    If security is your concern (it should be), don’t guess. I’d read a comparison like choose the right security plugin for your WordPress site and then follow up with a tighter selection process like learn how to select the best security plugin before you install anything.

    6. Add Content

    Content creation is where WordPress finally feels “real.”

    • Go to Posts → Add New for blog content.
    • Go to Pages → Add New for static pages (Home, About, Contact).
    • Use the block editor to add headings, images, and lists.

    Here’s the workflow I teach beginners because it prevents messy navigation:

    1. Create core pages: Home, About, Contact, Privacy Policy.
    2. Create your main menu and add only those pages.
    3. Publish 2–3 starter posts (even short ones) so your blog doesn’t look empty.
    4. Add categories only when you have at least 2–3 posts that belong in each.

    One small but important move: write your About page early. It forces you to clarify what the site is for, which makes every later content decision easier.

    7. Regular Updates

    Updates are non-negotiable. Most WordPress “mystery hacks” I’ve seen came down to ignored updates plus a weak admin password.

    What I recommend:

    • Update WordPress core monthly (or sooner if it’s a security release).
    • Update plugins/themes weekly, but do it with a backup.
    • Keep at least one off-site backup (not just “on the same server”).

    If you’re using UpdraftPlus or a host backup, do a restore test once. Seriously. Backups you can’t restore are just comforting stories.

    Common Challenges and Solutions

    You’ll hit bumps. That’s normal. The trick is recognizing whether it’s a “WordPress issue” or a “you installed three overlapping tools” issue.

    Compatibility issues

    Compatibility problems usually show up as:

    • White screen
    • Broken editor
    • Random layout glitches

    Fix it like a grown-up:

    1. Disable the last plugin you installed.
    2. Switch to a default theme temporarily.
    3. Check PHP version requirements in the plugin docs.

    If you can’t access wp-admin, use your host’s file manager and rename the plugin folder in wp-content/plugins/ to force-disable it.

    Page speed problems

    Most slow sites I’ve fixed had one (or more) of these:

    • Huge images straight from a phone
    • Too many page builder widgets
    • No caching
    • A “free” theme loading five font families

    Start with images: resize them and compress them. Then look at plugin bloat. Only after that should you touch advanced caching.

    If you’re integrating WordPress with other platforms, speed issues can hide in sync jobs too—especially if you’re pulling content from multiple systems. When you get there, a guide like sync content effectively between WordPress and other CMSs helps you avoid the classic mistake of re-importing the same media library over and over.

    Security vulnerabilities

    Security isn’t one plugin. It’s habits.

    • Use a password manager.
    • Limit admin accounts.
    • Turn on 2FA if your security plugin supports it.
    • Remove plugins you’re not using (deactivated isn’t the same as removed).

    And yes, updates matter, but so does exposure. If you install a plugin from a random zip file someone emailed you, you’re gambling.

    Conclusion

    Integrating WordPress as your CMS looks big at first, but it gets manageable once you follow a strict order: hosting, install, theme, settings, plugins, content, then maintenance. The real win is repeatability—when something breaks, you know where to look and what to roll back.

    If you are looking for custom solutions tailored to your business needs, consider Revnix, which specializes in AI agents and open-source web applications for complete ownership and flexibility.

    One last practical next step: block 60 minutes on your calendar this week, do your first update + backup + restore test, and write down what you learned. That’s the difference between “I have a site” and “I can run a site.”

    FAQs

    Q: Does WordPress have a CMS?

    Yes—WordPress is a CMS.

    Where beginners get tripped up is the wording. People sometimes say “WordPress + a CMS” as if WordPress needs a separate CMS layer. It doesn’t. Core WordPress already gives you the CMS basics: a database-backed content model (posts/pages), a media library, user roles, menus, revisions, and an editor.

    Here’s a simple way to confirm you’re using it like a CMS (not just a blog):

    1. Create a Page called “Services” (Pages → Add New).
    2. Create child pages like “Web Design” and “Maintenance.”
    3. Add them to your menu under Services.
    4. Assign a homepage (Settings → Reading).

    That flow—structured pages, navigation, and controlled publishing—is CMS behavior.

    Quick real example: I helped a local clinic site that had everything as blog posts because “posts are what WordPress uses.” The result was messy URLs, broken menus, and no clear hierarchy. We moved core content into pages, left articles as posts, and the site immediately became easier to manage.

    Common mistake: treating categories like “site sections” for static content. Categories are fine for blog organization, but they’re a weird crutch for evergreen pages.

    Q: Why are people moving away from WordPress?

    Some people leave WordPress because they outgrow it. Others leave because they set it up poorly and blame the tool.

    The legit reasons I see:

    • They want a locked-down platform with fewer moving parts (less maintenance).
    • Their team wants a fully hosted drag-and-drop builder with no plugin decisions.
    • They need enterprise workflows (complex approvals, multi-brand governance) and don’t want to build that on top.

    But, honestly, a big chunk of “we’re leaving WordPress” stories start like this: someone installed 40 plugins, used an abandoned theme, never updated, then got hit with a malware redirect.

    If you’re considering a move, do this mini-audit first:

    1. List every plugin and whether you still need it.
    2. Check update frequency (anything stale for 12+ months is a red flag).
    3. Measure performance with a baseline test (before you rip the platform out).
    4. Look at editorial needs—how many people publish, how often, and with what review steps.

    Persona anecdote: one small e-commerce brand I worked with swore WordPress was “too slow.” After we removed two overlapping page builders and fixed image sizes, their product pages loaded in about half the time. They didn’t need a replatform. They needed less clutter.

    Q: Is WordPress outdated in 2026?

    No. It’s not outdated—but it can feel outdated if you’re using it like it’s 2014.

    Modern WordPress in 2026 is about:

    • Block-based editing (cleaner content structure)
    • Better hosting stacks (server-side caching, CDN, modern PHP)
    • Leaner themes that don’t ship a kitchen sink

    Where it still frustrates people is the plugin ecosystem: it’s powerful, but it’s also uneven. So, you have to be picky.

    If you want to “modernize” an existing WordPress setup without rebuilding everything, here’s a practical, low-risk path:

    1. Update core + plugins on a staging site.
    2. Replace abandoned plugins with actively maintained alternatives.
    3. Switch to a lightweight theme if your current one is bloated.
    4. Clean media (compress oversized images).
    5. Add caching (plugin or host-level) after you’ve reduced weight.

    Common mistake: doing performance work before content/media cleanup. Caching can mask problems, but it won’t fix a 6MB hero image.

    Q: Can WordPress be used as a CMS?

    Absolutely. In fact, that’s what it’s best at for a lot of teams: predictable publishing, a huge ecosystem, and control over your data.

    If you’re integrating it into a bigger stack (say, WordPress + another CMS + email platform), the trick is defining a “source of truth.” Decide where each content type lives.

    A practical integration approach looks like this:

    1. Define content ownership: blog posts in WordPress, product data elsewhere, for example.
    2. Decide sync direction: one-way or two-way (two-way is harder than it sounds).
    3. Pick identifiers: slugs, IDs, or custom fields you won’t change later.
    4. Test with 10 items first: don’t sync your whole library as a first run.
    5. Monitor and log: you need visibility when imports fail.

    If email marketing is part of your CMS workflow (it usually is), don’t pick tools blindly. I’d compare options using something like discover effective email marketing software and then narrow it down with a shortlist like explore top email marketing tools so you don’t end up migrating lists a month later.

    Common mistakes I see in CMS integrations:

    • Syncing images repeatedly (media libraries explode in size fast)
    • Not mapping authors properly (everything becomes “admin”)
    • Forgetting redirects when URLs change

    If you fix those three early, your integration will feel boring—in the best way.

    sync content effectively between WordPress and other CMSs
    choose the right security plugin for your WordPress site
    learn how to select the best security plugin
    discover effective email marketing software
    explore top email marketing tools
    check out sustainable living tips for 2026

  • Top 10 Content Writing Tools to Boost Your Writing in 2026

    Top 10 Content Writing Tools to Boost Your Writing in 2026

    Discover the top 10 content writing tools for 2026, including AI and free options to enhance your writing.

    Top Content Writing Tools

    Good tools won’t make you a good writer, but they will keep you consistent—and consistency is what pays. The list below isn’t “the only way.” It’s what I’ve seen work when you’re publishing weekly (or daily) and still trying to sound like a human.

    1. Grammarly

    Grammarly is the quickest “second set of eyes” you can bolt onto your workflow. I mostly use it for three things: catching the dumb typos I stop seeing after pass #3, tightening clarity, and keeping tone from drifting (especially when I’ve stitched notes from a client call into a draft).

    Where Grammarly earns its keep

    If you write a lot of web content, you’ll notice a pattern: you over-explain, then you apologize, then you bury the point. Grammarly’s clarity nudges help you trim that. It’s not always right, but it’s a solid signal.

    One practical move: run Grammarly after you’ve done your own edit. If you run it too early, you’ll waste time polishing sentences you’re going to delete anyway.

    Common mistake

    People accept every suggestion. Don’t. Grammarly can flatten voice fast—especially if you write in a punchy or slightly opinionated style. I treat it like a sharp intern: helpful, not the boss.

    2. Jasper

    Jasper is one of the better-known AI content writing tools for getting a draft moving when the page is blank. I don’t use it to “publish straight from AI.” I use it to generate options—angles, outlines, intros, and alternative phrasing—then I rewrite hard.

    How I use Jasper without sounding robotic

    Here’s a simple loop that’s worked for me:

    1. Give Jasper context: audience, offer, and what you don’t want to say.
    2. Ask for 3–5 outlines (not a full article). Pick the best skeleton.
    3. Generate section-by-section, not one mega prompt.
    4. Rewrite the first 20% manually so the voice is yours.
    5. Add proof: numbers, examples, screenshots, steps.

    That “section-by-section” part matters, because long outputs tend to drift. The model starts confident, then it gets vague.

    Tradeoff

    Jasper is great for speed, but it can quietly invent details if you don’t constrain it. So if you’re writing anything sensitive (health, finance, legal), you need a stricter process.

    3. Surfer SEO

    Surfer SEO is for when you want to rank and you’d rather not guess what Google seems to reward. It compares top-ranking pages and gives you a content and keyword map you can actually follow.

    When Surfer is worth opening

    If I’m writing a page that needs to compete—“best X,” “X vs Y,” anything transactional—I’ll use Surfer. For a personal essay or a newsletter-style post, I usually skip it.

    Surfer is especially useful for:

    • spotting subtopics you forgot
    • building section order that matches search intent
    • avoiding thin content that looks “nice” but can’t rank

    Common mistake

    Writers chase Surfer’s score like it’s a game. That’s backwards. Use it to cover the topic, then write for humans. If you stuff every suggested term into awkward sentences, you’ll tank readability and conversions.

    4. Writesonic

    Writesonic is another AI writing assistant that’s strong on templates—ads, product descriptions, email variants, and short-form stuff where you need a lot of angles quickly.

    Best use case: variation on purpose

    If you’ve ever had to write 15 ad headlines that aren’t cringe, you’ll appreciate this category of tool. I’ll generate a batch, pick 3 that have a real hook, then rewrite each to match the brand.

    One nice move: use Writesonic to create two extremes (ultra-direct vs story-driven), then meet in the middle with your final version.

    Common mistake

    People rely on templates as a crutch. Templates can speed you up, but they can also make your copy look like everyone else’s. If you’re in a crowded niche, sameness is expensive.

    5. Hemingway Editor

    Hemingway Editor is what I open when I want my writing to stop trying so hard. It highlights long sentences, passive voice, and messy phrasing.

    My “Hemingway pass” method

    I’ll do one pass focused on:

    • breaking up long sentences (but not all of them)
    • swapping vague verbs (“do,” “make,” “get”) for real ones
    • deleting filler openers like “In order to”

    Then I stop. If you keep chasing a perfect readability score, you’ll end up writing like a user manual.

    Common mistake

    Writers delete every adverb because Hemingway shouts at them. Sometimes the adverb is the voice. Keep the ones that earn their spot.

    6. Copy.ai

    Copy.ai is built around copywriting outputs—ads, social posts, cold outreach, landing page sections. If you do client work, it’s useful for ideation and iteration.

    Where it’s genuinely helpful

    I like Copy.ai for:

    • hooks (especially when you’re tired)
    • benefit bullets that don’t sound like buzzwords
    • quick rewrites for different audiences

    A small trick: paste in a competitor’s style (not their content) and ask for “same tone, new angle.” You’ll still rewrite, but you’ll get unstuck fast.

    Tradeoff

    It’s easy to overproduce. You can generate 50 options and still avoid choosing one. Set a limit: 10 outputs, pick 2, rewrite 1.

    7. Sudowrite

    Sudowrite is aimed at fiction writers—story brainstorming, character development, scene rewrites. If you write narrative content (even brand storytelling), it can be surprisingly useful.

    Real use beyond “writing novels”

    I’ve seen people use Sudowrite to punch up:

    • case study narrative flow
    • founder stories
    • onboarding sequences that read like a mini-journey

    It’s not just “make it fancy.” It’s “help me find the next beat in the scene.”

    Common mistake

    Letting the tool drive the plot. If you don’t know your character’s goal (or your brand’s point), you’ll get pretty text that goes nowhere.

    8. MarketMuse

    MarketMuse is more strategy-heavy. It analyzes your content library and helps you decide what to build next, what to refresh, and what topics you’re missing.

    When MarketMuse shines

    If you manage more than a handful of pages—or you’re trying to build topical authority—MarketMuse can help you stop publishing random posts that don’t connect.

    I’ve used tools like this to:

    • identify “orphan” posts that never get internal links
    • plan clusters so each new post supports a main page
    • prioritize updates that can lift multiple pages at once

    Tradeoff

    It can feel heavy if you’re just writing one-off posts. Strategy tools pay off when you have volume and you’re willing to refresh old content.

    9. Frase

    Frase blends SEO research with content creation. It’s useful when you want to understand what questions people ask, what competitors cover, and how to structure your article.

    My quick Frase workflow

    1. Enter the keyword and scan the SERP-based outline.
    2. Pull 8–12 audience questions.
    3. Group those questions into 3–5 sections.
    4. Write the answer you’d give on a call—then polish.

    That approach keeps the piece grounded. Otherwise, you end up writing “content about content,” which looks fine but doesn’t help anyone.

    Common mistake

    Writers copy competitor headings too literally. Use them as a map, not a script.

    10. Canva

    Canva isn’t a writing tool, but it’s part of publishing now. A good visual can double the usefulness of a post—especially for social sharing and skimmability.

    Practical ways to pair Canva with writing

    I’ll use Canva for:

    • featured images that match the article’s promise
    • simple diagrams (process, framework, checklist)
    • content upgrades like a one-page summary

    A real scenario: I once watched a solid SEO post flop on social because it had no visuals. We added a single “workflow graphic” in Canva and republished. Shares went up, and time-on-page improved because people stopped bouncing.

    Common mistake

    Overdesigning. If the graphic takes longer than the article, you’re doing it backwards. Ship something clear, not fancy.

    Best Free Content Writing Tools

    Free tools can absolutely carry you—at least until you’re publishing at a pace where your time becomes the expensive part. If you’re a student, a new freelancer, or a founder writing your own marketing, this section is the starter kit I’d actually recommend.

    1. Google Docs

    Google Docs is still the best “default” writing tool because collaboration is painless. Comments, suggestions, version history—done.

    Step-by-step: a clean Docs workflow

    If you’re working with an editor or client, do this:

    1. Create a Doc with a simple naming pattern: Client - Topic - YYYY-MM-DD.
    2. Put the brief at the top: audience, goal, CTA, examples to mimic.
    3. Draft fast, no formatting beyond H2/H3.
    4. Switch to Suggesting mode for edits.
    5. Resolve comments as you apply changes (don’t leave a comment graveyard).

    This keeps the doc from turning into a confusing chat thread.

    Common mistake

    People write the final version first. In Docs, outline first, then draft, then edit. You’ll publish faster and argue less with yourself.

    2. Grammarly Free Version

    The free Grammarly gives you basic grammar and spelling checks, which is enough for a lot of writers.

    How to get value without paying

    Use it like a last pass, right before publishing. If you use it mid-draft, you’ll interrupt your flow and start “editing in circles.”

    Also, don’t forget the obvious: Grammarly won’t fix a weak point. If your intro doesn’t match the title, the grammar can be perfect and the post will still fail.

    3. Evernote

    Evernote is a solid idea bank. I like it for capturing messy thoughts that don’t belong in a polished outline yet.

    A simple system that stays usable

    • One notebook for Ideas
    • One notebook for Draft parts (intros, hooks, bullets)
    • Tags for the stage: seed, outline, drafted

    That’s it. If you build a 40-tag taxonomy, you’ll abandon it.

    Persona anecdote

    I worked with a freelancer who kept “ideas” in five places—WhatsApp, Notes app, email drafts, sticky notes, and browser bookmarks. We moved everything into Evernote for two weeks. She didn’t magically become a better writer, but she stopped losing good hooks. Her output jumped because she wasn’t re-inventing every topic.

    4. Hemingway Editor (Free Version)

    The free online Hemingway Editor is still one of the cleanest ways to check readability.

    What I look for inside Hemingway

    • sentences highlighted in red: split or rewrite
    • too many “hard to read” paragraphs: simplify structure
    • passive voice flags: fix the ones that hide responsibility

    Then I close it. Hemingway is a scalpel, not a lifestyle.

    5. Canva Free Version

    Canva’s free tier is enough for most blog visuals and social graphics.

    Step-by-step: turn one post into 3 assets

    Let’s say you publish a 2,000-word guide. In Canva, create:

    1. A hero image with the post title.
    2. A checklist graphic (5–7 bullets pulled from the article).
    3. One quote card with your spiciest line.

    Now you’ve got the post plus a mini distribution kit.

    Common mistake

    People design 12 graphics before the article is done. Write first. Design after the message is clear.

    Conclusion

    Choosing content writing tools isn’t about collecting apps. It’s about removing friction from the exact parts of writing that slow you down—blank-page panic, messy editing, SEO uncertainty, or publishing assets.

    If you want a simple “do this next” setup, here’s what I’d pick for most writers:

    • Draft + collaborate: Google Docs
    • Tighten clarity: Grammarly or Hemingway (or both, but at different stages)
    • SEO structure: Surfer SEO or Frase (pick one)
    • AI ideation: Jasper, Writesonic, or Copy.ai (again, pick one)
    • Visuals: Canva

    That “pick one” advice is opinionated on purpose. I’ve watched teams drown in tools and still ship late because nobody agreed on a workflow.

    A real example: what changed when we simplified

    On one Revnix content sprint, we had a writer bouncing between three AI tools, two SEO tools, and a notes app. Output looked busy, but deadlines slipped because every paragraph got re-generated twice.

    We cut the stack to: Docs → Frase for outline/questions → one AI tool for hooks → Grammarly at the end. The result was less “clever” mid-draft, but the final posts were tighter, and publishing became predictable again.

    FAQs

    • Q: Which tool is best for content writing?
      A: It depends on your bottleneck. If errors slow you down, start with Grammarly. If structure and rankings matter most, use Surfer SEO or Frase.

    • Q: What are the 5 most popular AI tools?
      A: Jasper, Copy.ai, Writesonic, Sudowrite, and Rytr get mentioned a lot, although popularity changes fast.

    • Q: Is AI Content Writer free?
      A: Many tools offer free trials or limited tiers, but the useful features usually sit behind a subscription.

    • Q: Which app pays for content writing?
      A: Platforms like Medium and Vocal can pay writers based on readership, but the payout depends on performance.

    • Q: Can I use content writing tools for SEO?
      A: Yes. Surfer SEO, Frase, and MarketMuse are built for that, and AI writers can help draft—if you edit responsibly.

    • Q: Are there any free AI tools for content writing?
      A: Some tools have limited free tiers, and you can get a long way with free editing + Docs while you build consistency.

    If you do one thing after reading this, don’t buy a tool yet—pick a workflow and run it for 10 drafts. Tools only help when the process is stable.

    My Journey in Writing Tools

    I’m Mobeen Abdullah, founder of Revnix, and my relationship with writing tools has been… messy. Not because the tools are bad, but because it’s easy to confuse “new tool energy” with real progress.

    Early on, I tried to solve everything with software. I’d find a shiny AI writer, generate a full blog post, feel productive, and then spend two hours fixing the parts that didn’t make sense. It was like ordering fast food and then cooking a meal to make it healthy.

    What finally clicked for me

    I stopped asking, “What’s the best tool?” and started asking, “Where do I lose time?” My answer wasn’t “writing.” It was:

    • staring at the outline too long
    • rewriting intros endlessly
    • second-guessing SEO coverage
    • polishing paragraphs that should’ve been deleted

    So I built a boring pipeline.

    The pipeline I actually run (and why)

    Here’s the step-by-step workflow I recommend to most writers I work with:

    1. Collect raw ideas (Evernote or a simple Docs file). No formatting.
    2. Outline using questions (Frase is good here). If you can’t outline, you can’t write.
    3. Draft fast in Docs. Ugly draft is fine—movement matters.
    4. Use AI for specific tasks: hooks, examples, alternative headings. Never “write the whole thing.”
    5. Edit for clarity (Hemingway), then correctness (Grammarly).
    6. Optimize for SEO last (Surfer or MarketMuse). At this stage, you’re adjusting, not rebuilding.
    7. Create 1–2 Canva visuals to support skimming and sharing.

    That order matters because it protects the draft. If you optimize too early, you’ll keep redoing the same work.

    A mistake I see constantly (and I’ve done it too)

    People plug an outline into an AI tool, get a clean-looking article, and skip the “prove it” step. The post reads fine, but it doesn’t have lived-in details—no numbers, no steps, no edge cases, no voice. It won’t earn trust, and it won’t convert.

    When I want to sanity-check my tool choices, I look at what experienced SEO teams use and why. For example, I’ll compare notes with guides like 12 Best SEO Content Writing Tools We Use at AIOSEO to see which tools show up in real publishing workflows, not just tool roundups.

    I also keep an eye on evolving AI tool lists like Best AI Tools for Content Writers in 2026, mainly to spot what’s new—then I test cautiously, because hype and reality rarely match.

    If you’re building your own stack, steal my bias: fewer tools, clearer stages, more publishing. The draft you ship beats the perfect draft you keep “improving.”

  • Ultimate Guide to Choosing a WordPress Security Plugin in 2026

    Ultimate Guide to Choosing a WordPress Security Plugin in 2026

    Explore the best WordPress security plugins of 2026, their features, comparisons, and best practices to secure your website effectively.

    Ultimate Guide to Choosing a WordPress Security Plugin in 2026

    Understanding WordPress Security

    In 2026, WordPress security is less about “one scary hacker” and more about automated attacks that never sleep. Bots crawl the internet looking for outdated plugins, weak credentials, exposed XML-RPC endpoints, sloppy file permissions, and hosting setups that give attackers easy wins.

    The numbers are ugly: it is estimated that over 13,000 WordPress sites are hacked every day, which works out to about 4.7 million hacks annually (Dev Community). I don’t quote that to sell fear. I quote it because the default WordPress site — especially the “set it and forget it” kind — is usually one neglected update away from trouble.

    WordPress core is generally secure, but most compromises I see don’t start with “core got owned.” They start with:

    • An old plugin that nobody wants to remove because “the site might break.”
    • A reusable admin password that leaked in some unrelated breach.
    • A dev environment accidentally indexed by Google.
    • File edits via wp-admin left enabled forever.

    Here’s a real pattern I’ve dealt with more than once: a small business site runs fine for months, then the owner installs a random free plugin to add a slider or a popup. Two quarters later, traffic drops. Meanwhile, the homepage quietly starts redirecting mobile users to spam. Nobody notices until a customer calls.

    A security plugin won’t fix bad decisions by itself, but it can do three very helpful things: block common attacks, alert you quickly when something changes, and reduce the time-to-recovery when you need to clean up.

    Key Features of Effective WordPress Security Plugins

    If you only remember one thing: security plugins aren’t interchangeable. Some are better at prevention (WAF, login hardening), others at detection (file integrity, malware scans), and a few are decent at cleanup.

    Below are the features I actually look for when I’m choosing a plugin for a client site.

    • Malware Scanning: Regular scanning for malware helps identify threats before they can do significant damage.
    • Firewalls: A robust web application firewall (WAF) like Wordfence protects your website from malicious traffic and attempts to exploit vulnerabilities.
    • Brute Force Protection: Features that limit login attempts and utilize two-factor authentication (2FA) help secure user account access.
    • Real-Time Monitoring: This helps detect and respond to threats as they occur, reducing potential damage.
    • Backup Solutions: Regular backups ensure that your site can be restored swiftly in case of a breach.

    Now, the messy part: lots of plugins claim these features, but the implementation varies a lot. So before you install anything, I’d pressure-test the plugin with a few questions.

    What I check before I commit:

    1) Does the plugin slow the site down? Some security scanning is heavy. If it hits CPU limits on cheap hosting, you’ll disable it… and then you’re back where you started.

    2) Can I export logs? When something goes sideways, you want evidence. If you can’t see blocked requests, login attempts, changed files, and admin actions, you’re blind.

    3) Does it play nicely with caching/CDN? A WAF at the plugin layer is helpful, but if you’re using Cloudflare or a host WAF too, you can end up troubleshooting false positives.

    4) Is the UI honest? This is opinionated, but I don’t like dashboards that scream “CRITICAL” for basic hygiene items just to upsell. A good tool tells you what’s real.

    Recommended Plugins for 2026

    These aren’t the only choices, but they’re common enough that you’ll run into them, and they cover different styles of site ownership.

    1. Wordfence: With over 4 million active installations, Wordfence remains a leader in WordPress security. It offers a comprehensive suite of tools including a firewall, malware scanner, and login security features (BeoHosting). It also provides real-time analytics and an easy-to-use dashboard.

    Where Wordfence shines, in my experience: you can lock down logins fast. If a site is actively getting brute-forced, you can tighten rate limits, add 2FA, and get breathing room.

    Tradeoff: on underpowered hosting, aggressive settings can feel “heavy.” So I usually start with sane defaults, then crank up only what the site can handle.

    1. Sucuri Security: Known for its effectiveness in malware detection and removal, Sucuri offers features like security activity auditing, file integrity monitoring, and a blacklist monitor (Sucuri). Its robust firewall adds an essential layer of protection.

    Practical note: activity auditing is underrated. When a new admin user appears and nobody on the team admits to it, logs are the difference between guessing and knowing.

    1. iThemes Security: This plugin focuses on locking down WordPress sites by adding an extra layer of security. It offers features like brute force protection and strong password enforcement, making it an excellent choice for comprehensive site security (WPKube).

    I tend to like iThemes Security for teams that need guardrails. If you run a site with multiple editors, contributors, and a marketing team that installs plugins impulsively, those “boring” controls matter.

    1. MalCare: A relatively newer player, MalCare is known for its one-click malware removal feature and real-time protection, making it a user-friendly option for non-technical users (Atomic Edge).

    Why I’ve seen it work well: small site owners don’t want a security project. They want a button that says “fix it.” One-click cleanup can be the difference between a same-day recovery and a week of lost leads.

    One quick caution about “recommended plugin lists”: they rarely mention context. A WooCommerce store processing orders all day has different needs than a brochure site. So treat these options like a shortlist, not an answer key.

    Choosing the Right Plugin

    Picking a WordPress security plugin is basically choosing what you want to optimize for: prevention, detection, recovery, or “I don’t touch code and I need it simple.” You can’t maximize everything on every budget.

    Here’s how I’d decide, step by step.

    Step 1: Write down what you’re protecting.

    • If you take payments, the risk is higher.
    • If you run membership logins, brute force and credential stuffing are constant.
    • If the site is “marketing only,” reputation and SEO damage are usually the biggest losses.

    Step 2: Identify how you’ll respond when something happens.

    This is where people lie to themselves. If you’re never going to read logs, don’t pick a plugin whose main value is detailed logging. If you can’t handle a manual cleanup, prioritize recovery features and offsite backups.

    Step 3: Match features to your reality:

    • Site Size and Traffic: Larger sites may need more advanced security features and real-time monitoring.
    • Technical Expertise: Some plugins require more technical knowledge to set up and operate effectively than others.
    • Budget: Many effective solutions are available for free, but premium options often provide additional features that can enhance security significantly.

    Now the part that’s not fun: test it.

    A simple “weekend test” I actually do:

    1) Install the plugin on staging (or at least during a low-traffic window).
    2) Enable login rate limiting + 2FA.
    3) Run a full scan.
    4) Check server load and page speed before/after.
    5) Trigger a few controlled events (failed logins, plugin update, theme file change) and confirm alerts arrive.

    If alerts don’t reach you, or if the plugin breaks legitimate logins, you’ll disable it later. That’s how security fails in real life — slowly, through annoyance.

    Common mistake I see: people stack plugins. They install two security plugins, a login limiter, and a “WAF plugin,” then wonder why wp-admin randomly throws 403 errors. You don’t get “double secure.” You get conflicting rules and false positives.

    Best Practices for Securing Your WordPress Site

    A plugin helps, but the boring basics do most of the work. Every time I’ve investigated a hacked WordPress site, the root cause is almost always something simple that got ignored.

    Here’s the checklist I push, even when people roll their eyes.

    • Keep Everything Updated: Regularly update WordPress, themes, and plugins to protect against newly discovered vulnerabilities.
    • Use Strong Passwords: Encourage users to create complex passwords and update them regularly; consider employing a password manager.
    • Limit Login Attempts: This reduces the risk of brute-force attacks significantly.
    • Perform Regular Backups: Ensure backups are consistent and stored securely, so recovery is quick in the event of an attack.

    Let me add the “how to do it without hating your life” version.

    Updates: do fewer, but do them on purpose.

    I’d rather see 12 well-maintained plugins than 35 random ones. Before updating, I check the plugin’s changelog, last update date, and support forum vibe. If it looks abandoned, I replace it.

    Anecdote: I once inherited a site with 60+ plugins. The owner insisted “they’re all needed.” After an hour, we found three separate plugins doing the same SMTP job, two doing caching, and one old page builder addon that hadn’t been updated in years. That addon was the entry point. Cleaning it up wasn’t glamorous, but it stopped the bleeding.

    Passwords: stop sharing admin accounts.

    If multiple people need access, create separate accounts with the least permissions they need. Then add 2FA. It’s annoying for a day, but it saves you when a contractor’s laptop gets compromised.

    Login protection: don’t just limit attempts — reduce the surface.

    • Change the default admin username if it’s still “admin.”
    • Disable XML-RPC if you don’t need it (or restrict it).
    • Add 2FA for admins and editors.

    Backups: “stored on the same server” isn’t a backup.

    I’ve seen hosts wipe infected accounts, including local backups. So keep at least one offsite copy. Also, test restores. A backup you’ve never restored is basically a wish.

    If you do those things plus a decent security plugin, you’ll avoid a huge chunk of real-world compromises.

    By following these practices and utilizing one of the recommended plugins, you can significantly enhance the security of your WordPress site. As Mobeen Abdullah, I have seen countless sites compromised due to neglecting these essential steps. Don’t let your site be the next statistic.

    Conclusion

    In 2026, protecting your WordPress site is more critical than ever, but it doesn’t have to become a full-time job. Choose one solid security plugin, configure it deliberately, and then back it up with disciplined updates, access control, and offsite backups.

    If you want a practical next step, do this: open your Plugins page, sort by “Last Updated,” and remove anything that looks abandoned or unnecessary. Then run your security plugin’s scan again. Most sites get safer in under an hour just by cutting dead weight.

    FAQs

    Q: Which security plugin is best for WordPress?

    A: The best WordPress security plugin varies, but options like Wordfence and Sucuri are highly recommended.

    Q: What is the best security plugin for WordPress in 2026?

    A: In 2026, top choices include Wordfence, Sucuri, and iThemes Security, known for their robust features.

    Q: What is the best free security plugin for WordPress?

    A: Wordfence and Sucuri offer powerful free versions, ideal for basic website protection.

    Q: How do I protect my WordPress site from hackers?

    A: Use a reliable security plugin, keep plugins updated, and employ strong passwords.

    Q: Are premium WordPress security plugins worth it?

    A: Premium plugins often include advanced features not available in free versions, making them valuable.

    Q: Can I rely solely on a security plugin for WordPress?

    A: While security plugins provide significant help, comprehensive security also involves good practices and regular maintenance.

    My Experience With This

    I’ve been on both sides of this: building sites that need to stay fast, and then cleaning up the aftermath when security got treated like an optional extra. The painful lesson is that “security” usually fails in process, not technology.

    For example, I’ve watched teams install a security plugin, feel safe, and then keep shipping risky stuff — shared admin logins, no staging site, random plugins added on Fridays. Then, when something breaks, nobody knows what changed.

    As someone who has worked in software engineering and open-source development, I advocate for utilizing tools like Nextly that not only streamline development processes but also incorporate robust security measures directly into the framework.

    That said, tools don’t absolve you. I still keep a simple routine: monthly plugin audit, weekly updates (after checking changelogs), and a restore test at least once per quarter. It’s not exciting, but it’s why my “surprise hack” rate stays low.

    If you’re stuck, start small: turn on 2FA for admins today, and remove one abandoned plugin this week. Momentum matters.

    Best Affordable Email Marketing Services in 2026

  • Best Affordable Email Marketing Services in 2026

    Best Affordable Email Marketing Services in 2026

    Discover the top affordable email marketing tools for small businesses and marketers in 2026. Compare features, pricing, and find the perfect fit for your needs.

    Top Affordable Email Marketing Services for 2026

    Email marketing is still one of the few channels you can “own,” but the tool you pick decides whether it feels like a cheat code or a chore. Before the list, here’s how I’d sanity-check any provider.

    How I rank these tools

    I don’t rank email tools by template count. I rank them by what breaks in the real world.

    • Deliverability basics: easy domain authentication (SPF/DKIM/DMARC) and clean sending practices.
    • Automation you’ll actually use: welcome series, abandoned cart (if ecommerce), simple segmentation.
    • Pricing that scales predictably: not just “free,” but what happens at 2k, 10k, 50k subscribers.
    • Editor + workflow: can you ship an email in 20 minutes without weird formatting bugs?

    If you’re a startup, the goal is usually speed. If you’re a small business, it’s consistency. Either way, the tool should get out of your way.

    1. Mailchimp

    Mailchimp is often the first tool people touch, and honestly, that’s for a reason: it’s approachable. It offers a free tier that allows users to send up to 10,000 emails per month to 2,000 subscribers.

    Where it shines is the “I just need to send a decent newsletter today” problem. The template library is big, the editor is familiar, and you’ll find tutorials for basically everything.

    The tradeoff: once you outgrow the basics, pricing and plan limits can feel like a maze. So if you’re choosing Mailchimp, plan for a future migration or keep your setup intentionally simple (newsletter + welcome email + maybe one tag-based segment).

    2. Sender

    Sender is a practical pick when you want a generous free plan and you don’t want to babysit a complicated UI. It allows sending up to 15,000 emails per month to 2,500 subscribers.

    The automation is good enough for most small teams: welcome emails, simple drips, and behavior-based sends that don’t require a marketing ops person.

    One thing I’ve seen teams mess up with Sender (and similar tools): they import a cold list and then blame the platform for poor deliverability. If you’re switching tools, warm up the domain and ramp sends over a couple of weeks. Your future inbox placement depends on it.

    3. Brevo

    Brevo (previously SendinBlue) is a strong “starter-to-serious” platform. Its free plan includes sending up to 300 emails per day and it includes features like segmentation and A/B testing.

    If you’re a startup that wants more than newsletters—say, onboarding sequences, trial nudges, and simple lifecycle campaigns—Brevo gets you there without forcing an enterprise contract.

    It’s not perfect, though. When you build more complex automations, naming and organizing workflows matters a lot. Otherwise, three months later you’ll be afraid to touch anything because you won’t remember what triggers what.

    For more detailed comparisons and insights, you can check the 15 Best Email Marketing Platforms 2026.

    4. MailerLite

    MailerLite is for people who want clean, fast, and not fussy. Their free plan supports up to 1,000 subscribers and includes landing pages and pop-ups.

    I like it for creators and small service businesses because you can ship a landing page + form + welcome email without duct tape. That matters when you’re running promos or collecting leads from a workshop.

    The common mistake here is overbuilding “funnels” too early. Start with one landing page, one lead magnet, and a 3–5 email sequence. Then iterate based on replies and click data.

    5. AWeber

    AWeber isn’t trendy, but it’s steady. It offers a 30-day free trial with full access to features, and it’s known for an easy interface and solid customer support.

    This is the tool I’d consider if you’re the type who values help docs, live support, and fewer surprises. Some teams underestimate how much time support saves when you’re stuck on something basic like list segmentation or forms.

    That said, if your entire strategy relies on deep behavioral automations, you may hit limits sooner than with more automation-first platforms.

    6. ActiveCampaign

    ActiveCampaign is what I reach for when automation is the strategy, not a nice-to-have. Pricing starts at $9 per month for 500 subscribers. It does segmentation, tagging, and automation in a way that actually supports growth experiments.

    If you’re running a SaaS trial, here’s a simple workflow that works surprisingly well:

    1. Day 0: welcome + “what are you trying to do?” question
    2. Day 1: one quick win tutorial
    3. Day 3: case study or example
    4. Day 7: “stuck?” check-in + CTA to book/help

    Do that, then measure replies and activation. You’ll learn more than you will from a dozen pretty newsletters.

    7. GetResponse

    GetResponse combines email marketing with extras like webinars and landing pages. Pricing starts at $15 per month.

    It’s a good fit if your marketing naturally revolves around live events: webinars, demos, workshops, live Q&A. Having the event and the email follow-up under one roof reduces the “export CSV, re-import CSV” nonsense.

    The tradeoff is focus. If you only need newsletters and a simple automation, the extra features can feel like clutter. So I’d pick it when you’ll truly use webinars, not because you might someday.

    8. Constant Contact

    Constant Contact is often chosen because of support and training resources. Starting at $20/month, you get a lot of templates and a structured way to run campaigns.

    This tends to work well for local businesses, nonprofits, and teams where the person sending emails isn’t a marketer by trade. When the workflow is obvious, you actually send emails consistently—and consistency beats “perfect strategy” that never ships.

    If you’re more technical or you like fine-grained automation, you might find it restrictive. But if you need reliability and guidance, it’s a reasonable spend.

    9. Benchmark Email

    Benchmark Email focuses on making email creation quick. Their free plan offers up to 3,500 emails per month to 500 subscribers, and the drag-and-drop editor is straightforward.

    If design isn’t your strength, this is the kind of tool that keeps you from wasting an afternoon nudging padding and fonts. Get in, build something acceptable, send it.

    One caution: don’t let the editor turn every email into a heavy “graphic newsletter.” Plain-ish emails often perform better for clicks and replies, and they load faster on mobile.

    10. Moosend

    Moosend is an affordable option with a free plan of up to 1,000 subscribers with unlimited emails. It also has strong automation and reporting for the price.

    Moosend makes sense when you want analytics that go beyond opens—especially if you’re comparing campaigns or testing subject lines. Just keep your tests honest: change one variable at a time, and give it enough sends to matter.

    Also, set up UTM tracking from day one. Otherwise, you’ll end up guessing which email drove sales when you finally look back at performance.

    Best Free Email Marketing Services

    Free tiers are great, but “free” can still be expensive if it costs you time or deliverability. That said, these are genuinely solid starting points:

    • MailerLite
    • Sender
    • Brevo

    If you’re just getting started, my advice is boring on purpose: pick one, authenticate your domain, write a welcome sequence, and send weekly for 8 weeks. Then decide if you’ve earned the right to switch tools.

    Quick deliverability checklist (don’t skip this)

    Most email marketing “doesn’t work” because the basics weren’t done. So before you blame subject lines, do this:

    1. Authenticate your domain (SPF + DKIM, and DMARC if you can).
    2. Use a real sending address (not a free Gmail/Outlook sender).
    3. Warm up gradually if you’re new—start with your most engaged contacts.
    4. Keep the list clean: remove hard bounces, don’t keep hammering unopens forever.
    5. Ask for replies early (welcome emails that invite a reply are underrated).

    I’ve watched teams double their inbox placement just by cleaning imports and slowing down the first week of sends.

    Conclusion

    Affordable doesn’t mean “pick the cheapest plan and pray.” It means you can run email consistently for a year without the tool (or the bill) derailing you.

    If you’re a solo creator or early-stage startup, I’d bias toward MailerLite, Sender, or Brevo—they’re simple, the free tiers are legit, and you can get a working system live fast. Meanwhile, if you’re doing SaaS onboarding or you’re serious about lifecycle automation, ActiveCampaign tends to pay for itself because you can target messages based on behavior instead of blasting everyone.

    Here’s the step-by-step I’d follow if you asked me to set this up on a tight budget next week:

    1. Pick one tool and commit for 90 days. Switching too early is how you lose tracking, break forms, and confuse your list.
    2. Write a 5-email welcome sequence that answers: who you are, what you sell, and what to do next.
    3. Create one segment (customers vs. leads, or “clicked in last 30 days” vs. everyone else). Keep it that simple at first.
    4. Send one newsletter per week with one job: teach something useful or move one offer. Don’t mix three goals.
    5. Review results monthly (clicks, replies, unsubscribes). Then tweak one thing.

    The biggest mistake I see is tool-hopping because a competitor has a shinier automation builder. The second biggest is treating email like a dumping ground for social posts. Write for the inbox, and the ROI shows up.


    FAQs

    • What is the average cost of email marketing services?
      The average cost ranges from $10 to $300 per month, depending on the number of subscribers and features.
    • Which is the best email marketing service?
      Mailchimp is often regarded as the best for beginners due to its user-friendly interface and comprehensive resources.
    • How much is a 1000 email list worth?
      A 1,000 email list can be worth anywhere from $500 to $1,000 based on engagement rates and other factors.
    • Is email marketing still worth it in 2026?
      Yes, email marketing remains effective due to its high ROI and direct communication capabilities.

    My Experience With This

    I’m Mobeen Abdullah, the Founder at Revnix, and I’ve learned (sometimes the hard way) that email marketing only looks simple. The messy part is everything around the send button—list hygiene, deliverability, tracking, and keeping a consistent cadence when product work gets hectic.

    One real example: on a previous push, we ran a lead magnet aimed at developers, collected signups fast, and then watched performance crater. Opens dropped, clicks were weak, and a few people even replied annoyed. The tool wasn’t the problem. Our process was.

    Here’s what we changed, step by step:

    1. We rebuilt the form and asked one qualifying question (“What are you working on?”). That single field helped us segment immediately.
    2. We rewrote the welcome email to be plain text, with one link and a direct question. Replies went up, and that helped deliverability because mailbox providers love engagement.
    3. We cut the list ruthlessly after 45 days—if someone never opened, we stopped sending weekly and moved them to a light re-engagement track.
    4. We standardized UTM tagging so we could prove what email actually drove signups and revenue.

    After that, email became predictable again. Not magic—predictable. And predictable is what you want when you’re balancing shipping product and marketing.

    By integrating tools like Nextly into our development processes, we enhanced our content-driven applications, streamlining our workflow and providing seamless user experiences. The right choice of email marketing software can similarly transform your campaigns—helping you connect with your audience more effectively.

    If you’re choosing a platform today, don’t start with “Which tool has the most features?” Start with: What’s the first automated sequence I’ll ship this week? If you can’t answer that, no platform will save you.

    The 17 Best Free Email Marketing Services

  • 2026’s Most Effective Email Marketing Software

    Discover the best email marketing software for e-commerce, tailored for small business owners and marketers. Get insights and examples now!

    Featured image for 2026's Most Effective Email Marketing Software for E-commerce

    Top Email Marketing Software for E-commerce in 2026

    Picking a platform in 2026 isn’t about who has the prettiest template editor. It’s about data, automation depth, and how quickly you can get from “customer did X” to “send message Y” without breaking things.

    1. Klaviyo

    Klaviyo is still the heavyweight for e-commerce because it treats your store like a data source, not just a contact list. The win is how easily you can segment based on behavior—browse events, product views, repeat purchases, predicted churn, you name it. And since it plugs into Shopify and WooCommerce cleanly, you usually spend less time duct-taping integrations and more time improving flows.

    That said, Klaviyo punishes sloppy operations. If your product catalog is a mess (duplicate SKUs, inconsistent product titles, variants that change names), your dynamic blocks and recommendations will look wrong. So, before you go wild with hyper-personalization, I’d clean the product feed and standardize naming.

    Where I see Klaviyo shine: brands doing $50k+/month who want to run serious lifecycle marketing—abandoned cart, browse abandonment, post-purchase cross-sell, VIP flows, winback, and back-in-stock—without feeling boxed in.

    2. Drip

    Drip is built around the question e-commerce owners actually care about: “Did this email make money?” It’s strong on behavioral automation, and it’s opinionated in a good way—events and revenue attribution sit close to the core product.

    If you like building logic trees (and you’re disciplined enough to keep them readable), Drip works nicely. For example, you can split a post-purchase flow based on first-time vs repeat customer, then branch again based on product category, then branch again based on whether they clicked a care-guide email. That’s the kind of thing that can lift repeat purchase rate without spamming.

    The tradeoff is that Drip can feel like “a workshop tool.” If you don’t have someone who enjoys maintaining automations, things get tangled fast. I’ve inherited Drip accounts where five different flows all emailed the same person within 24 hours—because nobody set global frequency rules.

    3. Mailchimp

    Mailchimp remains the easiest on-ramp for beginners, and that matters. If you’re pre-product-market-fit or you’re a tiny store trying to ship consistently, Mailchimp’s simplicity can be a feature, not a limitation.

    You can build forms, send newsletters, and get basic reporting without needing a dedicated email person. The template library is also friendly, especially when you’re moving fast and you don’t want to design from scratch.

    But here’s my blunt take: once your store relies on email revenue, you’ll start feeling the ceiling. Advanced segmentation, deep event-based targeting, and serious automation are where many teams eventually outgrow it. So, if you pick Mailchimp now, treat it as a “get moving” tool—then plan for a future migration before you’re stuck.

    4. Omnisend

    Omnisend is a solid choice when you want multi-channel without running three separate systems. Email + SMS + push can work extremely well for e-commerce, mainly because the customer journey isn’t email-only anymore.

    For example, I’ve seen brands run a cart recovery sequence like this: email at 1 hour, SMS at 4 hours (only for opted-in users), then an email at 24 hours with a slightly stronger offer. That sequencing tends to convert better than three emails in a row, and it’s less likely to annoy people.

    Omnisend’s real advantage is speed. You can stand up decent automations quickly, and for small teams that’s huge. The risk is that “multi-channel” becomes “multi-spam” if you don’t set guardrails. Frequency caps, smart suppression (recent buyers), and channel preferences aren’t optional.

    5. Maropost

    Maropost is more of a suite. You’re looking at email, SMS, automation, segmentation, and reporting under one roof, which can be appealing when your marketing operations are maturing.

    It’s a good fit for brands that want strong targeting and are starting to care about deeper orchestration—who gets what message, on what channel, and based on which signals. The dashboard and reporting are helpful when you’re trying to tie campaign performance to revenue and not just opens.

    The caution: suites can encourage overengineering. If your team is small, a simpler platform plus a clean set of core flows might outperform an “all features enabled” setup that nobody maintains.

    How to Start Email Marketing

    If you’re starting from zero (or from “we send a sale email sometimes”), you need a simple system you can run every week. Complexity comes later, because otherwise you’ll build a spaceship with no fuel.

    Step 1: Pick one platform—then commit

    Choose a tool based on your stage, not your ego. If you’re early, Mailchimp or Omnisend can get you moving. If you already have traction and want deeper lifecycle automation, Klaviyo or Drip is usually the faster path to real revenue.

    Then commit for at least 60–90 days. Switching platforms every few weeks is how teams avoid doing the hard part (segmentation + good offers) while blaming the tool.

    Step 2: Set up list capture that doesn’t feel desperate

    You need a reason for someone to give you their email. “Sign up for updates” is not a reason.

    What I’d do:
    – Put a simple pop-up with a concrete offer (10% off, free shipping threshold reminder, or a helpful guide).
    – Add an embedded form in the footer and on the checkout confirmation page.
    – If you can, add a post-purchase opt-in for back-in-stock alerts or product care tips.

    Keep the ask honest. If you promise “exclusive drops,” you need to actually send them.

    Step 3: Send a welcome flow before you send newsletters

    This is the part beginners skip, and it’s a mistake.

    A practical welcome flow (3–4 emails) looks like:
    1. Email 1 (immediate): deliver the promised incentive + one best-seller.
    2. Email 2 (next day): brand story + social proof (reviews, UGC, press mention).
    3. Email 3 (day 3): product education (how to choose, sizing, care guide, comparison).
    4. Email 4 (day 5): soft urgency (offer ends) or a curated bundle.

    Even if you never send a newsletter again, this flow will keep earning.

    Step 4: Build the “boring money” automations

    Before fancy campaigns, set up these four:
    Abandoned cart (with a strong first email)
    Browse abandonment (especially for higher-AOV products)
    Post-purchase (care tips + cross-sell + review request)
    Winback (90–120 days no purchase, adjust by your buying cycle)

    I’ve watched small stores double email revenue just by fixing these.

    Step 5: Segment early, but keep it sane

    Segmentation doesn’t mean 47 micro-lists. Start with a few that map to actual decisions:
    – First-time buyers vs repeat buyers
    – VIP/high AOV customers
    – Recent purchasers (suppress them from aggressive promos)
    – Category interest (based on browse/purchase)

    This is how you avoid blasting people with irrelevant promos.

    Step 6: Measure the right thing weekly

    Open rates can be misleading (privacy changes didn’t help), so I bias toward:
    – Revenue per recipient (RPR)
    – Conversion rate from email clicks
    – Unsubscribe/spam complaint rate
    – Deliverability signals (sudden drops, Gmail tab issues, etc.)

    And yes, you still look at click rate, because it tells you if your message is landing.

    Common mistakes I keep seeing

    • Buying lists. You’ll trash deliverability fast, and it’s hard to recover.
    • No suppression rules. Someone buys, then gets a “last chance to buy” email 2 hours later. Bad experience.
    • Too many flows that overlap. If you don’t map your automations on one sheet, you will spam people accidentally.
    • One CTA, five links. Pick a primary action per email, otherwise clicks scatter.

    Effective Examples of Email Marketing Strategies and Their Value

    The best strategies are the ones you can run repeatedly without creative burnout. I care less about “clever” and more about “consistent.”

    Personalized Offers

    Personalization works when it’s rooted in real behavior, not just “Hi {FirstName}.” If someone bought running shoes, the next email shouldn’t be a random store-wide promo. It should be socks, insoles, a care kit, or a training plan—something that makes sense.

    A simple approach that performs:
    – Segment by last purchased category.
    – Recommend 3–5 complementary items.
    – Add a “because you bought X” line so it doesn’t feel creepy.

    Research shows that personalized emails improve click-through rates by 26% on average. Use that as a nudge to build basic segments, because you don’t need machine-learning magic to benefit.

    Mini example I’ve seen work: a skincare brand ran a “routine builder” follow-up. After purchase, customers got a three-email sequence: morning routine, night routine, then “what to do when irritation happens.” Returns dropped slightly, repeat purchase went up. Not because of discounts—because the emails were actually helpful.

    Engaging Subject Lines

    Your subject line isn’t where you show off your vocabulary. It’s where you earn the open.

    Studies reveal that 47% of email recipients will open an email based on the subject line alone. That lines up with what I’ve observed when A/B testing: subject lines rarely save a bad offer, but they absolutely can choke a good one.

    What I’d test (and why):
    Benefit-forward: “Softer tees, same fit” (clear promise)
    Curiosity with honesty: “We fixed the one annoying thing” (specific)
    Direct promo: “48-hour flash sale: 20% off” (no games)

    Common mistake: trying to be “mysterious” with zero context. If your brand isn’t already loved, vague subject lines just get ignored.

    Also, don’t ignore preview text. It’s free real estate, and it often decides the open when subject lines are similar.

    Clear Calls to Action

    Every email needs a job.

    If it’s a launch email, the job is “shop the drop.” If it’s post-purchase, the job might be “read the care guide” or “complete your set.” When you cram multiple CTAs into one message, people hesitate—then do nothing.

    My rule: one primary CTA button, then maybe one secondary text link for people who aren’t ready. Keep the button copy specific. “Shop now” is fine, but “Build your bundle” usually beats it when you’re bundling.

    One more thing: match the landing page to the promise. If the CTA says “Shop best-sellers,” don’t dump them on the homepage. Send them to a best-sellers collection. That’s basic, yet it’s constantly missed.

    How Much is a 1000 Email List Worth?

    A 1000-contact email list might be worth between $300 and $400 on average, but that number swings hard depending on your niche, margins, and engagement.

    Here’s what changes the math fast:
    Source quality: Organic signups from buyers and true fans beat giveaway leads every time.
    Purchase cycle: Consumables (coffee, skincare) monetize quicker than furniture.
    Email program maturity: A list with a working welcome + post-purchase flow is worth more than a list that only gets random promos.

    A more useful way to think about it is “revenue per subscriber per month.” If your list earns $0.30/subscriber/month, then 1000 subscribers is ~$300/month. If you improve your welcome series and lift that to $0.60, you didn’t just “grow the list”—you doubled the value of what you already have.

    So yes, email is still a top-tier channel in 2026. But it pays you back based on how clean your data is, how relevant your messaging is, and whether you’re running a real lifecycle program.

    My Experience With This

    I’ve seen email marketing save brands that were bleeding money on ads. I’ve also seen it quietly become the top revenue channel for stores that thought it was “just newsletters.” The difference is never a secret hack—it’s operational discipline.

    One project that sticks with me: a small e-commerce store (under $30k/month) came to me convinced they needed a new platform. They were ready to rip out everything and migrate.

    Instead, we spent two weeks doing the boring stuff.

    What we changed (and in what order)

    First, we mapped their customer journey on one page—literally a Google Doc. Then we audited every email they sent in the last 60 days. After that, we fixed three things:

    1. Welcome flow was missing. They had a pop-up discount, but the “welcome email” went out once a week in a batch. So, people forgot they even signed up.
    2. No suppression after purchase. Buyers kept getting aggressive promo emails, which drove unsubscribes.
    3. Their product pages didn’t match email promises. The email would hype a bundle, but the link went to a generic category.

    We built a 4-email welcome flow, a basic post-purchase sequence, and a simple winback. Nothing fancy.

    What happened next

    Within about a month, email revenue increased noticeably—mainly because the automations captured sales they were previously missing. More importantly, complaint rates dropped because the program became less annoying.

    That’s why I’m biased toward “boring + reliable.” I’d rather run five flows that print money than twenty flows that conflict.

    And yes, I’ve also watched teams over-automate. Someone adds a browse abandonment, then a “product education” series, then an SMS follow-up, then a retargeting ad… and suddenly one shopper gets eight messages in two days. The fix is usually a simple frequency cap and better exclusions, not another clever template.

    FAQ

    • How do I start email marketing?
      Start by choosing one platform, setting up list capture, and launching a welcome flow before you obsess over newsletters. Then add the core automations: abandoned cart, browse abandonment, post-purchase, and winback.

    If you want a clean “first week” plan, here’s what I’d do:
    1) Day 1: pick platform + connect Shopify/WooCommerce
    2) Day 2: add a signup form + basic pop-up
    3) Day 3: write Welcome Email #1 (deliver offer + best-seller)
    4) Day 4: write Welcome Email #2 (story + proof)
    5) Day 5: write Welcome Email #3 (education + curated products)
    6) Day 6: set up abandoned cart (1–3 emails)
    7) Day 7: review metrics + fix obvious issues

    • How much is a 1000 email list worth?
      Often $300-$400, but engagement and product margins change that fast. A list of past buyers is typically worth more than a bigger list of discount hunters.

    • Is email marketing still worth it in 2026?
      Yes, because it’s still one of the few channels you control. Ads fluctuate, algorithms shift, and CPMs spike, but your list is yours—as long as you respect deliverability and consent.

    • How do I become an email marketer?
      Do it hands-on. Pick one brand (even your own side project), run a welcome flow, then run one campaign a week for eight weeks. Track revenue per recipient, learn basic segmentation, and practice writing offers. Courses help, but real inbox results teach faster.

    • What are some effective email marketing examples?
      Personalized offers based on purchase history, subject-line testing that’s tied to a real offer, and emails with one clear CTA that matches a focused landing page.

    Here are three “easy to ship” examples:
    – Post-purchase care guide + cross-sell (no discount)
    – Back-in-stock alert with a tight CTA
    – VIP early access for repeat buyers

    • What tools help improve email marketing effectiveness?
      Automation builders, A/B testing, segmentation, and analytics that tie sends to revenue—not just opens. Deliverability tools matter too, especially once you scale.

    • What’s the biggest beginner mistake?
      Sending promos to everyone. Segment early (buyers vs non-buyers, recent purchasers, category interest), then suppress recent buyers from aggressive sales emails.

    Additionally, you can find more resources on Top Email Marketing Tools for 2026.

  • 6 Essential WordPress Security Plugins You Need in 2026

    6 Essential WordPress Security Plugins You Need in 2026

    I’m Mobeen Abdullah (founder of Nextly), and if you’re running WordPress in 2026, you need to treat security plugins like you treat backups: non-negotiable. WordPress powers over 41% of the web, which is exactly why attackers keep farming it for easy wins—weak passwords, outdated plugins, and sloppy admin setups.

    I’ve watched otherwise “fine” sites go sideways fast: a client skipped updates for “just a few weeks,” then a vulnerable plugin got popped, and suddenly we had spam pages indexed in Google and a hosting provider threatening suspension. The painful part wasn’t the hack—it was the cleanup, the lost time, and the trust hit. Security isn’t one magic button, but the right plugins make the boring stuff (firewalls, scanning, login protection, alerts) actually doable.

    The ecosystem is also getting noisier. With reports pointing to a 42% increase in vulnerabilities in the WordPress world, you don’t want to be the site that finds out late. So below are 6 essential WordPress security plugins I’d consider “table stakes” in 2026, plus the practical setup moves I’d make on day one to get value instead of just installing another dashboard widget.

    If you manage a blog, a WooCommerce store, or a portfolio, this is how you buy yourself fewer 2 a.m. surprises—and a lot more peace of mind.

    Top Security Plugins for WordPress in 2026

    WordPress security plugins aren’t all doing the same job. Some are great at blocking bad traffic, others are better at malware cleanup, and a few exist mostly to make you feel better.

    Here are six that stand out in 2026, plus how I’d actually use them without tanking performance or drowning in alerts.

    1. Wordfence Security

    Wordfence is the one I install when I want strong coverage quickly—endpoint firewall, malware scanning, and solid visibility into what’s hitting your site.

    That matters because a “secure” site still gets hammered. According to a recent report, more than 14,000 WordPress sites reported security vulnerabilities caused by weak passwords and outdated plugins, which is the kind of boring problem Wordfence helps you clamp down on.

    How I configure Wordfence (fast, sane defaults):

    • First, I run an initial scan and fix the obvious stuff (modified core files, abandoned plugins, sketchy admin users).
    • Then, I turn on login protection (limit attempts + strong password enforcement). Brute force is still the easiest win for attackers.
    • Next, I review firewall mode. If you can, enable the strongest mode Wordfence supports for your hosting setup.
    • Finally, I tune alerts. Otherwise, you’ll get 40 emails a day and start ignoring the one that matters.

    Premium adds real-time IP blacklisting, which is useful if you’re seeing repeat attacks from known bad networks. That said, I’ve also seen people buy Premium and still get popped because they never updated vulnerable plugins—Wordfence can’t “subscription” your way out of bad maintenance.

    For a deeper feature/pricing breakdown, check out this Wordfence review.

    2. Sucuri Security

    Sucuri shines when you want a cloud-based layer in front of your server. So instead of your host eating the traffic, the firewall can block a lot of nastiness before WordPress even has to deal with it.

    Where Sucuri is worth it:

    • Sites that get scraped, spammed, or constantly probed (popular blogs, small stores, local businesses with lots of form submissions).
    • Anyone who can’t afford downtime during an attack—because rate-limiting and WAF rules help keep you online.

    A common mistake I see: people install Sucuri, see “monitoring enabled,” and assume they’re done. Meanwhile, XML-RPC is wide open, admin usernames are still “admin,” and the site has 26 plugins that haven’t been updated in months.

    If you do one practical thing after installing Sucuri, do this: enable monitoring, confirm alert emails actually reach you, and run hardening steps one by one. You want fewer toggles, not more.

    3. All In One WP Security & Firewall

    All In One WP Security & Firewall is the best “free but serious” option on this list. It covers user account security, firewall rules, database security, and a bunch of hardening steps that new site owners usually skip.

    The big win is that it’s organized in a way that makes sense. You can work through it like a checklist instead of getting lost in settings.

    What I’d prioritize inside the plugin (in order):

    • Lock down logins (rename admin user if it exists, add login attempt limits).
    • Turn on basic firewall protections that don’t break themes or page builders.
    • Add database and file permission checks—because sloppy permissions are a quiet foot-gun.

    Tradeoff: because it’s free and broad, you still need to know when not to flip a setting. I’ve seen aggressive rules block REST API calls and break the checkout on WooCommerce. So test changes on staging if you can.

    More details here: this miniOrange review.

    4. iThemes Security

    iThemes Security is great for tightening up the stuff people forget: brute force protection, strong password enforcement, file change detection, and a bunch of “one-click” fixes.

    It’s also beginner-friendly, which is underrated. If you’re managing a client site and they’ll be in wp-admin, you want guardrails they won’t fight.

    How I use iThemes on real sites:

    • I enable brute force protection and set sensible lockout thresholds.
    • Then I force strong passwords for admins and editors. Yes, someone will complain. Do it anyway.
    • Next, I review user accounts and remove anything stale (old contractors, “test” users, duplicates).

    Where people mess up: they turn on every hardening feature at once, something breaks, and then they disable the plugin entirely. Go one change at a time, check the site, move on.

    If you want comparisons and beginner context, WPBeginner has a solid overview: WPBeginner.

    5. MalCare Security

    MalCare is the one I reach for when I care about two things: accurate detection and clean, low-drama cleanup.

    A lot of scanners either miss obfuscated malware or light up false positives until you stop trusting them. MalCare’s approach tends to be lighter on performance, and it’s built for cleanup workflows that don’t involve manually diffing files for hours.

    This matters more than people think. The volume is ugly: 11,334 new vulnerabilities were reported in just the previous year (TechTide Solutions). So, even if you run a small site, you’re swimming in the same ocean.

    A practical “if you’re already infected” playbook:

    • Put the site in maintenance mode (or at least protect key pages).
    • Run MalCare’s scan and confirm what it flags.
    • Use the cleanup option, then rotate passwords (WP users, hosting, SFTP, database).
    • After that, update/replace the plugin or theme that likely caused the infection.

    One more mistake I see: people clean malware but don’t close the entry point. Then they get reinfected and assume the cleaner “didn’t work.” Cleanup is step two, not step ten.

    6. Jetpack Security

    Jetpack Security is popular because it’s bundled and familiar, but it’s not just “extra stuff.” It can cover brute force protection, malware scanning, and spam filtering, and it plays nicely with a lot of mainstream WordPress setups.

    The feature I care about most is backups. If your site gets wrecked, a clean restore is the fastest way to get back online while you diagnose what happened.

    Also, plugin hygiene still decides who gets hurt. As reported, 41% of all disclosed flaws in 2026 were linked to unpatched plugins (Sitios SV). So Jetpack’s value is higher when you pair it with disciplined updates.

    My Jetpack reality check:

    • If you already use it, lean into the backups and brute force protection.
    • If you don’t, don’t install it just because it’s “all-in-one.” Choose it because you’ll actually use the security features.

    Conclusion

    If you take one thing from this: installing a plugin is not a security plan—configuring it, maintaining it, and responding to alerts is.

    In 2026, Wordfence, Sucuri, All In One WP Security & Firewall, iThemes Security, MalCare, and Jetpack cover the core layers most WordPress sites need: firewalling, malware detection/cleanup, login protection, monitoring, and recovery. The best combo depends on your site type. For example, on WooCommerce I care more about uptime (WAF + rate limiting) and clean restores, while on content sites I focus on brute force protection and malware scanning.

    Here’s the step I’d do today, before you forget: pick two plugins that complement each other (usually one firewall-oriented and one cleanup/backup-oriented), configure them deliberately, and schedule a monthly “security maintenance” block. Thirty minutes a month beats three days of incident cleanup.

    Security is boring when it works. That’s the goal.

    FAQ

    • Q: Which security plugin is best for WordPress?
      A: Wordfence Security is often considered the best because it combines an endpoint firewall, malware scanning, and visibility into attacks. That said, I’ve seen it fail in practice when site owners ignore updates—so pair it with disciplined patching.

    • Q: What is the best free WordPress security plugin?
      A: All In One WP Security & Firewall is highly rated and free. It’s also structured like a checklist, which helps if you’re not a security person. Still, change settings gradually, because aggressive rules can break APIs or checkout flows.

    • Q: Do I need more than one security plugin?
      A: Sometimes, yes—but don’t stack five overlapping tools. I usually pick one that blocks (WAF/firewall) and one that helps me recover (backups/cleanup). Two well-configured plugins beat a pile of half-configured ones.

    • Q: Why are people moving away from WordPress?
      A: Concerns about security, performance, and management complexity. WordPress can be very secure, but it punishes neglect—especially when plugin sprawl and delayed updates creep in.

    • Q: What is the best security plugin for WordPress in 2026?
      A: Experts still recommend Wordfence and Sucuri based on emerging trends, but “best” depends on your threat model. If you’re constantly attacked or can’t afford downtime, a strong WAF layer (like Sucuri) becomes a bigger deal.

    My Journey in WordPress Security

    Being in this field as Mobeen Abdullah for several years has taught me that most WordPress security incidents aren’t Hollywood hacks—they’re paperwork failures. Someone didn’t renew a license, a plugin got abandoned, updates piled up, and the site quietly became an easy target.

    One case that stuck with me: a small business site got hit with injected spam links. Nothing looked broken on the homepage, so the owner ignored it. A week later, their organic traffic fell off a cliff because Google started flagging the domain. Cleanup took a day. Rebuilding trust took months. That’s why I bias toward boring layers—WAF + scanning + backups—because they prevent the “silent damage” that hurts the most.

    My rule now is simple: I want real-time monitoring, a clear alert path (email/Slack—whatever you’ll actually read), and a recovery plan that doesn’t involve guessing. When a client says, “We’ll deal with security after launch,” I push back, because after launch is when the attacks start.

    If you’re setting this up this week, install one plugin, configure it fully, and prove you can restore a backup. Then add the next layer. That order saves you from the false confidence trap.

    Connect with Mobeen Abdullah on LinkedIn

    Nextly

  • 6 Essential WordPress Security Plugins You Need in 2026

    6 Essential WordPress Security Plugins You Need in 2026

    I’m Mobeen Abdullah (founder of Nextly), and if you’re running WordPress in 2026, you need to treat security plugins like you treat backups: non-negotiable. WordPress powers over 41% of the web, which is exactly why attackers keep farming it for easy wins—weak passwords, outdated plugins, and sloppy admin setups.

    I’ve watched otherwise “fine” sites go sideways fast: a client skipped updates for “just a few weeks,” then a vulnerable plugin got popped, and suddenly we had spam pages indexed in Google and a hosting provider threatening suspension. The painful part wasn’t the hack—it was the cleanup, the lost time, and the trust hit. Security isn’t one magic button, but the right plugins make the boring stuff (firewalls, scanning, login protection, alerts) actually doable.

    The ecosystem is also getting noisier. With reports pointing to a 42% increase in vulnerabilities in the WordPress world, you don’t want to be the site that finds out late. So below are 6 essential WordPress security plugins I’d consider “table stakes” in 2026, plus the practical setup moves I’d make on day one to get value instead of just installing another dashboard widget.

    If you manage a blog, a WooCommerce store, or a portfolio, this is how you buy yourself fewer 2 a.m. surprises—and a lot more peace of mind.

    Top Security Plugins for WordPress in 2026

    WordPress security plugins aren’t all doing the same job. Some are great at blocking bad traffic, others are better at malware cleanup, and a few exist mostly to make you feel better.

    Here are six that stand out in 2026, plus how I’d actually use them without tanking performance or drowning in alerts.

    1. Wordfence Security

    Wordfence is the one I install when I want strong coverage quickly—endpoint firewall, malware scanning, and solid visibility into what’s hitting your site.

    That matters because a “secure” site still gets hammered. According to a recent report, more than 14,000 WordPress sites reported security vulnerabilities caused by weak passwords and outdated plugins, which is the kind of boring problem Wordfence helps you clamp down on.

    How I configure Wordfence (fast, sane defaults):

    • First, I run an initial scan and fix the obvious stuff (modified core files, abandoned plugins, sketchy admin users).
    • Then, I turn on login protection (limit attempts + strong password enforcement). Brute force is still the easiest win for attackers.
    • Next, I review firewall mode. If you can, enable the strongest mode Wordfence supports for your hosting setup.
    • Finally, I tune alerts. Otherwise, you’ll get 40 emails a day and start ignoring the one that matters.

    Premium adds real-time IP blacklisting, which is useful if you’re seeing repeat attacks from known bad networks. That said, I’ve also seen people buy Premium and still get popped because they never updated vulnerable plugins—Wordfence can’t “subscription” your way out of bad maintenance.

    For a deeper feature/pricing breakdown, check out this Wordfence review.

    2. Sucuri Security

    Sucuri shines when you want a cloud-based layer in front of your server. So instead of your host eating the traffic, the firewall can block a lot of nastiness before WordPress even has to deal with it.

    Where Sucuri is worth it:

    • Sites that get scraped, spammed, or constantly probed (popular blogs, small stores, local businesses with lots of form submissions).
    • Anyone who can’t afford downtime during an attack—because rate-limiting and WAF rules help keep you online.

    A common mistake I see: people install Sucuri, see “monitoring enabled,” and assume they’re done. Meanwhile, XML-RPC is wide open, admin usernames are still “admin,” and the site has 26 plugins that haven’t been updated in months.

    If you do one practical thing after installing Sucuri, do this: enable monitoring, confirm alert emails actually reach you, and run hardening steps one by one. You want fewer toggles, not more.

    3. All In One WP Security & Firewall

    All In One WP Security & Firewall is the best “free but serious” option on this list. It covers user account security, firewall rules, database security, and a bunch of hardening steps that new site owners usually skip.

    The big win is that it’s organized in a way that makes sense. You can work through it like a checklist instead of getting lost in settings.

    What I’d prioritize inside the plugin (in order):

    • Lock down logins (rename admin user if it exists, add login attempt limits).
    • Turn on basic firewall protections that don’t break themes or page builders.
    • Add database and file permission checks—because sloppy permissions are a quiet foot-gun.

    Tradeoff: because it’s free and broad, you still need to know when not to flip a setting. I’ve seen aggressive rules block REST API calls and break the checkout on WooCommerce. So test changes on staging if you can.

    More details here: this miniOrange review.

    4. iThemes Security

    iThemes Security is great for tightening up the stuff people forget: brute force protection, strong password enforcement, file change detection, and a bunch of “one-click” fixes.

    It’s also beginner-friendly, which is underrated. If you’re managing a client site and they’ll be in wp-admin, you want guardrails they won’t fight.

    How I use iThemes on real sites:

    • I enable brute force protection and set sensible lockout thresholds.
    • Then I force strong passwords for admins and editors. Yes, someone will complain. Do it anyway.
    • Next, I review user accounts and remove anything stale (old contractors, “test” users, duplicates).

    Where people mess up: they turn on every hardening feature at once, something breaks, and then they disable the plugin entirely. Go one change at a time, check the site, move on.

    If you want comparisons and beginner context, WPBeginner has a solid overview: WPBeginner.

    5. MalCare Security

    MalCare is the one I reach for when I care about two things: accurate detection and clean, low-drama cleanup.

    A lot of scanners either miss obfuscated malware or light up false positives until you stop trusting them. MalCare’s approach tends to be lighter on performance, and it’s built for cleanup workflows that don’t involve manually diffing files for hours.

    This matters more than people think. The volume is ugly: 11,334 new vulnerabilities were reported in just the previous year (TechTide Solutions). So, even if you run a small site, you’re swimming in the same ocean.

    A practical “if you’re already infected” playbook:

    • Put the site in maintenance mode (or at least protect key pages).
    • Run MalCare’s scan and confirm what it flags.
    • Use the cleanup option, then rotate passwords (WP users, hosting, SFTP, database).
    • After that, update/replace the plugin or theme that likely caused the infection.

    One more mistake I see: people clean malware but don’t close the entry point. Then they get reinfected and assume the cleaner “didn’t work.” Cleanup is step two, not step ten.

    6. Jetpack Security

    Jetpack Security is popular because it’s bundled and familiar, but it’s not just “extra stuff.” It can cover brute force protection, malware scanning, and spam filtering, and it plays nicely with a lot of mainstream WordPress setups.

    The feature I care about most is backups. If your site gets wrecked, a clean restore is the fastest way to get back online while you diagnose what happened.

    Also, plugin hygiene still decides who gets hurt. As reported, 41% of all disclosed flaws in 2026 were linked to unpatched plugins (Sitios SV). So Jetpack’s value is higher when you pair it with disciplined updates.

    My Jetpack reality check:

    • If you already use it, lean into the backups and brute force protection.
    • If you don’t, don’t install it just because it’s “all-in-one.” Choose it because you’ll actually use the security features.

    Conclusion

    If you take one thing from this: installing a plugin is not a security plan—configuring it, maintaining it, and responding to alerts is.

    In 2026, Wordfence, Sucuri, All In One WP Security & Firewall, iThemes Security, MalCare, and Jetpack cover the core layers most WordPress sites need: firewalling, malware detection/cleanup, login protection, monitoring, and recovery. The best combo depends on your site type. For example, on WooCommerce I care more about uptime (WAF + rate limiting) and clean restores, while on content sites I focus on brute force protection and malware scanning.

    Here’s the step I’d do today, before you forget: pick two plugins that complement each other (usually one firewall-oriented and one cleanup/backup-oriented), configure them deliberately, and schedule a monthly “security maintenance” block. Thirty minutes a month beats three days of incident cleanup.

    Security is boring when it works. That’s the goal.

    FAQ

    • Q: Which security plugin is best for WordPress?
      A: Wordfence Security is often considered the best because it combines an endpoint firewall, malware scanning, and visibility into attacks. That said, I’ve seen it fail in practice when site owners ignore updates—so pair it with disciplined patching.

    • Q: What is the best free WordPress security plugin?
      A: All In One WP Security & Firewall is highly rated and free. It’s also structured like a checklist, which helps if you’re not a security person. Still, change settings gradually, because aggressive rules can break APIs or checkout flows.

    • Q: Do I need more than one security plugin?
      A: Sometimes, yes—but don’t stack five overlapping tools. I usually pick one that blocks (WAF/firewall) and one that helps me recover (backups/cleanup). Two well-configured plugins beat a pile of half-configured ones.

    • Q: Why are people moving away from WordPress?
      A: Concerns about security, performance, and management complexity. WordPress can be very secure, but it punishes neglect—especially when plugin sprawl and delayed updates creep in.

    • Q: What is the best security plugin for WordPress in 2026?
      A: Experts still recommend Wordfence and Sucuri based on emerging trends, but “best” depends on your threat model. If you’re constantly attacked or can’t afford downtime, a strong WAF layer (like Sucuri) becomes a bigger deal.

    My Journey in WordPress Security

    Being in this field as Mobeen Abdullah for several years has taught me that most WordPress security incidents aren’t Hollywood hacks—they’re paperwork failures. Someone didn’t renew a license, a plugin got abandoned, updates piled up, and the site quietly became an easy target.

    One case that stuck with me: a small business site got hit with injected spam links. Nothing looked broken on the homepage, so the owner ignored it. A week later, their organic traffic fell off a cliff because Google started flagging the domain. Cleanup took a day. Rebuilding trust took months. That’s why I bias toward boring layers—WAF + scanning + backups—because they prevent the “silent damage” that hurts the most.

    My rule now is simple: I want real-time monitoring, a clear alert path (email/Slack—whatever you’ll actually read), and a recovery plan that doesn’t involve guessing. When a client says, “We’ll deal with security after launch,” I push back, because after launch is when the attacks start.

    If you’re setting this up this week, install one plugin, configure it fully, and prove you can restore a backup. Then add the next layer. That order saves you from the false confidence trap.

    Connect with Mobeen Abdullah on LinkedIn

    Nextly

  • How to Sync Content Between WordPress and Other CMSs Efficiently

    Sync content between WordPress and other CMSs and you’ll either save your team hours a week—or quietly create a duplicated-content mess that nobody owns.

    I’m abcac. I’ve spent years on the digital marketing side of CMS work, which means I’m usually the one pushing for “publish faster” while also getting yelled at when the article shows up with broken embeds, missing authors, or the wrong canonical tag.

    Efficient synchronization isn’t just automation for automation’s sake. It protects brand consistency, keeps SEO signals clean, and stops editors from doing the same update three times in three places.

    In this guide, I’ll walk through practical ways to integrate WordPress with other CMSs (custom platforms, headless systems, or even another WordPress). You’ll get the tradeoffs, the common traps, and the checks I use so the sync stays boring—and boring is good.

    Featured image for How to Sync Content Between WordPress and Other CMSs Efficiently

    How to Sync Content Between WordPress and Other CMSs Efficiently

    Synchronizing content between WordPress and other CMSs can feel intimidating, but it’s manageable when you treat it like a data pipeline, not a “copy/paste problem.” The win isn’t just speed. It’s confidence—knowing the WordPress version matches the source, every time.

    Understanding the Basics of WordPress Integration

    WordPress integration means WordPress can reliably send, receive, and reconcile content with another system. The word “reconcile” matters, because two-way sync without rules turns into a tug-of-war.

    1. Using API Integration

    API integration is my default choice when the other CMS has a real API and you have someone who can code (even a little). You get control over mapping, scheduling, and error handling, which is where most integrations succeed or die.

    A simple, sane approach looks like this:

    • Identify the API Endpoints: Every CMS has specific API endpoints for content management. For WordPress, key endpoints include posts, pages, users, and custom post types.
    • Set Up Authentication: Most APIs require authentication. Use OAuth, API keys, or JWT tokens to secure access.
    • Develop the Integration Logic: You can write scripts in languages like PHP or Python to pull data from one CMS and push it to WordPress, or vice versa. This allows for real-time synchronization.

    Here’s the step-by-step breakdown I use on real projects (because “just use the API” is not a plan):

    1. Decide the source of truth. Pick one system that “wins” for each field: title, body, excerpt, author, slug, tags, featured image, SEO meta. If you skip this, editors will overwrite each other and blame the sync.
    2. Create a stable ID mapping. I store the upstream CMS content ID in WordPress post meta (for example, external_id). Then I upsert: if external_id exists, update; if not, create.
    3. Normalize content before pushing. HTML cleaning is the hidden tax. Convert weird line breaks, strip unsupported blocks, and handle embeds. I’ve seen integrations die because someone pasted a table that the target editor can’t render.
    4. Pick your trigger style:
    5. Polling (cron) every X minutes is easy and predictable.
    6. Webhooks are faster and cheaper, but you need to verify signatures and handle retries.
    7. Log everything. Not “we should log.” Actually log. Store request IDs, payload snippets, timestamps, and the WordPress post ID you touched. When an exec asks “why didn’t this publish?”, logs are the difference between a fix and a guessing game.

    A real example: a digital marketing team I worked with needed to pull blog posts from a custom CMS into WordPress. We set up an API integration that automatically fetched posts every hour, significantly reducing manual work and ensuring all posts were live on both platforms quickly.

    The mistake we made early on: we treated “published” as a boolean. Meanwhile, their CMS had states like Draft → Review → Scheduled → Published. So, we accidentally published a few pieces that were only meant for internal review. After that, we mapped states explicitly and required an “ApprovedForSyndication” flag before WordPress would publish.

    2. Utilizing WordPress Plugins

    If you need something running fast, plugins can be the right call—especially when the integration is one-way (import into WordPress) and the content format is consistent.

    • WP All Import: This plugin allows you to import content from various sources into WordPress easily. You can schedule imports and map fields accurately.
    • WP Migrate DB Pro: Great for migrating databases and keeping WordPress synchronized with another CMS database.
    • Zapier: Although not a direct integration plugin, Zapier can connect WordPress with numerous other applications, enabling automated workflows.

    What I like about plugins: you can prove the workflow in a day and iterate. What I don’t like: once a plugin becomes “mission-critical plumbing,” you’re now building your business process on top of someone else’s update cycle.

    A quick “plugin-first” checklist I use:

    • Can it map custom fields cleanly? If the other CMS has structured data, you’ll need reliable field mapping.
    • Does it handle media imports (featured images, galleries) without breaking URLs?
    • Is scheduling native? If you can’t schedule imports, someone will build a fragile workaround.
    • Does it have error reporting you’ll actually read? “Import completed” is meaningless if 30% of items failed silently.

    Common mistake: teams try to use a migration plugin as a synchronization system. Migration tools shine when you move once (or a few times), then cut over. They’re usually not built for ongoing two-way sync with conflict resolution.

    3. Manual Syncing Strategies

    Manual syncing still shows up in the real world, usually for good reasons: legal review, localization, or when the other CMS is ancient and locked down.

    • Content Calendars: Use a shared content calendar to keep track of what content needs to be published on which platform and when.
    • Standard Operating Procedures (SOPs): Develop SOPs for content updates to ensure consistency across teams.
    • Regular Audits: Conduct audits of both CMSs to verify that content is aligned and make necessary adjustments.

    If you’re stuck doing this manually, make it less painful with a “diff mindset.” I’ve had editors use a simple rule: never retype anything you can export. Export to CSV/JSON, paste once, then spot-check.

    One tactic that works surprisingly well: create a shared “Sync Notes” field (even a Google Doc link) where the editor logs what changed and where. That sounds basic, but it prevents the classic problem where someone updates the WordPress post, forgets the other CMS, and then the next sync overwrites it.

    Tools for Efficient WordPress Integration

    Tools matter, but only after you’ve decided your rules (source of truth, IDs, and triggers). Otherwise, you’re just picking a fancier way to create inconsistent content.

    • Integromat (Make): A powerful automation tool that connects different services and automates workflows between them. You can create scenarios that trigger when new content is published.
    • IFTTT (If This Then That): This tool allows you to tie actions across different platforms. For example, you can set it to automatically share new WordPress posts on other platforms.

    Here’s how I’d choose tools in practice, based on the messiness level.

    When Make is the right move

    Make (formerly Integromat) is great when you need “glue logic” without building and hosting your own integration service. So, if you’re syncing WordPress with a headless CMS, an Airtable editorial database, and Slack approvals, Make can be a lifesaver.

    A step-by-step flow I’ve shipped for a content team:

    1. Trigger: “Item marked Approved” in the upstream CMS.
    2. Transform: Convert rich text to HTML, map taxonomy, and generate an excerpt if missing.
    3. Media: Download the hero image, upload to WordPress Media Library, store the new attachment ID.
    4. Upsert: Find post by external_id; update if found, create if not.
    5. Notify: Post a Slack message with the WordPress URL and a checklist: formatting, internal links, featured image, author.

    Why it worked: editors kept control of approval, while WordPress stayed clean and consistent. Also, the Slack “done” message created accountability—someone had to eyeball it.

    Common mistake with Make: people forget idempotency. If the scenario runs twice (and it will), you don’t want duplicates. Always build a “search before create” step, and store the WordPress post ID back in the source system when possible.

    Where IFTTT fits (and where it doesn’t)

    IFTTT is okay for lightweight, low-risk automations—things like “when a WordPress post publishes, share to X” or “copy titles into a spreadsheet.” It’s not my pick for serious CMS-to-CMS sync.

    I’ve seen teams use IFTTT to push drafts around, and then wonder why authorship, categories, and images go missing. The platform just isn’t designed for deep field mapping.

    If you use IFTTT anyway, keep it in the shallow end:

    • Use it for notifications and distribution, not canonical content.
    • Don’t rely on it for scheduled publishing, because timing drift happens.
    • Build a manual QA checkpoint, because you won’t get rich logs.

    Tooling I’d add if you’re scaling

    Once you’re syncing hundreds or thousands of items, you’ll want a few more “boring but useful” pieces:

    • A queue (even a simple one) so you can retry failures without rerunning everything.
    • A staging environment for WordPress so you can test transformations without breaking production.
    • A monitoring view: error rate, average runtime, and a list of items that failed.

    One memorable incident: a team imported 2,000 posts overnight, but their tool didn’t throttle media uploads. WordPress got hammered, the site slowed to a crawl, and their host rate-limited requests. The fix was simple—batching and backoff—but it cost a day of firefighting because nobody planned for load.

    Challenges to Consider

    Sync isn’t “set and forget.” Even good integrations drift over time, because editors change behavior, CMS fields evolve, and plugins update.

    Data integrity (formatting, fields, and drift)

    Data integrity issues usually show up as a thousand small paper cuts: curly quotes turning into garbage characters, tables collapsing, headings changing levels, or custom fields landing in the wrong place.

    What I do to keep integrity high:

    • Define a content contract. Literally write down what fields exist and what they mean.
    • Validate on the way in. If required fields are missing, don’t publish—fail fast and alert someone.
    • Run diff audits. Weekly or monthly, compare a sample set across systems.

    A real-world example: we once synced “reading time” as a number, but the upstream system stored “5 min” as text. WordPress accepted it, then the theme expected an integer and broke the template on a handful of posts. After that, we added basic type checks before updating.

    Common mistake: forgetting taxonomy normalization. “Case Studies” vs “case-studies” vs “Case studies” becomes three categories, and then your archives look amateur.

    Security risks (APIs are doors)

    Opening up APIs is necessary, but it expands your attack surface.

    Practical safeguards that don’t slow you down too much:

    • Scope credentials tightly. The integration should have only the permissions it needs.
    • Rotate keys/tokens on a schedule, and revoke them when staff changes.
    • Verify webhook signatures and reject unknown sources.
    • Rate-limit requests and watch for unusual spikes.

    I’ve seen “quick” integrations ship with a hardcoded API key in a repo that multiple contractors had access to. Nothing bad happened, but that was luck, not design.

    Performance issues (slow sync, slow site)

    Performance problems show up in two places: your sync jobs take forever, and your WordPress site gets sluggish.

    A few fixes that actually move the needle:

    • Send fewer fields. Don’t update the whole post if only the excerpt changed.
    • Batch operations. Pull 50 items at a time, not 1,000.
    • Defer media. If images are heavy, queue them and process off-peak.

    One “hidden” performance killer: doing expensive lookups on every item. If you can cache taxonomy IDs or author mappings during a run, do it. It’s boring, but it’s the difference between a 4-minute sync and a 45-minute sync.

    Conclusion

    Synchronizing content between WordPress and other CMSs works best when you treat it like a system: clear ownership, predictable triggers, and a way to detect when things go wrong.

    If I had to boil it down to what I’d do on a new project, it’s this:

    1. Choose your source of truth for each field (title, body, slug, SEO meta, featured image).
    2. Store an external ID in WordPress so updates don’t create duplicates.
    3. Start with one-way sync (upstream → WordPress), then add two-way only if there’s a real need.
    4. Add QA checkpoints—at least early on—because the first 50 items teach you what the next 5,000 will break.

    A quick persona anecdote from my side: I worked with a regional publisher where marketing owned WordPress, editorial owned a separate CMS, and nobody owned “sync correctness.” So, when a disclaimer changed, it got updated in one system but not the other, and legal escalated. After that, we created a tiny rule: disclaimers live in one place only, and WordPress pulls them as a reusable block. That single decision prevented repeat incidents.

    My Experience With This

    As abcac, I’ve learned the hard way that CMS sync projects fail for human reasons more than technical ones. People disagree on who’s allowed to edit what, and then the integration just amplifies the confusion.

    So, I bias toward boring patterns: one source of truth, explicit mappings, and logs you can read at 2 a.m. when something inevitably publishes wrong.

    Your next step: pick one content type (blog posts, help docs, product pages) and prototype the sync end-to-end with 10 items. You’ll find the real edge cases fast.

    FAQs

    • Q: Why are people moving away from WordPress?
      A: Reasons include performance issues, competition with newer platforms, and user preference for specialized CMS tools.
    • Q: Is WordPress outdated in 2026?
      A: WordPress continues to evolve, but challenges exist with emerging technologies and new competitors.
    • Q: Can WordPress be used as a CMS?
      A: Yes, WordPress is a versatile CMS that supports diverse websites while maintaining ease of use.
    • Q: Which CMS is better than WordPress?
      A: It depends on specific needs; some users prefer platforms tailored to specific functionalities like eCommerce.