Category: Web Development

  • Headless CMS Integration Tutorial

    Headless CMS Integration Tutorial

    Learn how to integrate a headless CMS with your website in 2026 through this comprehensive guide offering practical examples and insights.
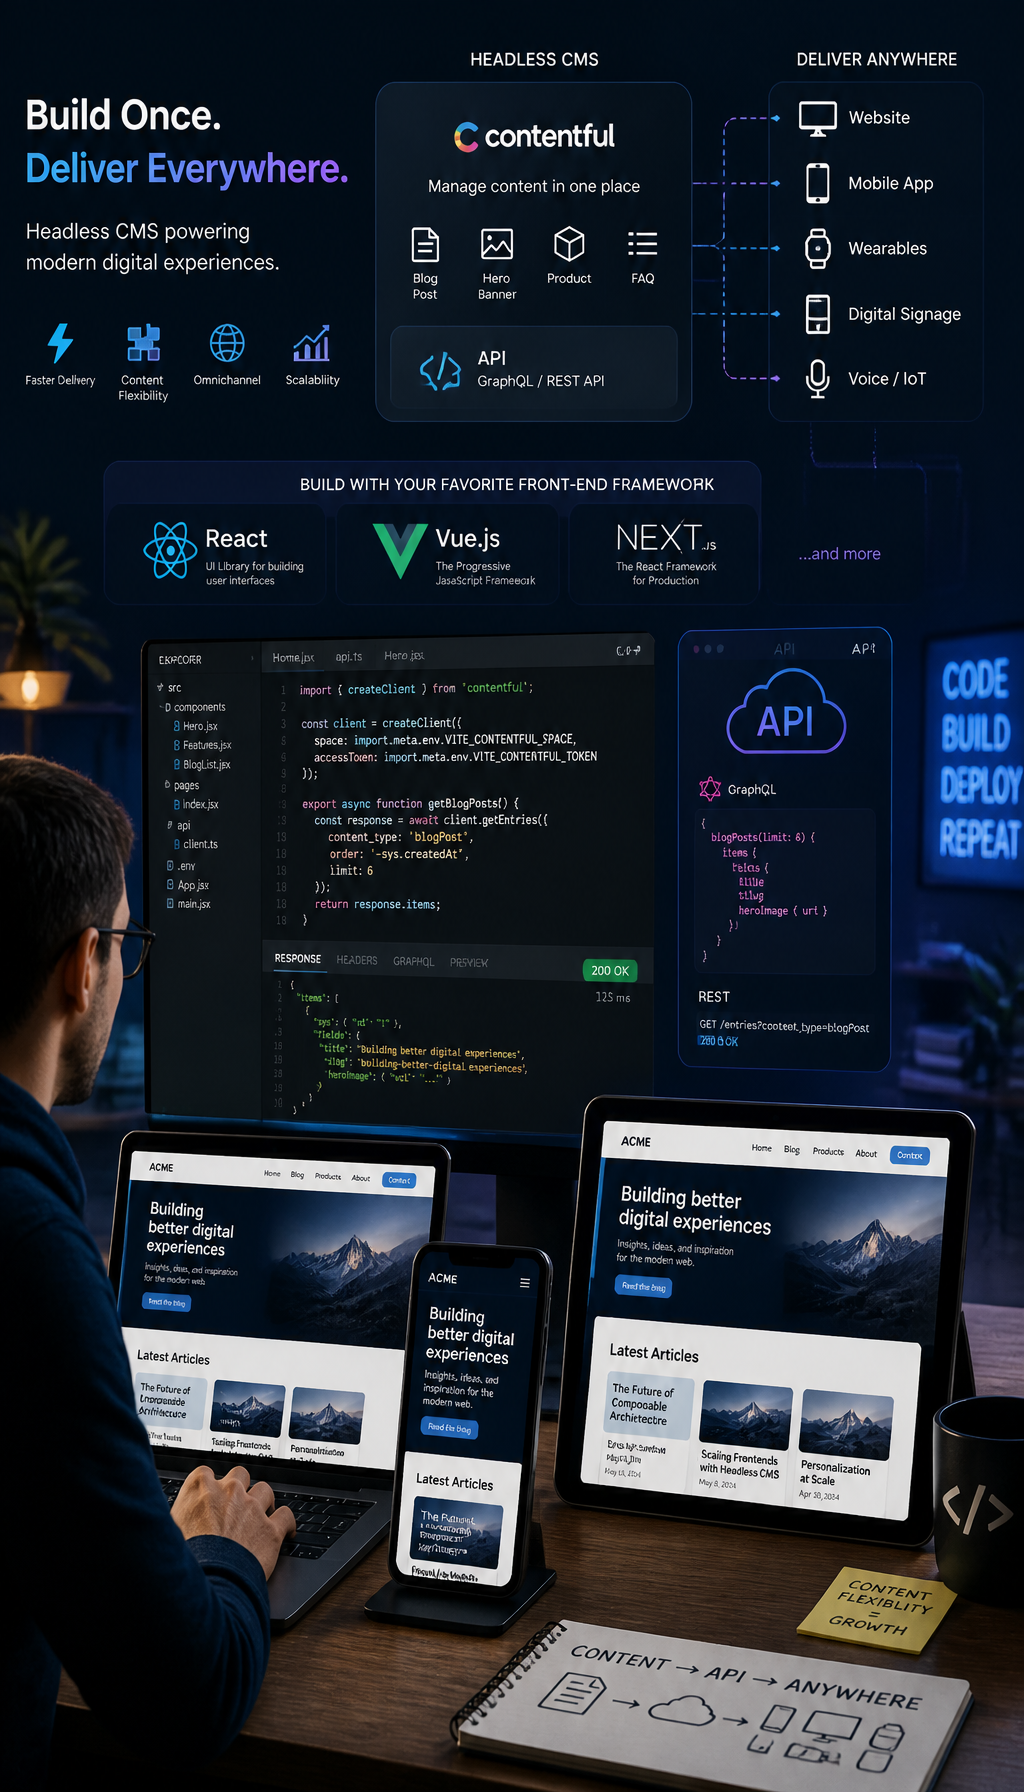
    Featured image for How to Integrate a Headless CMS with Your Website in 2026

    How to Integrate a Headless CMS

    A headless CMS integration is mostly three jobs: model content, expose it via an API, then consume it safely in your frontend. The “easy” part is fetching JSON. The hard part is everything around that JSON—preview, caching, permissions, and editors not hating the UI.

    Understanding Headless CMS: Definitions and Examples

    Before we dive into setup, get the mental model straight. A headless CMS stores content and serves it over an API. Your website (or app) renders it however you want.

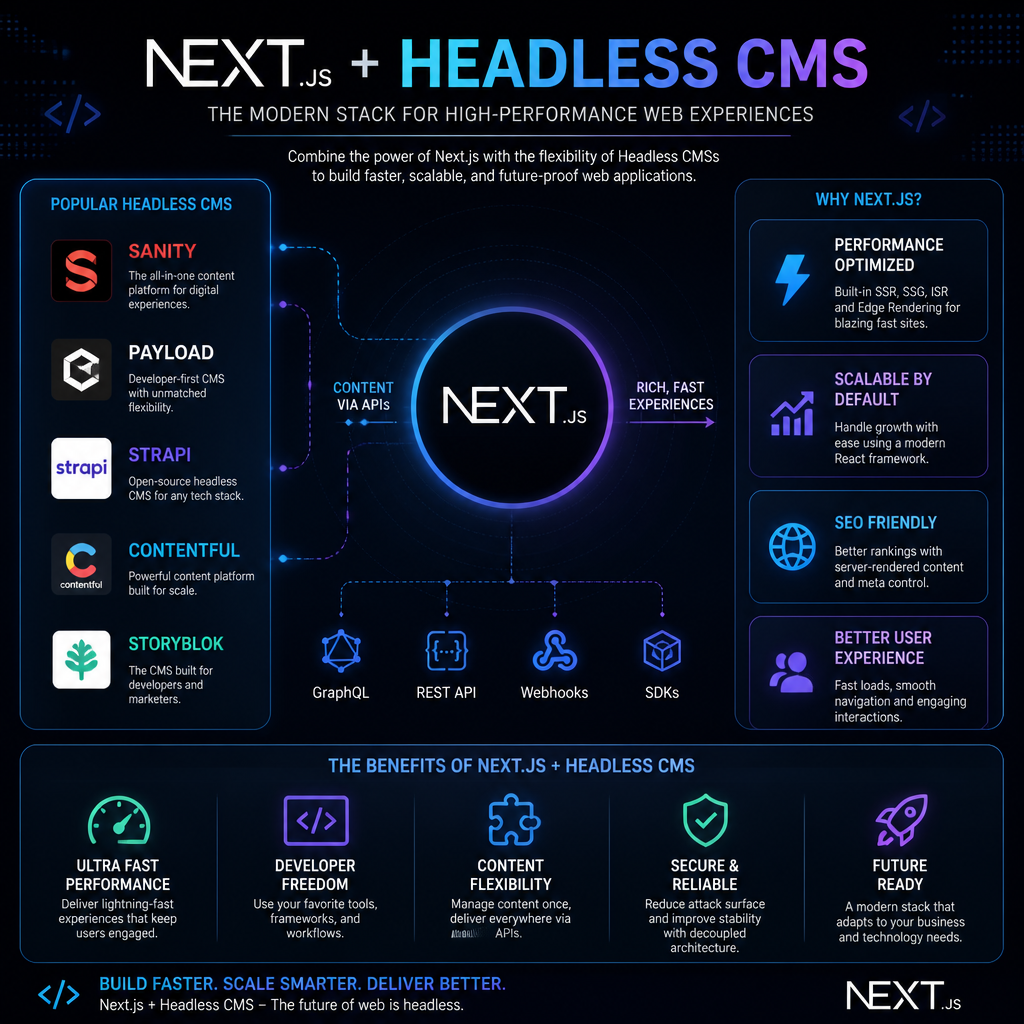
    Some popular examples of headless CMS include Strapi, Contentful, Sanity, and Ghost. Each one has a different vibe:

    • Strapi: open-source, self-hostable, and hackable. If you like owning your stack, it’s a solid default. Their take on headless and transformation is outlined here: Strapi.
    • Contentful: enterprise-y, polished, and API-first. Great if you want a strong SaaS and you’re fine with the pricing curve.
    • Sanity: developer-friendly with a real-time, schema-driven approach. Editors often like the studio once it’s tailored.
    • Ghost: more publishing-focused. It can work headless, but it’s not my first pick for complex product content.

    The tradeoff is simple: headless gives you freedom, but it also removes the “theme does everything” safety net. So, you need a plan.

    What Does Headless Mean in CMS?

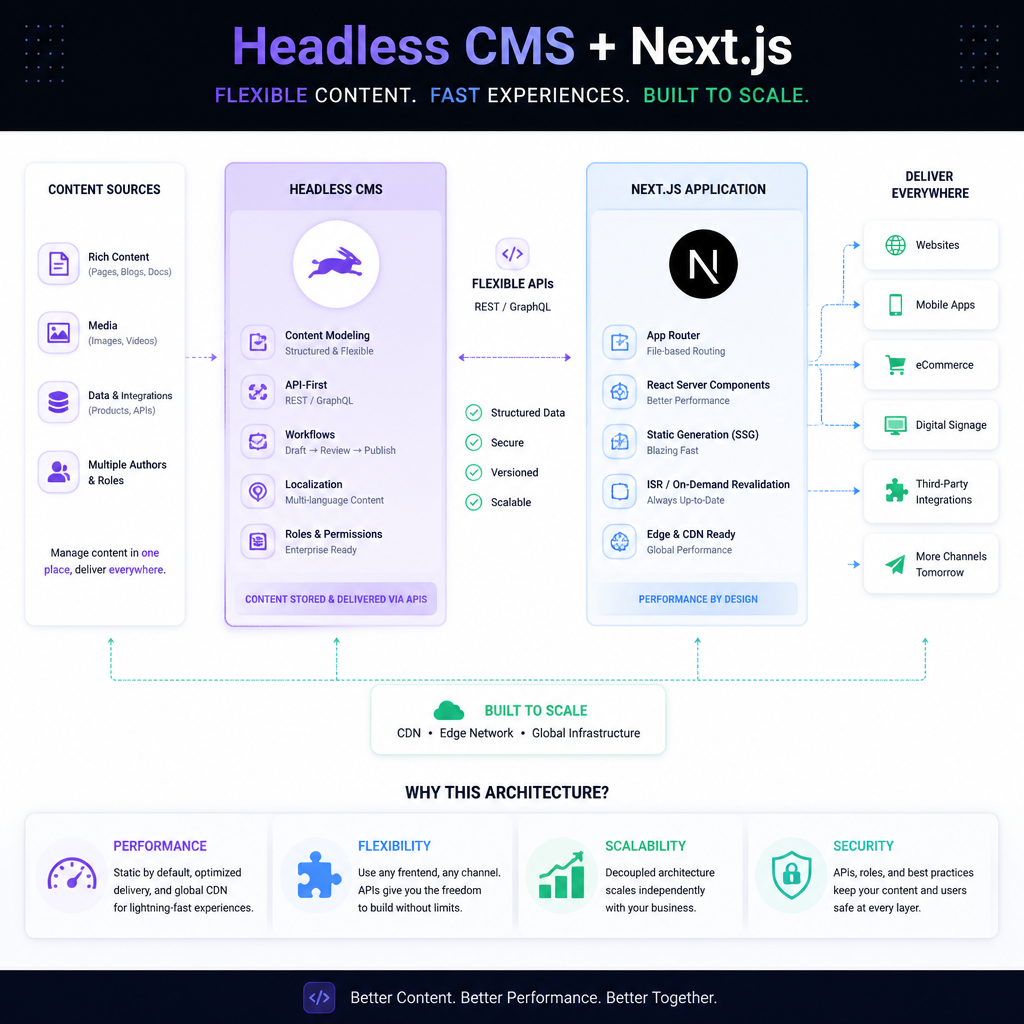
    In the CMS world, headless means the backend (admin, database, content workflows) is decoupled from the frontend (your website UI). Because of that split, you can push the same content to multiple channels—web, mobile, in-app help, screens in a store—without duplicating it.

    That separation is why teams adopt headless when they start caring about omnichannel, performance, or frontend autonomy. But since the CMS no longer “owns” rendering, you must implement things a traditional CMS used to hand you for free: routing, SEO tags, sitemaps, previews, and caching.

    Here’s a visual representation that illustrates the architecture of a headless CMS:

    Headless CMS integration architecture diagram

    A quick, real example from my side: I worked on a marketing site where the team went headless to let product engineers ship React components without waiting on a CMS theme release. That part worked. The part they didn’t budget for? Preview. Editors couldn’t see drafts, so they started publishing “just to check,” which created a bunch of accidental live changes. We fixed it by adding a preview token flow and draft endpoints—two days of work that should’ve been in the original plan.

    Steps for Integration

    These steps assume a typical modern setup: a headless CMS (Strapi or SaaS), a frontend (Next.js/Nuxt/React), and a deploy platform (Vercel, Netlify, or your own).

    The sequence matters. If you build the frontend first and “figure out content later,” you’ll end up rebuilding components when content doesn’t fit.

    Step 1: Choose Your Headless CMS

    Pick your CMS based on operational reality, not hype.

    My shortlist questions:

    • Do we need self-hosting (compliance, cost control, custom plugins), or do we prefer SaaS (less ops, faster start)?
    • How complex is our content model—localized fields, references, rich components, scheduled publishing?
    • Do we need roles/permissions that marketing can manage without engineering tickets?
    • What’s the preview story? If it’s clunky, adoption dies.

    If you’re a small team with a strong dev bench, Strapi is often a good balance. If you’re scaling editorial across multiple properties, Contentful/Sanity might save time because the UI and workflow polish is already there.

    Common mistake: choosing a CMS because “it’s open source” or “it’s enterprise” without mapping who will maintain it. If your team can’t patch, upgrade, and monitor a self-hosted CMS, SaaS will feel expensive until the first incident.

    Step 2: Set Up Your Development Environment

    Get your local workflow tight before you involve content editors. That means repeatable installs and a clear path to staging.

    Typical baseline in 2026:

    • Node.js (for Strapi and many frontends)
    • A package manager (pnpm/npm/yarn)
    • GitHub for version control
    • A database (often Postgres in prod; SQLite locally is fine early on)

    For example, with Strapi, you can initialize your project directly in your terminal:

    npx create-strapi-app my-project --quickstart
    

    That spins up a default project and an admin UI. From there, I usually do two “boring” things immediately:

    1) Commit the baseline to Git (so you can diff config changes later).
    2) Create separate env files for local/staging/prod. If you hardcode API URLs once, you’ll regret it.

    Another mistake I see: teams forget CORS and auth during setup, so the frontend works locally but fails in staging. Fix it early—set explicit allowed origins and keep secrets out of the repo.

    Step 3: Create API Endpoints

    This is where “headless” either becomes clean or chaotic. Spend time on content modeling.

    In Strapi, you typically:

    • Create Content Types (e.g., Page, Post, Product, Author)
    • Add fields with validation (slug uniqueness, required title, max lengths)
    • Define relations (a Page has many Sections; a Post has one Author)
    • Configure roles/permissions for public reads

    Strapi automatically generates REST endpoints for content types. That’s convenient, but don’t blindly expose everything. Lock down permissions and decide what’s public.

    Step-by-step content modeling approach I use:

    1) List page templates you actually ship (home, landing, docs, blog).
    2) For each template, list repeatable components (hero, feature grid, CTA, FAQ block).
    3) Create content types that match those building blocks.
    4) Add a slug strategy early (/blog/:slug, /pages/:slug). Changing it later is a redirect party.

    If you skip this and just make one giant “Page” with 40 optional fields, editors will fill it wrong, and developers will write a bunch of if (field) conditionals. It gets ugly fast.

    Step 4: Integrate with Your Frontend Framework

    Now connect your frontend to the CMS over HTTP.

    If you’re using React, you might use axios or the Fetch API:

    import axios from 'axios';
    
    const fetchData = async () => {
        const response = await axios.get('https://your-strapi-api-url.com/your-endpoint');
        console.log(response.data);
    };
    

    That works, but in real projects you’ll want a bit more structure:

    • A single API client module (cmsClient.js) so you don’t scatter URLs everywhere
    • Environment-based base URLs (process.env.CMS_URL)
    • Timeouts and retries (because the CMS will have a bad day eventually)

    If you’re using Next.js (common in 2026), decide early whether you’ll render pages with:

    • SSG (static generation): fastest, but needs revalidation/webhooks
    • SSR (server-side rendering): fresher content, but higher runtime cost
    • Hybrid: usually the sweet spot—static for marketing pages, SSR for personalized stuff

    A practical pattern:

    1) Fetch content by slug.
    2) Render components based on “sections” in the payload.
    3) Cache aggressively at the edge.
    4) Revalidate on publish via webhook.

    Where teams mess up: they pull the CMS on every request with no caching. It seems fine in dev. Then a campaign hits, your CMS rate limits, and the site falls over.

    Step 5: Test and Iterate

    Testing isn’t optional; it’s the difference between “headless is great” and “headless is cursed.”

    I run these checks before calling an integration “done”:

    • API contract tests: does the endpoint return what the frontend expects?
    • Preview flow: can an editor view a draft without publishing?
    • Permissions: is private content truly private?
    • Performance: what happens when a page needs 10 referenced entries?

    Tools like Postman can help you test your API endpoints effectively. But also test with the real frontend, because the annoying bugs show up in rendering, not JSON.

    A quick workflow that’s saved me pain:

    1) In Postman, save a collection for key endpoints.
    2) Add example responses (good + missing fields).
    3) Use those examples to build a mock mode.
    4) Build frontend components against mock data first, then hook up live data.

    Headless CMS Integration Examples

    A case study is useful, but a “week-two reality check” is even better. Here’s the kind of scenario I’ve seen repeatedly: a team migrates to headless for speed, ships the API, and then realizes they need governance—naming, slug rules, and who approves what.

    So, bake that into your integration plan.

    Case Study: Strapi Implementation

    A well-documented case study involves a company that migrated from a traditional CMS to a headless CMS like Strapi. They experienced significant increases in website performance and user engagement. Upon switching, they reported a 65% reduction in page load times and a 50% increase in user interaction metrics (ColorWhistle).

    Those numbers won’t automatically be yours, obviously. Still, performance gains are common when you decouple rendering, push pages to a CDN, and stop doing heavy server work on every request.

    How I’ve seen it play out in practice: we moved a brochure site from a theme-driven CMS to a headless setup with static generation and edge caching. The biggest win wasn’t just raw speed. It was consistency—deploys became predictable, and content changes stopped breaking layout because components had stricter schemas.

    If you want to chase similar results, focus on these levers:

    • Reduce round trips: fetch one “page” payload that includes nested sections, not 12 separate calls.
    • Cache smartly: cache CMS responses for seconds/minutes, cache rendered pages for minutes/hours.
    • Optimize images: serve modern formats and sizes based on device.

    Headless CMS Integration GitHub Resources

    GitHub can cut your build time in half if you use it well. It can also waste a weekend if you copy a repo that “kinda works” but bakes in bad assumptions.

    Searching for terms like “headless CMS tutorial” or “Strapi integration example” can yield valuable code snippets and project templates tailored for integration with various frameworks.

    What I look for in a repo before I trust it:

    • Recent commits (stale headless examples rot quickly)
    • Clear env var documentation
    • A basic content model included (seed data or migrations)
    • Preview + webhook examples (rare, but gold)

    A mini story: I once inherited a “starter” that hardcoded the API token in the frontend build output. It worked, sure. It also exposed a write-capable token to every visitor. We rotated credentials, rebuilt auth, then wrote a one-page checklist for reviewers: “no secrets in client bundles.” That’s the kind of boring guardrail that saves you.

    Common Pitfalls to Avoid

    Most headless CMS failures aren’t about the CMS. They’re about integration decisions you didn’t realize you were making.

    1. Underestimating Complexity: Transitioning to a headless CMS can introduce complexities. Ensure your team is prepared and understands the technical implications.

    Where it bites: preview, localization, redirects, and “what is a page” debates. So, define ownership early—who owns the content model, who owns the frontend components, and who approves schema changes.

    1. Neglecting Documentation: Always refer to the official documentation of the CMS you choose. Each platform may have unique set-up procedures and requirements.

    Also document your own conventions: slug rules, component naming, required fields. Otherwise, six months later you’ll have heroTitle, Hero_Title, and titleHero all doing the same job.

    1. Ignoring Performance Optimization: Monitor how your frontend is fetching and rendering data. Utilize caching mechanisms to improve performance where necessary.

    Practical checklist:

    • Add response caching at the API layer (even 30–60 seconds helps)
    • Use CDN caching for rendered pages
    • Avoid N+1 queries when resolving relations
    • Set payload limits (don’t ship entire rich text blobs to list pages)

    • Shipping without a preview plan: Editors need draft previews, period.

    The usual solution is a preview route in your frontend that accepts a short-lived token, fetches draft content, and disables caching. It’s not glamorous, but it prevents accidental publishes.

    1. Overexposing your API: Public endpoints should be read-only and scoped.

    If you need private content, put it behind server-side calls or a backend-for-frontend layer. Don’t hand out tokens to the browser unless they’re strictly public.

    Conclusion

    Integrating a headless CMS with your website can vastly improve your content management strategies and user engagement. But the real payoff comes when you treat integration like a product: solid content models, predictable deploys, and guardrails that keep editors productive.

    If you only do one thing next, do this: build a tiny vertical slice—one page type, one preview flow, one publish webhook—and run it end-to-end in staging. You’ll learn more in two days from that slice than from weeks of debating platforms.

    FAQ

    • Q: What is headless CMS integration?
      A: Headless CMS integration means you connect a headless content system to your website (and often other channels) through APIs, so the CMS manages content while your frontend handles rendering. In practice, that usually includes four moving parts: (1) a content model (types, fields, relations), (2) API delivery (REST/GraphQL), (3) a frontend data layer (clients, caching, error handling), and (4) editorial workflows like preview, drafts, and publishing.

    A real-world example: if marketing publishes a new landing page in Strapi, your frontend should either rebuild (static) or revalidate a cached route (hybrid). That “publish → site updates” path is part of integration, not a nice-to-have.

    • Q: What is the difference between CMS and headless CMS?
      A: A traditional CMS usually bundles content management and presentation together—admin UI plus theming plus rendering. That’s convenient, but it can limit frontend choices and performance. A headless CMS splits those concerns: the CMS becomes a content API, while your website becomes an app that consumes content.

    The tradeoff shows up fast. With headless, you gain flexibility (React/Vue/whatever, omnichannel reuse), but you also own things a traditional CMS hands you: routing, SEO tags, sitemaps, preview, and caching. If your team doesn’t want to own that surface area, a traditional CMS can still be the right call.

    • Q: What are examples of headless CMS?
      A: Popular headless CMS options include Strapi, Contentful, Sanity, and Ghost.

    How I’d choose between them:

    • If you want open-source and control, Strapi is a strong candidate.
    • If your editorial team needs polished workflows and you’re okay with SaaS, Contentful is often a safe choice.
    • If you want schema-as-code and a highly customizable editor experience, Sanity can be great.
    • If you’re mostly publishing posts/newsletters, Ghost can work well, although it’s less of a “content platform” for complex component-driven sites.

    One common mistake: treating CMS selection as permanent. You can migrate later, but only if you design your frontend with a thin CMS adapter layer, not CMS-specific logic sprinkled across every component.

    • Q: What does headless mean in CMS?
      A: “Headless” means the CMS doesn’t control the frontend “head.” It stores content and exposes it over an API, while your website (or app) decides how to present it.

    Step-by-step, the flow usually looks like this:

    1) An editor writes content in the CMS.
    2) The CMS stores it and makes it available via an API.
    3) Your frontend fetches it (build time, request time, or a mix).
    4) Caching layers store either the API response or the rendered HTML.
    5) On publish, a webhook triggers a rebuild or cache revalidation.

    If you’re stuck debugging “why doesn’t the site update when I publish,” it’s almost always because step 5 is missing—or because caching is working exactly as configured.
    Market Statistics

  • Step-by-Step WordPress Integration with Popular CMS

    Step-by-Step WordPress Integration with Popular CMS

    Learn how to integrate WordPress with popular CMS platforms through this step-by-step guide, with best practices and the Siteimprove WordPress plugin.

    Featured image for Step-by-Step Guide to WordPress Integration with Popular CMS

    Step-by-Step Guide to WordPress Integration with Popular CMS

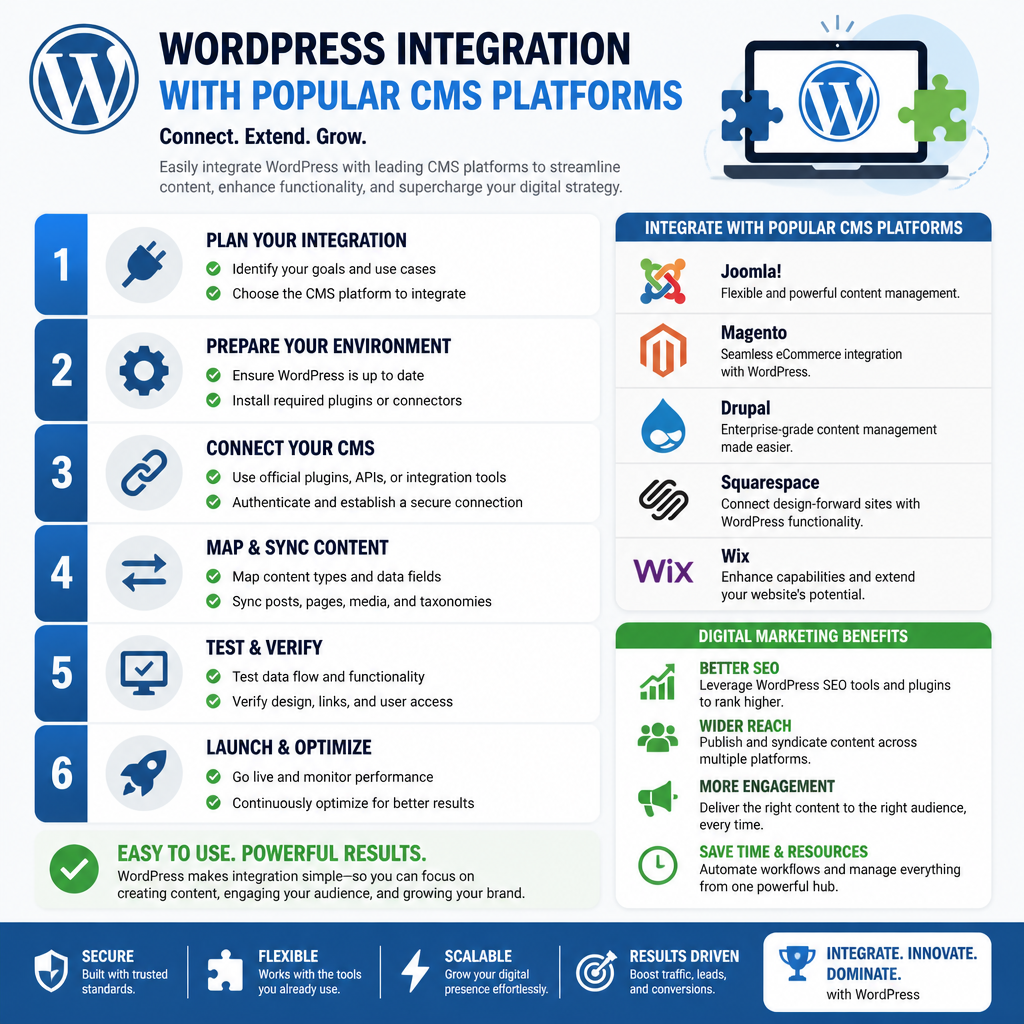
    Integrating WordPress with other CMS platforms can streamline your workflow and expand your site’s capabilities. That said, “integration” can mean anything from embedding WordPress content inside another frontend to running WordPress headless behind a different app.

    Before you touch plugins, decide who owns what: where content gets edited, where pages render, and which system is the “source of truth.” That one decision prevents half the weird edge cases later.

    WordPress integration with popular CMS architecture diagram showing WordPress, APIs, and a frontend app

    1. Understanding WordPress as a CMS

    Before diving into integration, it’s essential to acknowledge that WordPress itself is a Content Management System (CMS). It allows users to create and manage digital content efficiently. With a flexible architecture, WordPress powers 41.9% of all websites globally as of June 2026, showcasing its dominance in the CMS market.

    What that translates to in real projects: WordPress already has opinionated tooling for content—roles, revisions, editorial UI, media management, and a plugin ecosystem that covers a lot of “oh no, we need this next week” features.

    But WordPress also carries assumptions. Themes want to render pages. Plugins may assume they control URLs. So, if you’re integrating with another CMS or framework, you’re often negotiating those assumptions—sometimes gently (via embeds), sometimes with a crowbar (headless + custom routing).

    2. Selecting the Right CMS for Integration

    Many CMS platforms integrate with WordPress, including:
    Joomla
    Drupal
    Next.js
    Wix

    Each has unique advantages, so choose a CMS that aligns with your project goals and technical requirements. For instance, if performance and scalability are priorities, Next.js may offer a compelling solution, especially when leveraging static site generation capabilities. Additionally, tools like Nextly can simplify schema design, enhancing your integration process.

    Here’s the decision filter I use when a client says “we want WordPress + X.”

    First, ask what you’re trying to fix. If the pain is publishing workflow, WordPress should probably stay in the driver’s seat. If the pain is frontend performance or app-like UX, then a framework (like Next.js) makes sense, while WordPress becomes your content backend.

    Second, be honest about who maintains it. Drupal and Joomla integrations can be solid, but they’re less forgiving if the team doesn’t already know them. Meanwhile, Wix can work for small marketing sites, but it gets awkward when you need deeper programmatic control (custom auth, complex redirects, content sync jobs).

    3. Preparing for Integration

    Before starting the integration process, ensure you have:
    – A clear understanding of your current WordPress setup.
    – Access to the admin panel of both WordPress and the target CMS.
    – Backups of your existing website to prevent data loss.

    Checklist for Preparation:
    – [ ] Review current plugins and themes.
    – [ ] Ensure compatibility between WordPress and the target CMS.
    – [ ] Document existing content structures.

    Also, map your content types on paper before you map them in code.

    I’ve seen integrations derail because “Posts” in WordPress were used for everything—blog, help docs, landing pages, even product specs—because it was convenient at the time. So, when another CMS expects clean separation (Docs vs Blog vs Marketing), your sync becomes a pile of conditional logic.

    One practical move: export a sample set of content (10–20 items) and inspect it. Look for shortcodes, legacy page builder blocks, and weird HTML pasted from Google Docs. Those are the exact things that look fine in WP, then break when rendered elsewhere.

    4. Using Plugins for Integration

    One of the easiest ways to integrate WordPress with another CMS is through plugins. For example, the Siteimprove WordPress plugin helps site managers optimize content directly within WordPress. This plugin acts as a bridge, offering insights into accessibility and SEO issues in real-time and ensuring content quality before publication. It’s essential to install this plugin to benefit from its pre-publish checks and site management capabilities (Siteimprove Help Center).

    Plugins are great when the integration is “adjacent” to publishing—SEO checks, accessibility checks, analytics, editorial workflow, and similar.

    But I’m biased against relying on plugins as your only integration mechanism when you’re syncing content between systems. Why? Because plugin updates happen on someone else’s schedule, and a minor update can change output formatting or API behavior. If you do go plugin-heavy, lock versions, test updates in staging, and keep a rollback plan that’s actually been rehearsed.

    5. Steps for Integration

    Here’s how to proceed with a typical integration:
    Step 1: Install the necessary plugins on your WordPress site. Search for the desired integration plugin in the WordPress Plugin Directory and click “Install.”
    Step 2: Activate the plugin and configure its settings. This might include linking your WordPress site with your chosen CMS.
    Step 3: Start syncing content. Depending on the CMS, this may involve using APIs or export/import features to transfer data. Make sure your content is well-structured and formatted appropriately.
    Step 4: Test the setup thoroughly. After integration, check for broken links, accessibility issues, and any discrepancies in how content appears across platforms.

    A few “real world” notes on Step 3, because that’s where most teams bleed time.

    If you’re integrating WordPress with a modern frontend (like Next.js), you’ll typically pull content via the WordPress REST API or WPGraphQL (if you choose to add it). Then you’ll need to decide how content updates flow. Polling works, but it’s slow and wasteful. Webhooks are better, but they take more setup.

    Content sync also forces you to pick a canonical URL strategy. For example, will /blog/my-post live on the other CMS while WordPress sits on a subdomain like cms.example.com? If so, you’ll want redirects, consistent canonicals, and a plan for media URLs (because hotlinking WP uploads from a different domain can get messy with caching and mixed content).

    Testing shouldn’t be a single pass, either. I usually test:
    – Draft vs published visibility
    – Image-heavy posts (and lazy-loading)
    – Internal links inside content
    – Search and pagination
    – 404 behavior (because integrations love creating “ghost URLs”)

    6. Best Practices for WordPress Integration

    To ensure a successful WordPress integration with another CMS, consider the following best practices:
    Maintain Documentation: Keep a record of all changes made during the integration.
    Regular Updates: Ensure your plugins and WordPress are always up-to-date to avoid security vulnerabilities.
    Monitor Performance: Use analytics tools to track how the integration affects site performance and user engagement.

    I’ll add a few practices I wish more teams treated as non-negotiable.

    Keep your integration logic thin and readable. If you’re transforming content (blocks to HTML, shortcodes to components, custom fields to JSON), centralize that mapping in one place. Otherwise, you end up with “just this one exception” scattered across templates until nobody can safely change anything.

    Set up a staging environment that mirrors production—including caching layers. An integration that looks fine uncached can fall apart once you add CDN caching, ISR, or aggressive page caching. That’s not theoretical; I’ve watched a “working” build ship and then serve old content for 24 hours because cache purge wasn’t wired to publishing.

    7. Common Challenges and Solutions

    Challenge: Plugin Compatibility Issues

    Many users face compatibility problems between various plugins. Regularly check for updates from plugin authors and utilize the support forums for troubleshooting.

    A pattern I’ve seen: a page builder plugin outputs markup that’s fine inside WordPress, but your other CMS frontend can’t interpret it cleanly. So, you get broken layouts or missing components.

    When that happens, you either standardize authoring (block editor only, fewer fancy widgets), or you write a transformation layer that converts the content into something your frontend expects. That second route works, but it’s ongoing work—budget for it.

    Solution: Testing Environment

    Before pushing changes to the live site, create a staging site to test the integration without affecting the user experience.

    Treat staging like a gate, not a suggestion. Test plugin updates there first, then promote.

    If you can, add a simple regression checklist that anyone on the team can run in 10 minutes: publish a post, edit a page, upload an image, confirm it renders in the other system, check redirects, and verify forms or CTAs still fire. It’s boring, but it saves you from the “why did the homepage break on Tuesday?” mystery.

    8. Conclusion

    Integrating WordPress with other CMS platforms can open new opportunities for web developers, bloggers, and marketers alike. By following this guide and utilizing tools like the Siteimprove plugin, you can enhance your site’s functionality and maintain high content quality.

    Pick a clear source of truth, keep the integration simple, and test updates like you mean it—then ship the first version and iterate from real usage, not guesses.

  • Next.js for Headless CMS Projects

    Next.js for Headless CMS Projects

    Discover the top reasons why Next.js is an ideal choice for your headless CMS projects, including flexibility, performance, and community insights.

    Featured image for Top Reasons to Choose Next.js for Your Headless CMS Projects

    Top Headless CMS Options for Next.js

    image

    Picking a headless CMS is less about hype and more about matching your editing workflow, content model, and deployment constraints. These are the ones I keep seeing work well with Next.js when teams actually ship.

    Sanity

    Sanity is the “I need weird content structures and I need them yesterday” option.

    What makes it click with Next.js is the flexibility of the content model and the speed at which you can iterate. When marketing comes in with “we want a landing page builder, but also reusable product modules, but also localized disclaimers,” Sanity tends to handle that without you rebuilding the schema three times.

    A pattern I like: build a small set of composable page sections (Hero, Split, TestimonialGrid, CTA) and let editors assemble pages. Then, in Next.js, you map section types to React components. That keeps the frontend predictable, while the CMS stays flexible.

    Common mistake: letting the schema sprawl. If every page gets a custom section type, you’ll end up with a React component zoo. I usually cap the first version at 8–12 section types, then force reuse for a month. It’s boring, but it works.

    Payload CMS

    Payload is for teams who want developer control and don’t mind getting their hands dirty.

    Because it’s open-source and code-first, you can keep content structure, access rules, and hooks close to your application logic. That’s a huge win when your “CMS” is really an internal tool that happens to publish pages.

    Where Payload shines with Next.js is when you need more than marketing pages—think gated content, user-specific experiences, or e-commerce-like catalogs. You can use its REST or GraphQL APIs to feed dynamic routes, while Next.js handles caching and rendering.

    Mistake I’ve watched teams make: running Payload like it’s a SaaS CMS and ignoring ops. If you host it yourself, you own backups, upgrades, and security patches. Decide that up front, because “we’ll deal with it later” turns into a weekend migration.

    Strapi

    Strapi is the fast on-ramp, especially if you’re onboarding people who aren’t CMS experts.

    The admin UI is friendly, the plugin ecosystem covers a lot, and you can get to “content is flowing” quickly. With Next.js, it’s a straightforward setup: model content types, expose endpoints, fetch in server components or route handlers (or in getStaticProps/getServerSideProps if you’re in older patterns).

    The big tradeoff is extensibility. You can extend Strapi deeply, but once you go beyond the happy path, you need discipline around versioning and plugins. I’ve inherited Strapi builds where one abandoned plugin blocked an upgrade, and suddenly the team is pinned on an old version for months.

    Contentful

    Contentful is the enterprise pick when governance matters more than tinkering.

    If you need roles, approvals, structured content across multiple channels, and a UI that non-technical editors won’t fight, Contentful is usually a safe bet. Next.js integrates cleanly, and you can build a predictable publishing pipeline with preview environments.

    The downside is cost and rigidity. You’ll pay for scale, and you’ll feel the edges if you want highly custom editorial UX. That said, when a company needs consistency across web, mobile, and email content, Contentful’s structured approach saves a lot of arguments.

    For a broader rundown of platforms that play nicely with Next.js, this guide is a solid starting point: headless CMS and Next.js.

    Community Insights on Next.js Headless CMS

    Community feedback is useful, but only if you read between the lines. Reddit threads and GitHub issues tend to reveal the same themes—just with more swearing and better edge cases.

    Performance comes up constantly, and for good reason. Next.js paired with a headless CMS gives you options: pre-render what’s stable, render on-demand what’s volatile, and cache aggressively in between. When teams do this well, they stop “optimizing” every sprint because the baseline is already solid.

    Flexibility is the other recurring point. A headless CMS lets editors work without waiting for deploys, while Next.js lets developers shape the UX without fighting the CMS theme layer. That separation is the entire game.

    Collaboration improvements are real, too. When content and presentation aren’t tangled, you can run parallel workstreams: editors draft, developers ship features, and QA validates the final assembly. It’s not magic, but it does reduce bottlenecks.

    One caution from the trenches: preview is where stacks go to die. If you can’t reliably preview draft content in a realistic environment, editors lose trust fast. Whatever CMS you pick, budget real time for preview URLs, auth rules, and cache invalidation.

    Building with Next.js CMS Templates

    Templates are great—until you treat them like a finished architecture. Use them to skip the boring setup, then immediately make the project yours.

    Selecting a Template

    Start by choosing a template that matches your real use case, not the one you hope you’ll have.

    If you’re building a content site with a small team, a starter that includes preview, image handling, and basic SEO fields saves days. If you’re building something closer to an app (accounts, paid access, dashboards), pick a template that already has auth and permissions thought through.

    Some popular options include:

    • Next.js & Payload Template: Usually the quickest way to get a real backend + frontend running together. You get collections, auth, and an API surface without inventing it all from scratch.
    • Vercel’s Next.js Starter Kits: These tend to be polished and performance-aware, so you’re not undoing bad defaults later.

    A step-by-step approach I use when evaluating templates:

    1. Run it locally and confirm it boots cleanly on a fresh machine. If it needs five undocumented env vars, that’s a smell.
    2. Create one real content type (like “Landing page” with sections). If the template fights you here, it’ll be worse later.
    3. Test preview with draft content. Don’t skip this—preview is the first thing editors will complain about.
    4. Check routing and slugs. You want predictable URL rules, because changing URL strategy midstream is painful.
    5. Decide where caching lives (Next.js fetch caching, CDN, CMS webhook revalidation). If the template ignores caching, you’ll be paying for it in runtime costs.

    Real example: I once watched a team pick an e-commerce starter for a marketing site because it “looked nice.” Two weeks later, they were ripping out cart logic, inventory schemas, and UI components they didn’t need. They lost time twice—first integrating, then deleting.

    Enhancing Content Management

    Templates don’t just speed up pages—they can improve editorial sanity if you set guardrails.

    Here’s what I add on top of most Next.js CMS templates in the first couple of days:

    • A content checklist inside the CMS: required SEO title, meta description, OG image, canonical URL rules. Editors like checklists because it removes guesswork.
    • A “page status” field (draft, review, scheduled, published). Even if your CMS has workflow, a simple status field helps the frontend decide what to show in preview.
    • Slug locking rules after publish. Otherwise, someone changes a slug and you ship a quiet SEO disaster.

    Then I wire Next.js rendering to the content reality:

    • Stable pages (About, Pricing) get static generation.
    • High-change pages (News, Promotions) use ISR or server rendering with caching.
    • Preview bypasses caching and includes draft content.

    Common mistakes I see with templates:

    • Shipping the demo content model. Demo schemas are for demos. If you don’t redesign the content types around your business, editors will eventually create hacks (and you’ll support them forever).
    • Ignoring webhooks/revalidation. Without revalidation, editors hit publish and don’t see changes. They assume the CMS is broken, even though it’s your cache.
    • Overbuilding page builders on day one. A flexible section-based builder is good. A full drag-and-drop free-for-all usually creates inconsistent pages and fragile components.

    If you do the boring parts early—preview, caching, slugs, and workflow—the template stops being “starter code” and becomes a stable foundation.

    Conclusion

    Next.js is a strong pick for headless CMS work because it lets you mix rendering strategies without turning your codebase into spaghetti. Pair it with the right CMS and you get a setup that’s fast for users, workable for editors, and predictable for developers.

    If you’re deciding what to build next, I’d approach it like this:

    A practical decision path

    1. Define who publishes content and how often. Daily publishing with multiple editors pushes you toward strong workflows and preview tooling.
    2. List your content types (not pages). Products, locations, authors, resources, legal pages—this determines your CMS fit.
    3. Pick your “failure mode”. Do you prefer vendor lock-in (but less ops), or self-hosting (but more control)? Be honest.
    4. Prototype one full slice: create content → preview → publish → verify cache invalidation → verify SEO tags. If that loop feels clunky, stop and adjust before you scale it.

    A quick anecdote from the messy side

    On a previous build, we nailed the frontend performance but skipped a proper preview system because “we’ll add it later.” Then the editorial team started using production as preview—publishing drafts, checking layout, then unpublishing. The site looked unstable, stakeholders lost confidence, and we ended up hotfixing preview under pressure.

    Since then, I treat preview as a launch-blocker feature, not a nice-to-have. Next.js can do it cleanly, but you have to commit early.

    Finally, timing matters. The headless CMS market is projected to grow from $3.94 billion in 2026 to $22.28 billion by 2034, with a CAGR of over 21% (Future Market Insights). More tools will show up, and more vendors will promise “instant integration.” So, pick the stack you can operate calmly.

    FAQs

  • Next.js for Headless CMS Projects

    Next.js for Headless CMS Projects

    Discover the top reasons why Next.js is an ideal choice for your headless CMS projects, including flexibility, performance, and community insights.

    Featured image for Top Reasons to Choose Next.js for Your Headless CMS Projects

    Top Headless CMS Options for Next.js

    Picking a headless CMS is less about hype and more about matching your editing workflow, content model, and deployment constraints. These are the ones I keep seeing work well with Next.js when teams actually ship.

    Sanity

    Sanity is the “I need weird content structures and I need them yesterday” option.

    What makes it click with Next.js is the flexibility of the content model and the speed at which you can iterate. When marketing comes in with “we want a landing page builder, but also reusable product modules, but also localized disclaimers,” Sanity tends to handle that without you rebuilding the schema three times.

    A pattern I like: build a small set of composable page sections (Hero, Split, TestimonialGrid, CTA) and let editors assemble pages. Then, in Next.js, you map section types to React components. That keeps the frontend predictable, while the CMS stays flexible.

    Common mistake: letting the schema sprawl. If every page gets a custom section type, you’ll end up with a React component zoo. I usually cap the first version at 8–12 section types, then force reuse for a month. It’s boring, but it works.

    Payload CMS

    Payload is for teams who want developer control and don’t mind getting their hands dirty.

    Because it’s open-source and code-first, you can keep content structure, access rules, and hooks close to your application logic. That’s a huge win when your “CMS” is really an internal tool that happens to publish pages.

    Where Payload shines with Next.js is when you need more than marketing pages—think gated content, user-specific experiences, or e-commerce-like catalogs. You can use its REST or GraphQL APIs to feed dynamic routes, while Next.js handles caching and rendering.

    Mistake I’ve watched teams make: running Payload like it’s a SaaS CMS and ignoring ops. If you host it yourself, you own backups, upgrades, and security patches. Decide that up front, because “we’ll deal with it later” turns into a weekend migration.

    Strapi

    Strapi is the fast on-ramp, especially if you’re onboarding people who aren’t CMS experts.

    The admin UI is friendly, the plugin ecosystem covers a lot, and you can get to “content is flowing” quickly. With Next.js, it’s a straightforward setup: model content types, expose endpoints, fetch in server components or route handlers (or in getStaticProps/getServerSideProps if you’re in older patterns).

    The big tradeoff is extensibility. You can extend Strapi deeply, but once you go beyond the happy path, you need discipline around versioning and plugins. I’ve inherited Strapi builds where one abandoned plugin blocked an upgrade, and suddenly the team is pinned on an old version for months.

    Contentful

    Contentful is the enterprise pick when governance matters more than tinkering.

    If you need roles, approvals, structured content across multiple channels, and a UI that non-technical editors won’t fight, Contentful is usually a safe bet. Next.js integrates cleanly, and you can build a predictable publishing pipeline with preview environments.

    The downside is cost and rigidity. You’ll pay for scale, and you’ll feel the edges if you want highly custom editorial UX. That said, when a company needs consistency across web, mobile, and email content, Contentful’s structured approach saves a lot of arguments.

    For a broader rundown of platforms that play nicely with Next.js, this guide is a solid starting point: headless CMS and Next.js.

    Community Insights on Next.js Headless CMS

    Community feedback is useful, but only if you read between the lines. Reddit threads and GitHub issues tend to reveal the same themes—just with more swearing and better edge cases.

    Performance comes up constantly, and for good reason. Next.js paired with a headless CMS gives you options: pre-render what’s stable, render on-demand what’s volatile, and cache aggressively in between. When teams do this well, they stop “optimizing” every sprint because the baseline is already solid.

    Flexibility is the other recurring point. A headless CMS lets editors work without waiting for deploys, while Next.js lets developers shape the UX without fighting the CMS theme layer. That separation is the entire game.

    Collaboration improvements are real, too. When content and presentation aren’t tangled, you can run parallel workstreams: editors draft, developers ship features, and QA validates the final assembly. It’s not magic, but it does reduce bottlenecks.

    One caution from the trenches: preview is where stacks go to die. If you can’t reliably preview draft content in a realistic environment, editors lose trust fast. Whatever CMS you pick, budget real time for preview URLs, auth rules, and cache invalidation.

    Building with Next.js CMS Templates

    Templates are great—until you treat them like a finished architecture. Use them to skip the boring setup, then immediately make the project yours.

    Selecting a Template

    Start by choosing a template that matches your real use case, not the one you hope you’ll have.

    If you’re building a content site with a small team, a starter that includes preview, image handling, and basic SEO fields saves days. If you’re building something closer to an app (accounts, paid access, dashboards), pick a template that already has auth and permissions thought through.

    Some popular options include:
    Next.js & Payload Template: Usually the quickest way to get a real backend + frontend running together. You get collections, auth, and an API surface without inventing it all from scratch.
    Vercel’s Next.js Starter Kits: These tend to be polished and performance-aware, so you’re not undoing bad defaults later.

    A step-by-step approach I use when evaluating templates:
    1. Run it locally and confirm it boots cleanly on a fresh machine. If it needs five undocumented env vars, that’s a smell.
    2. Create one real content type (like “Landing page” with sections). If the template fights you here, it’ll be worse later.
    3. Test preview with draft content. Don’t skip this—preview is the first thing editors will complain about.
    4. Check routing and slugs. You want predictable URL rules, because changing URL strategy midstream is painful.
    5. Decide where caching lives (Next.js fetch caching, CDN, CMS webhook revalidation). If the template ignores caching, you’ll be paying for it in runtime costs.

    Real example: I once watched a team pick an e-commerce starter for a marketing site because it “looked nice.” Two weeks later, they were ripping out cart logic, inventory schemas, and UI components they didn’t need. They lost time twice—first integrating, then deleting.

    Enhancing Content Management

    Templates don’t just speed up pages—they can improve editorial sanity if you set guardrails.

    Here’s what I add on top of most Next.js CMS templates in the first couple of days:
    A content checklist inside the CMS: required SEO title, meta description, OG image, canonical URL rules. Editors like checklists because it removes guesswork.
    A “page status” field (draft, review, scheduled, published). Even if your CMS has workflow, a simple status field helps the frontend decide what to show in preview.
    Slug locking rules after publish. Otherwise, someone changes a slug and you ship a quiet SEO disaster.

    Then I wire Next.js rendering to the content reality:
    – Stable pages (About, Pricing) get static generation.
    – High-change pages (News, Promotions) use ISR or server rendering with caching.
    – Preview bypasses caching and includes draft content.

    Common mistakes I see with templates:
    Shipping the demo content model. Demo schemas are for demos. If you don’t redesign the content types around your business, editors will eventually create hacks (and you’ll support them forever).
    Ignoring webhooks/revalidation. Without revalidation, editors hit publish and don’t see changes. They assume the CMS is broken, even though it’s your cache.
    Overbuilding page builders on day one. A flexible section-based builder is good. A full drag-and-drop free-for-all usually creates inconsistent pages and fragile components.

    If you do the boring parts early—preview, caching, slugs, and workflow—the template stops being “starter code” and becomes a stable foundation.

    Conclusion

    Next.js is a strong pick for headless CMS work because it lets you mix rendering strategies without turning your codebase into spaghetti. Pair it with the right CMS and you get a setup that’s fast for users, workable for editors, and predictable for developers.

    If you’re deciding what to build next, I’d approach it like this:

    A practical decision path

    1. Define who publishes content and how often. Daily publishing with multiple editors pushes you toward strong workflows and preview tooling.
    2. List your content types (not pages). Products, locations, authors, resources, legal pages—this determines your CMS fit.
    3. Pick your “failure mode”. Do you prefer vendor lock-in (but less ops), or self-hosting (but more control)? Be honest.
    4. Prototype one full slice: create content → preview → publish → verify cache invalidation → verify SEO tags. If that loop feels clunky, stop and adjust before you scale it.

    A quick anecdote from the messy side

    On a previous build, we nailed the frontend performance but skipped a proper preview system because “we’ll add it later.” Then the editorial team started using production as preview—publishing drafts, checking layout, then unpublishing. The site looked unstable, stakeholders lost confidence, and we ended up hotfixing preview under pressure.

    Since then, I treat preview as a launch-blocker feature, not a nice-to-have. Next.js can do it cleanly, but you have to commit early.

    Finally, timing matters. The headless CMS market is projected to grow from $3.94 billion in 2026 to $22.28 billion by 2034, with a CAGR of over 21% (Future Market Insights). More tools will show up, and more vendors will promise “instant integration.” So, pick the stack you can operate calmly.

    FAQs

    Q: What are the benefits of using a headless CMS with Next.js?
    A: You get better performance options (SSG/SSR/ISR), cleaner separation between content and UI, and a workflow where editors can publish without waiting on deploys.

    Q: Which headless CMS is best suited for a Next.js project?
    A: It depends on constraints. Sanity is great for flexible content modeling, Payload is excellent when you want code-first control, Strapi is a fast on-ramp, and Contentful fits teams that need enterprise governance.

    Q: How does Next.js improve SEO for headless CMS applications?
    A: Faster load times help, but the bigger win is control: server rendering where it matters, static output when possible, and predictable metadata handling per content type.

  • Headless CMS and Next.js: Your 2026 Guide

    Headless CMS and Next.js: Your 2026 Guide

    Discover how to effectively integrate Headless CMS with Next.js in 2026, enhancing your web development projects.

    Featured image for Getting Started with Headless CMS and Next.js in 2026

    Getting Started with Headless CMS for Next.js

    A Headless CMS gives you an admin UI for editors and an API for developers—without forcing you into a specific front end. Next.js is a great match because it can render content a bunch of different ways depending on the page and traffic.

    Understanding Headless CMS

    A Headless CMS stores content and exposes it over an API (REST and/or GraphQL), while your Next.js app handles routing, layouts, and rendering.

    Here’s what actually matters in the 2026 day-to-day:

    • Flexibility: you can redesign the front end without rewriting content models. That’s not theoretical; it’s the difference between a 2-week refresh and a 2-month “replatform.”
    • Omnichannel delivery: the same “Article” can power the website, an in-app help center, and even an internal dashboard. You’re not duplicating copy across systems.
    • Separation of concerns: editors work in the CMS, devs work in Next.js. That separation reduces merge conflicts, but it also forces you to define content types clearly (which is a good pain).

    One important nuance: “headless” doesn’t automatically mean “faster.” You still have to choose SSR vs SSG vs ISR wisely, and you still need caching. Otherwise you just moved the bottleneck.

    Benefits of Using Headless CMS with Next.js

    1. Enhanced Performance: Next.js gives you SSR and SSG, so you can ship fast pages and keep SEO-friendly HTML. But you only win if you avoid doing live CMS fetches on every request for pages that don’t change hourly.
    2. Developer Experience: file-based routing, server components (where it fits), and a big ecosystem make integration pretty straightforward. That said, a sloppy content model will still make your front end miserable.
    3. Scalability: scaling in a headless world usually means (a) scaling API reads, (b) controlling cache invalidation, and (c) keeping editorial workflows sane. Next.js helps, but it won’t magically fix content chaos.

    Tradeoff I’ll call out: headless setups can become “distributed systems” surprisingly fast—CMS, web app, image CDN, search, preview environment, webhook handlers. You get power, but you also get more moving parts to monitor.

    Popular Headless CMS Options for Next.js

    Several CMS options are compatible with Next.js. These three come up constantly for good reasons:

    • Payload: open-source, TypeScript-native, and developer-first. It’s a strong choice when you want to own your data model and keep types tight.
    • Sanity: great real-time editing and collaboration, plus a flexible schema. Teams with lots of editorial iteration tend to like it.
    • Strapi: open-source with a plugin ecosystem and lots of community knowledge. It’s often the “default” pick for teams that want something familiar.

    My opinionated filter when choosing:

    • If your team cares about TypeScript end-to-end and you want to keep CMS logic close to your app, Payload is hard to beat.
    • If editors need live collaboration and structured content will evolve weekly, Sanity shines.
    • If you need something straightforward and you’re okay spending time on config and plugins, Strapi can work.

    Resources for Next.js Headless CMS Templates

    Templates can save you time, but they can also bake in odd decisions (auth assumptions, caching patterns, folder structure). So I treat them like scaffolding, not architecture.

    When you evaluate a template, look for:

    • Customization: can you change the content model without fighting the starter? If every field is hardcoded into a UI component, that starter will age badly.
    • Community and Support: active issues, recent commits, and real examples. A dead starter is technical debt with a README.
    • Documentation: not just “run npm install,” but details on preview, webhooks, and deployment.

    Recommended Templates:
    – Starter templates for Payload CMS can often be found on their official GitHub repository.
    – Next.js templates on platforms like Vercel or Template resources to quickly deploy your applications.

    One more practical tip: before you commit, run a “content change drill.” Add a field to the content type and see how many places in the front end you have to touch. If it’s more than you expected, your model or rendering strategy needs work.

    Using Payload CMS with Next.js

    Payload CMS is a solid choice with Next.js in 2026 because it doesn’t fight the way modern Next apps are built. If you like TypeScript, predictable local dev, and owning your schema, it’s a comfortable setup.

    Why Choose Payload?

    Payload is designed to integrate cleanly with Next.js, and a few details make it genuinely pleasant:

    • Comprehensive API: you can query content without inventing a custom backend layer. That’s fewer servers and fewer “why is this endpoint different?” conversations.
    • Typescript Support: typed collections reduce dumb mistakes—like shipping a component that assumes author.name exists when your model uses displayName.
    • Document-based Structure: it maps nicely to things like pages, posts, case studies, docs, and products.

    Where Payload can bite you: permissions and drafts. It’s powerful, but it means you have to be explicit about read access, preview behavior, and what “published” really means.

    Here’s the real-world pattern I’ve seen work: treat the CMS like a product. Version your schema changes, review access rules like you review code, and don’t let “just add a field” happen directly in production.

    Setting Up Payload CMS

    I’ll lay this out as a practical build checklist—the order matters because it prevents you from painting yourself into a corner.

    1. Install Payload:
      Run the command to set up a new Payload project directly in your Next.js app:
      bash
      npx create-payload-app

    2. Configuration:
      Configure your Payload CMS settings in the payload.config.ts file. This includes defining your collections, fields, and permissions.

    Start small. One collection. A couple fields. Get the full loop working (create → preview → publish → render) before you model your entire company.

    A sane first collection:
    pages: title (text), slug (text), layout (blocks), publishedAt (date), status (draft/published)

    Then lock down access rules:
    – Public users: can read only published pages
    – Editors: can read/write drafts
    – Admins: can manage users and globals

    1. Fetch Data:
      Use Payload’s API to fetch content. For instance:
      javascript
      import { usePayload } from 'payload-hooks';
      const { docs } = usePayload('my-collection');

    Practical note: be careful with where you fetch.

    • For mostly-static marketing pages, prefer build-time/ISR fetches and cache aggressively.
    • For authenticated dashboards or frequently changing data, SSR (or server actions) can make sense.

    Don’t default to “fetch on every request” because it’s easy. Your CMS will become your bottleneck the first time a campaign spikes traffic.

    1. Deploy:
      Finally, deploy your application to a platform like Vercel, which provides an ideal environment for Next.js applications.

    Before you hit deploy, wire up:
    – environment variables for database + secrets
    – a preview environment (or branch deployments)
    – a webhook strategy for revalidation (so content updates actually show up)

    This is the part people skip, and then they wonder why editors are doing hard refreshes and Slack’ing screenshots.

    Payload CMS in Action

    I’ll give you two examples: one from the wild (linked), and one I’ve personally seen play out on teams.

    First, there’s a public case study: Michigan Business adopted Payload CMS for their content needs. The thing to notice in setups like that isn’t “they used Payload,” it’s why: faster iteration, clearer separation between content updates and code deploys, and less friction for the people who actually maintain the site day to day.

    For more in-depth information, refer to the source of the payload integration’s success story in Michigan here.

    Now the gritty example I see a lot: a team starts with a simple marketing site, then adds a resources hub, then adds gated PDFs, then adds a partner directory. At first, they hardcode a bunch of stuff because “it’s just a few pages.” Six months later, every change requires a developer, and the CMS is basically a blog no one trusts.

    Here’s how I’d run that migration to Payload + Next.js without breaking everything:

    1. Inventory content: list every page type (landing page, case study, blog post, docs page). Count them. Identify what actually changes weekly.
    2. Define a minimal content model: don’t model the universe. Model what you ship. If you need flexible layouts, use blocks—but keep the block set small.
    3. Build one vertical slice: create one page type end-to-end: CMS entry → API fetch → Next.js route → SEO tags → preview.
    4. Add preview early: if editors can’t preview drafts, they’ll either publish risky changes or stop using the CMS.
    5. Set up revalidation: publish should trigger an update. If you rely on “wait for the cache,” people will lose confidence.
    6. Backfill content: migrate content in batches, not a giant weekend cutover. You’ll catch model gaps faster.

    Common mistakes (I’ve made a couple of these myself):

    • Overusing “blocks”: blocks are great, but unlimited freedom turns into inconsistent pages and a messy front end. I cap block types and I document when to use each.
    • Forgetting access rules: someone will accidentally expose drafts if you don’t explicitly protect them.
    • Not planning images: if your media pipeline is an afterthought, you’ll end up serving huge images and tanking performance.
    • No rollback plan: content changes can break layout. Keep a way to revert quickly—versioning, backups, or at least a “duplicate page” workflow.

    If you want more reading around architecture decisions, I’ve seen good overviews like Why Payload CMS is the Best CMS for NextJS and broader comparisons such as Next.js CMS: Best Headless CMS Choices for 2026. I don’t treat any single post as gospel, but they’re useful for framing tradeoffs.

    Headless CMS with Next.js content flow diagram

    Conclusion

    Headless CMS + Next.js isn’t a trend in 2026—it’s the default shape for teams that want speed without handing the keys to a fragile theme layer.

    But here’s the honest part: you only get the payoff if you run it like a system, not a pile of tools. Your content model needs boundaries, your rendering strategy needs intent, and your editor workflow needs to match how your team actually works.

    A quick persona story I’ve watched play out: a product marketer wants to launch 12 new pages for a campaign next Tuesday. The dev team is already booked. In a coupled CMS, that request turns into “pick a template and pray.” In a good headless setup, the marketer duplicates a page, swaps blocks, updates copy, previews it, and hits publish—while the dev team stays focused on the product.

    That’s the win. Not “API-first,” not buzzwords. Just fewer bottlenecks.

    If you’re about to implement this, my recommended next step is boring on purpose:

    1. Pick one content type (like pages or posts).
    2. Ship it end-to-end with Payload + Next.js including preview and revalidation.
    3. Only then expand the schema.

    And if you’re still deciding on the front end side of headless, this perspective on the Best frontend for headless CMS is a decent jumping-off point.

    Build the smallest thing that proves the workflow—then scale it. That’s how you avoid rebuilding it again next year.

  • Headless CMS and Next.js: Your 2026 Guide

    Discover how to effectively integrate Headless CMS with Next.js in 2026, enhancing your web development projects.

    Featured image for Getting Started with Headless CMS and Next.js in 2026

    Getting Started with Headless CMS for Next.js

    A Headless CMS gives you an admin UI for editors and an API for developers—without forcing you into a specific front end. Next.js is a great match because it can render content a bunch of different ways depending on the page and traffic.

    Understanding Headless CMS

    A Headless CMS stores content and exposes it over an API (REST and/or GraphQL), while your Next.js app handles routing, layouts, and rendering.

    Here’s what actually matters in the 2026 day-to-day:

    • Flexibility: you can redesign the front end without rewriting content models. That’s not theoretical; it’s the difference between a 2-week refresh and a 2-month “replatform.”
    • Omnichannel delivery: the same “Article” can power the website, an in-app help center, and even an internal dashboard. You’re not duplicating copy across systems.
    • Separation of concerns: editors work in the CMS, devs work in Next.js. That separation reduces merge conflicts, but it also forces you to define content types clearly (which is a good pain).

    One important nuance: “headless” doesn’t automatically mean “faster.” You still have to choose SSR vs SSG vs ISR wisely, and you still need caching. Otherwise you just moved the bottleneck.

    Benefits of Using Headless CMS with Next.js

    1. Enhanced Performance: Next.js gives you SSR and SSG, so you can ship fast pages and keep SEO-friendly HTML. But you only win if you avoid doing live CMS fetches on every request for pages that don’t change hourly.
    2. Developer Experience: file-based routing, server components (where it fits), and a big ecosystem make integration pretty straightforward. That said, a sloppy content model will still make your front end miserable.
    3. Scalability: scaling in a headless world usually means (a) scaling API reads, (b) controlling cache invalidation, and (c) keeping editorial workflows sane. Next.js helps, but it won’t magically fix content chaos.

    Tradeoff I’ll call out: headless setups can become “distributed systems” surprisingly fast—CMS, web app, image CDN, search, preview environment, webhook handlers. You get power, but you also get more moving parts to monitor.

    Popular Headless CMS Options for Next.js

    Several CMS options are compatible with Next.js. These three come up constantly for good reasons:

    • Payload: open-source, TypeScript-native, and developer-first. It’s a strong choice when you want to own your data model and keep types tight.
    • Sanity: great real-time editing and collaboration, plus a flexible schema. Teams with lots of editorial iteration tend to like it.
    • Strapi: open-source with a plugin ecosystem and lots of community knowledge. It’s often the “default” pick for teams that want something familiar.

    My opinionated filter when choosing:

    • If your team cares about TypeScript end-to-end and you want to keep CMS logic close to your app, Payload is hard to beat.
    • If editors need live collaboration and structured content will evolve weekly, Sanity shines.
    • If you need something straightforward and you’re okay spending time on config and plugins, Strapi can work.

    Resources for Next.js Headless CMS Templates

    Templates can save you time, but they can also bake in odd decisions (auth assumptions, caching patterns, folder structure). So I treat them like scaffolding, not architecture.

    When you evaluate a template, look for:

    • Customization: can you change the content model without fighting the starter? If every field is hardcoded into a UI component, that starter will age badly.
    • Community and Support: active issues, recent commits, and real examples. A dead starter is technical debt with a README.
    • Documentation: not just “run npm install,” but details on preview, webhooks, and deployment.

    Recommended Templates:
    – Starter templates for Payload CMS can often be found on their official GitHub repository.
    – Next.js templates on platforms like Vercel or Template resources to quickly deploy your applications.

    One more practical tip: before you commit, run a “content change drill.” Add a field to the content type and see how many places in the front end you have to touch. If it’s more than you expected, your model or rendering strategy needs work.

    Using Payload CMS with Next.js

    Payload CMS is a solid choice with Next.js in 2026 because it doesn’t fight the way modern Next apps are built. If you like TypeScript, predictable local dev, and owning your schema, it’s a comfortable setup.

    Why Choose Payload?

    Payload is designed to integrate cleanly with Next.js, and a few details make it genuinely pleasant:

    • Comprehensive API: you can query content without inventing a custom backend layer. That’s fewer servers and fewer “why is this endpoint different?” conversations.
    • Typescript Support: typed collections reduce dumb mistakes—like shipping a component that assumes author.name exists when your model uses displayName.
    • Document-based Structure: it maps nicely to things like pages, posts, case studies, docs, and products.

    Where Payload can bite you: permissions and drafts. It’s powerful, but it means you have to be explicit about read access, preview behavior, and what “published” really means.

    Here’s the real-world pattern I’ve seen work: treat the CMS like a product. Version your schema changes, review access rules like you review code, and don’t let “just add a field” happen directly in production.

    Setting Up Payload CMS

    I’ll lay this out as a practical build checklist—the order matters because it prevents you from painting yourself into a corner.

    1. Install Payload:
      Run the command to set up a new Payload project directly in your Next.js app:
      bash
      npx create-payload-app

    2. Configuration:
      Configure your Payload CMS settings in the payload.config.ts file. This includes defining your collections, fields, and permissions.

    Start small. One collection. A couple fields. Get the full loop working (create → preview → publish → render) before you model your entire company.

    A sane first collection:
    pages: title (text), slug (text), layout (blocks), publishedAt (date), status (draft/published)

    Then lock down access rules:
    – Public users: can read only published pages
    – Editors: can read/write drafts
    – Admins: can manage users and globals

    1. Fetch Data:
      Use Payload’s API to fetch content. For instance:
      javascript
      import { usePayload } from 'payload-hooks';
      const { docs } = usePayload('my-collection');

    Practical note: be careful with where you fetch.

    • For mostly-static marketing pages, prefer build-time/ISR fetches and cache aggressively.
    • For authenticated dashboards or frequently changing data, SSR (or server actions) can make sense.

    Don’t default to “fetch on every request” because it’s easy. Your CMS will become your bottleneck the first time a campaign spikes traffic.

    1. Deploy:
      Finally, deploy your application to a platform like Vercel, which provides an ideal environment for Next.js applications.

    Before you hit deploy, wire up:
    – environment variables for database + secrets
    – a preview environment (or branch deployments)
    – a webhook strategy for revalidation (so content updates actually show up)

    This is the part people skip, and then they wonder why editors are doing hard refreshes and Slack’ing screenshots.

    Payload CMS in Action

    I’ll give you two examples: one from the wild (linked), and one I’ve personally seen play out on teams.

    First, there’s a public case study: Michigan Business adopted Payload CMS for their content needs. The thing to notice in setups like that isn’t “they used Payload,” it’s why: faster iteration, clearer separation between content updates and code deploys, and less friction for the people who actually maintain the site day to day.

    For more in-depth information, refer to the source of the payload integration’s success story in Michigan here.

    Now the gritty example I see a lot: a team starts with a simple marketing site, then adds a resources hub, then adds gated PDFs, then adds a partner directory. At first, they hardcode a bunch of stuff because “it’s just a few pages.” Six months later, every change requires a developer, and the CMS is basically a blog no one trusts.

    Here’s how I’d run that migration to Payload + Next.js without breaking everything:

    1. Inventory content: list every page type (landing page, case study, blog post, docs page). Count them. Identify what actually changes weekly.
    2. Define a minimal content model: don’t model the universe. Model what you ship. If you need flexible layouts, use blocks—but keep the block set small.
    3. Build one vertical slice: create one page type end-to-end: CMS entry → API fetch → Next.js route → SEO tags → preview.
    4. Add preview early: if editors can’t preview drafts, they’ll either publish risky changes or stop using the CMS.
    5. Set up revalidation: publish should trigger an update. If you rely on “wait for the cache,” people will lose confidence.
    6. Backfill content: migrate content in batches, not a giant weekend cutover. You’ll catch model gaps faster.

    Common mistakes (I’ve made a couple of these myself):

    • Overusing “blocks”: blocks are great, but unlimited freedom turns into inconsistent pages and a messy front end. I cap block types and I document when to use each.
    • Forgetting access rules: someone will accidentally expose drafts if you don’t explicitly protect them.
    • Not planning images: if your media pipeline is an afterthought, you’ll end up serving huge images and tanking performance.
    • No rollback plan: content changes can break layout. Keep a way to revert quickly—versioning, backups, or at least a “duplicate page” workflow.

    If you want more reading around architecture decisions, I’ve seen good overviews like Why Payload CMS is the Best CMS for NextJS and broader comparisons such as Next.js CMS: Best Headless CMS Choices for 2026. I don’t treat any single post as gospel, but they’re useful for framing tradeoffs.

    Headless CMS with Next.js content flow diagram

    Conclusion

    Headless CMS + Next.js isn’t a trend in 2026—it’s the default shape for teams that want speed without handing the keys to a fragile theme layer.

    But here’s the honest part: you only get the payoff if you run it like a system, not a pile of tools. Your content model needs boundaries, your rendering strategy needs intent, and your editor workflow needs to match how your team actually works.

    A quick persona story I’ve watched play out: a product marketer wants to launch 12 new pages for a campaign next Tuesday. The dev team is already booked. In a coupled CMS, that request turns into “pick a template and pray.” In a good headless setup, the marketer duplicates a page, swaps blocks, updates copy, previews it, and hits publish—while the dev team stays focused on the product.

    That’s the win. Not “API-first,” not buzzwords. Just fewer bottlenecks.

    If you’re about to implement this, my recommended next step is boring on purpose:

    1. Pick one content type (like pages or posts).
    2. Ship it end-to-end with Payload + Next.js including preview and revalidation.
    3. Only then expand the schema.

    And if you’re still deciding on the front end side of headless, this perspective on the Best frontend for headless CMS is a decent jumping-off point.

    Build the smallest thing that proves the workflow—then scale it. That’s how you avoid rebuilding it again next year.