Blog

  • Which WordPress Security Plugin is Right for You in 2026?

    A WordPress security plugin isn’t optional in 2026—if your site matters, you need a real plan, not just “I installed something once.” I’ve cleaned up enough hacked WP installs to tell you the same thing every time: most breaches look obvious in hindsight, and the boring preventative stuff wins.

    I’m Mobeen Abdullah (Founder/CEO, ~10 years building and maintaining WordPress-based sites), and I’m biased toward setups that don’t create new problems: low false positives, predictable updates, and clear recovery steps. Security is a system, but the plugin you pick sets the tone—especially for non-technical site owners.

    WordPress still attracts a ton of automated attacks because it’s everywhere. You don’t need paranoia, but you do need the basics covered: firewall/WAF behavior, malware scanning that’s actually useful, and sane login protections.

    Below, I’ll walk through the main plugins people keep circling back to in 2026, where they shine, where they’re annoying, and how I’d choose based on the type of site you’re running and how much time you’ll realistically spend babysitting it.

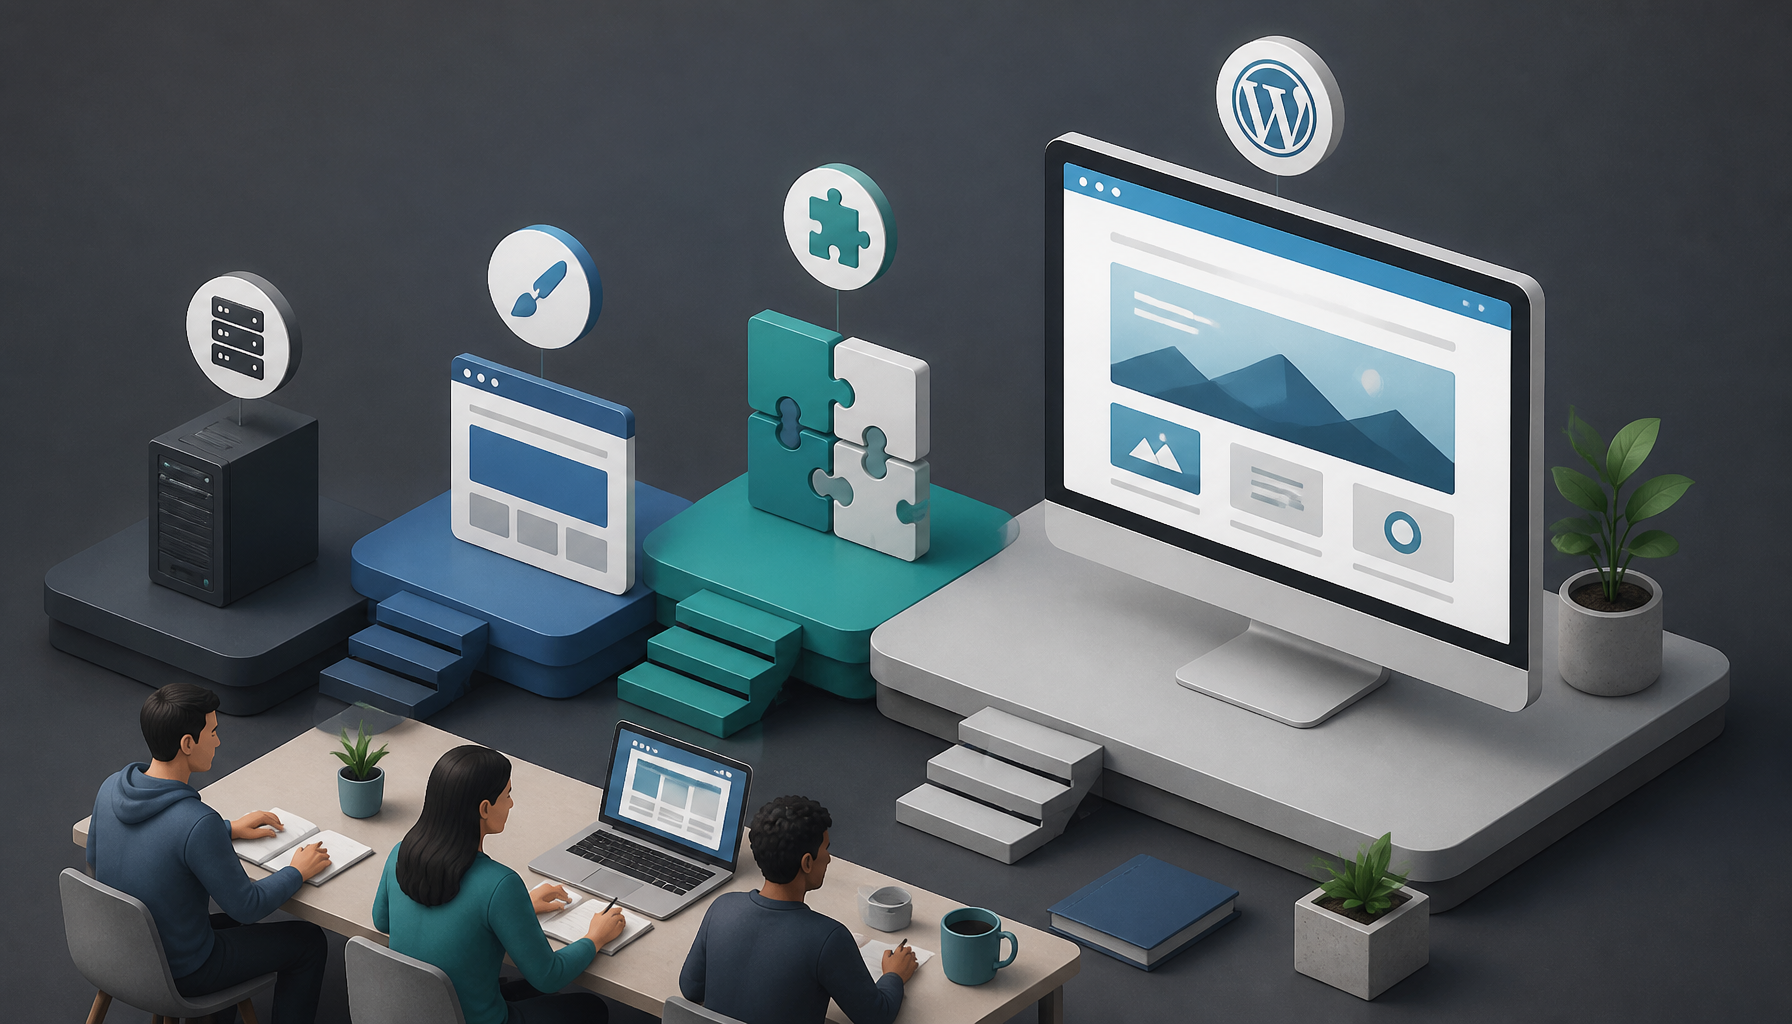
    Featured image for Which WordPress Security Plugin is Right for You in 2026?

    Which WordPress Security Plugin is Right for You in 2026?

    Top WordPress Security Plugins for 2026

    If you want the “default safe choices,” you’re basically looking at Wordfence vs Sucuri first. I’m not saying the others are bad, but these two come up over and over in real-world incident cleanup, hosting support tickets, and agency maintenance plans.

    According to recent evaluations, both Wordfence and Sucuri are at the forefront of security solutions. I like starting there, then working backward into constraints (budget, traffic, WooCommerce, team size).

    Wordfence Security

    Wordfence is widely recognized as one of the best security plugins for WordPress. It provides a comprehensive suite of features including a firewall, malware scanning, and login security. According to a report from Atomic Edge, the plugin not only protects against threats but actively monitors site traffic and behavior, which can be crucial in identifying potential breaches before they escalate.

    What sets Wordfence apart is its dedicated security research team that continuously updates the firewall rules and malware signatures, ensuring that users are always protected from the latest threats. The free version offers a substantial level of protection, while premium options enhance support and features.

    Here’s how Wordfence behaves in the messy reality of running a site:

    • It’s noisy by default, and that’s both good and bad. On a fresh install, Wordfence tends to alert on a lot—odd login attempts, blocked IPs, scan results that look scary. So, you’ll probably spend 30–60 minutes tuning notifications the first week. If you don’t, you’ll either ignore everything (bad) or accidentally block legit users (also bad).
    • The firewall + login hardening combo is the point. For most small-to-mid sites, the fastest win is limiting brute-force logins, enforcing strong passwords, and having the firewall block common exploit patterns. That’s why Wordfence feels “immediate.” You install it and attacks start showing up in the logs.
    • Scanning is useful, but not magic. A scan can tell you “this file changed,” but it can’t always tell you “this is the backdoor.” I’ve seen hacked sites where the payload lived in a mu-plugin or was injected into the database. Wordfence helped us spot indicators, but we still had to do real forensics.

    A quick example: I once inherited a brochure site that had a “random redirect” issue only on mobile. The owner swore nothing changed. Wordfence’s scan flagged a modified theme file, but the real culprit was a tiny injected script in an old header include that only fired for specific user agents. Wordfence got us 70% of the way there—then manual inspection finished the job.

    Where I’d pick Wordfence: content sites, small business sites, WooCommerce stores that need solid login controls, and any team that wants a plugin that’s actively maintained and doesn’t feel abandoned.

    Sucuri Security

    Another well-regarded option is the Sucuri Security plugin, which focuses on both prevention and recovery. This plugin is particularly notable for its performance in malware removal and website firewall capabilities, effectively acting as a guard against common vulnerabilities. Reviews indicate that Sucuri is reliable for both free and premium versions, making it a solid choice for those who require comprehensive security measures without a high cost (12 Best WordPress Security Plugins for 2026).

    Sucuri tends to appeal to people who want a cleaner story around “protect + recover,” and honestly, that matters. When a site gets compromised, the technical fix is only half the problem—the other half is business fallout.

    A few grounded notes from using Sucuri-style setups:

    • The website firewall angle can be a big deal if you’re getting hammered. A plugin firewall is helpful, but an external WAF can reduce load before WordPress even wakes up. That said, you’ll still want WordPress-level hardening because attackers don’t always come through the front door.
    • Cleanup and monitoring are part of the decision. Some site owners don’t want to learn what “file integrity” means. They want to pay to make the problem go away, and they want reporting they can forward to a client or boss.
    • It’s a better fit when uptime/reputation is the priority. For agencies, this matters because you’re not just protecting a site—you’re protecting your relationship.

    If you’ve ever had to explain a malware incident to a non-technical stakeholder, you’ll appreciate that Sucuri’s positioning is often easier to communicate: “We have a firewall, we monitor, and we can remediate.” That clarity reduces decision-lag when something goes sideways.

    Best Free WordPress Security Plugins

    Free plugins can absolutely raise your baseline. The trap is assuming “free” means “set-and-forget.” Even the best free tool needs a little setup—and you need to keep WordPress, themes, and plugins updated or you’re basically locking your front door while leaving the окна open.

    If you’re running a low-risk site (portfolio, brochure site, small blog), a free plugin plus good hygiene is usually fine. If you’re processing payments, storing customer data, or running a membership site, I’d at least consider a paid firewall/WAF path.

    All In One WP Security and Firewall

    This plugin is an all-in-one solution that offers a range of features without any cost. With options like user account monitoring, firewall protection, and file integrity monitoring, it covers essential security needs effectively.

    What I like about All In One WP Security is that it nudges you toward a checklist mindset. You turn on features one by one, and you can see your posture improve.

    But here’s the tradeoff: because it offers so many switches, you can also break things if you flip them blindly. I’ve seen clients enable aggressive rules, then wonder why a form plugin stopped submitting or why their caching layer started acting weird.

    My way to roll it out safely:

    • Start with login protections (limit attempts, enforce strong passwords).
    • Add file integrity monitoring next—quietly at first, so you learn what “normal changes” look like.
    • Only then touch the more aggressive firewall rules, and test checkout/contact forms right away.

    WP Security Ninja

    WP Security Ninja is another free option that provides vulnerability scanning and speed optimization features. It is particularly useful for website owners who want a straightforward approach to enhancing their site’s security.

    I’ve used tools like this as a “second opinion” scanner. That’s the right mental model: it’s not your whole security program; it’s a set of checks that catches common misconfigurations.

    This approach works well when:

    • you inherited a site and don’t trust the build,
    • you suspect someone installed “nulled” themes/plugins in the past,
    • or you just want a quick audit before a redesign launch.

    One caution, though: vulnerability scans are only as helpful as the follow-up. If the scan tells you “directory listing enabled” or “weak admin username,” fix it that day. Don’t put it in a backlog and forget it.

    iThemes Security

    iThemes Security offers a free version that includes strong password enforcement and login attempt limits. This plugin is user-friendly and effective for securing against basic vulnerabilities, making it an excellent choice for beginners.

    I like iThemes Security for teams that want simple guardrails. It’s the plugin I’ve seen non-technical admins actually keep configured because it doesn’t overwhelm them.

    That said, “beginner-friendly” sometimes means you’ll outgrow it. If you start adding custom integrations, running WooCommerce at scale, or managing multiple authors, you may want deeper visibility into traffic patterns and exploit blocking.

    A real pattern I’ve seen: iThemes Security works great for a solo business site until the first wave of credential stuffing hits (thousands of login attempts from rotating IPs). At that point, a stronger firewall/WAF story becomes more attractive.

    Comparison of WordPress Security Plugins

    Choosing a plugin is less about “best” and more about fit. So, I’d pick based on three things: your risk (what happens if you go down), your time (who maintains it), and your tolerance for alerts.

    Feature Wordfence Sucuri All In One WP Security iThemes Security
    Firewall Yes Yes Yes No
    Malware Scanner Yes Yes Yes Yes
    Login Security Yes Yes Yes Yes
    Real-Time Threat Defense Yes Yes No No
    Security Monitoring Yes Yes Yes Yes
    Premium Support Yes Yes No Yes

    This table is a decent snapshot, but the “feel” matters too. Two plugins can both have a malware scanner, yet one gives you actionable results and the other gives you anxiety.

    Here’s a quick decision shortcut I use:

    • If you want strong DIY protection: Wordfence is usually the pick, but budget time to tune it.
    • If you want protection plus a clearer recovery story: Sucuri is often easier to justify.
    • If you’re on a strict budget and you’ll actually configure it: All In One WP Security can raise your baseline a lot.
    • If you want simple guardrails for a small site: iThemes Security is easy to live with.

    Also, don’t miss the “outside the plugin” basics. A plugin won’t save you from:

    • outdated PHP/WP versions,
    • abandoned plugins,
    • admin accounts shared across contractors,
    • or weak hosting isolation.

    If you want a broader checklist beyond plugins, these are solid reads: Best WordPress Security Plugins for 2026 and A Practical WordPress Security Guide for 2026.

    Conclusion

    In my opinion, as Mobeen Abdullah, both Wordfence and Sucuri are excellent choices for protecting your WordPress site in 2026. Your decision should depend on your specific requirements, such as whether you need robust firewall protection and real-time monitoring. Free plugins like All In One WP Security prove to be sufficient for many users, providing a foundation for secure WordPress management without the financial burden.

    If you only do one thing after reading this, do this: pick one plugin, configure it properly, then schedule a monthly 20-minute routine (updates, quick scan review, user audit). Security fails more from neglect than from ignorance.

    FAQ

    Q: What is the best WordPress security plugin for free?

    A: All In One WP Security offers comprehensive features at no cost.

    Q: How do I secure my WordPress site?

    A: Install a security plugin, keep WordPress updated, and use strong passwords.

    Q: Are premium security plugins worth it?

    A: Yes, they usually provide advanced features and better support.

    Q: Can I use multiple security plugins?

    A: It’s not recommended as they can conflict with each other.

    Q: How often should I update my security plugin?

    A: Regularly check for updates, ideally monthly.

    Q: What to look for in a security plugin?

    A: Look for features like malware scanning, firewall protection, and good user reviews.

  • Top Email Marketing Tools for 2026

    Top Email Marketing Tools for 2026

    Discover the top 5 email marketing tools for small businesses in 2026. Learn which platforms boost engagement and drive sales effectively.

    Featured image for Top 5 Email Marketing Tools for 2026

    Top Email Marketing Tools for 2026

    Picking a platform is mostly about your reality: how technical you are, how fast you need to move, and whether you sell services or products. Email marketing remains one of the highest ROI channels, generating approximately $36 to $42 for every $1 spent (Averi Academy). That number only shows up, though, when your basics are solid.

    So instead of “best overall,” I’m going to be annoyingly practical: what each tool is good at, where it bites, and who should pick it.

    1. Mailchimp

    Mailchimp is still the easiest “get something out the door” tool for a lot of small businesses. The editor is friendly, the templates are fine, and you can go from zero to sending in an afternoon.

    Where Mailchimp shines

    If you’re a solo operator doing a newsletter plus occasional promos, Mailchimp is comfortable. Automation, segmentation, and A/B testing are there when you’re ready, but you don’t have to touch them on day one.

    Analytics are also readable. I’ve worked with tools where reporting feels like a spreadsheet punishment. Mailchimp’s dashboards are usually enough to answer, “Did this email do anything?” without a data person.

    Step-by-step: the first campaign I’d build

    1) Create one audience (don’t split lists unless you truly need to).
    2) Set up a basic welcome email that fires instantly after signup. Keep it short: who you are, what they’ll get, one link.
    3) Tag subscribers at the point of entry (lead magnet A vs B, or “customer” vs “prospect”).
    4) Send one broadcast to your whole list before you get fancy. That’s how you baseline open and click rates.

    Common mistakes I see

    People create three different audiences because it “looks organized,” then pay multiple times for the same contact. Another classic: they obsess over the template and never fix the offer. Pretty emails don’t save weak copy.

    2. Brevo (formerly Sendinblue)

    Brevo is the tool I reach for when a small business wants automation but doesn’t want to remortgage the house for it. It’s practical, and it generally plays well with eCommerce.

    Why Brevo works for lean teams

    The automation builder is the main draw. You can trigger emails based on actions (signup, purchase, page view depending on setup), and that’s where small lists start punching above their weight.

    Also, the pricing tends to feel fair when you’re growing. I’ve seen owners stay consistent with email longer when they don’t feel punished for adding subscribers.

    A real scenario

    A local fitness studio I helped had two problems: leads ghosted after the trial class, and former members never came back. We built a simple Brevo flow:

    • Day 0: “Nice to meet you” + schedule link
    • Day 2: FAQ about what to bring + a 10% pack offer
    • Day 7: success stories (short, with photos)
    • Day 21: “Haven’t seen you” check-in

    Nothing magical. But because it ran automatically, they stopped leaking follow-ups.

    Common mistakes I see

    Folks build a 12-step automation before sending a single email. Don’t. Start with two emails, confirm the triggers work, then add steps.

    3. Klaviyo

    If you run eCommerce and you’re not using behavior-based targeting, you’re leaving money on the table. That’s basically Klaviyo’s whole thing.

    What Klaviyo is best at

    Segmentation gets serious fast: purchase history, product categories, AOV bands, repeat vs one-time buyers. You can slice the list in ways that make your emails feel personal without manually hand-picking people.

    Klaviyo also pushes you toward revenue attribution. It’s not perfect (no attribution is), but it’s better than guessing.

    Step-by-step: the minimum viable eComm setup

    If you sell products, I’d build these three flows before I start “newsletter strategy” debates:

    1) Welcome series (2 emails): brand promise + best sellers, then social proof.
    2) Abandoned cart: one reminder, then a second email 18–24 hours later.
    3) Post-purchase: how to use/care instructions + cross-sell that actually matches what they bought.

    Then I’d add a winback flow after you’ve got enough repeat purchase data.

    Common mistakes I see

    People over-segment so hard that each segment ends up with 73 people. The emails look “targeted,” but you can’t learn anything because volume is too low. Start broader, then narrow once you see patterns.

    4. ActiveCampaign

    ActiveCampaign is for the business that needs email plus a light CRM brain. If you sell services, book calls, manage pipelines, or run consultative sales, this is where it starts to click.

    Why I like it for service businesses

    You can map a lead journey that isn’t just “send newsletter.” It’s: inquiry → booked call → proposal sent → won/lost → onboarding. Email can support each step without you living in your inbox.

    I’ve used ActiveCampaign setups where the owner gets a task when a lead clicks pricing twice in a week. That sounds small, but it’s exactly the kind of signal that helps you respond at the right time.

    Step-by-step: a simple nurture that converts

    1) Capture leads with one form (don’t run five unless you track them).
    2) Create a 5-day sequence: problem, mistake, case study, offer, last call.
    3) Add one rule: if they book a call, pull them out of the sequence.
    4) Add a deal stage pipeline so you can see where leads stall.

    Common mistakes I see

    Teams turn on every automation option and build spaghetti. Then nobody can debug it. I keep a “boring rule”: if you can’t explain the automation on a whiteboard in 60 seconds, it’s too complicated.

    5. HubSpot Marketing Hub

    HubSpot is the all-in-one option that’s actually usable. If you want your email, CRM, landing pages, and reporting in one place (and you don’t want to duct-tape five tools together), HubSpot is the obvious pick.

    When HubSpot is worth it

    If you’re juggling a small team—one person writing, one person selling, maybe an assistant managing contacts—HubSpot reduces chaos. The integrated CRM is the real value, because it stops email from being a separate universe.

    The free tier is also a solid “prove it” starting point. You can validate whether consistent email is driving leads before paying for deeper automation.

    Common mistakes I see

    People buy HubSpot because it’s famous, then never clean up their contact properties or lifecycle stages. That’s like buying a nice toolbox and throwing everything in one drawer. Spend an hour defining: Lead, MQL, SQL, Customer. You’ll feel the difference immediately.

    Email Marketing Insights for Businesses

    You can pick any of the five tools above and still get mediocre results if your fundamentals are sloppy. Here’s what I’d evaluate before you migrate lists or rebuild templates.

    Ease of use beats “power”

    If the tool feels heavy, you’ll avoid it, and then you’ll “forget” to email for two months. That’s the real killer. Pick the platform you’ll actually open on a Tuesday.

    Budget isn’t just the monthly fee

    Pricing jumps as your list grows, but hidden cost shows up as time: migrations, broken automations, and rebuilding forms. I’d rather pay slightly more for a tool that keeps me consistent.

    Integrations are your future self insurance

    Today you “just need emails.” Next quarter you want Shopify/WooCommerce sync, appointment booking, lead ads, or CRM. Check integrations now so you’re not stuck doing CSV gymnastics later.

    Support matters when things break

    At some point you’ll have a deliverability scare or a form that stops capturing leads. When that happens, docs and support quality are the difference between a 20-minute fix and a two-day headache.

    If you want more context on what’s trending this year, I’d skim these two roundups: top email marketing tools and top 5 email marketing trends.

    How Do I Start Email Marketing?

    Start smaller than you want to. Seriously.

    The setup I’d recommend (first 7 days)

    Day 1: Pick one platform and connect your sending domain (or at least set up the basics the tool asks for). If you skip this, you’ll eventually wonder why emails land in spam.

    Day 2: Create one signup form and put it somewhere obvious (home page, checkout, booking page). Don’t hide it in the footer like it’s a legal disclaimer.

    Day 3: Write a welcome email that sounds like a human wrote it. One paragraph about what they’ll get, one link to your best resource, and a simple “hit reply and tell me what you’re trying to do.” Replies are gold.

    Day 4: Import any existing contacts only if you have permission. If you’re not sure, don’t import them. A smaller clean list beats a big angry one.

    Day 5: Send your first broadcast. Keep the goal singular: one story, one offer, one call-to-action.

    A quick personal example

    When I launched a small SaaS-style side project, I wasted a week perfecting branding. The email that actually got paying customers was a plain welcome note plus a “here’s what to do next” bullet list. It wasn’t pretty, but it was clear—so it worked.

    How Much Is a 1000 Email List Worth?

    It depends, and the boring answer is the true one: engagement and buyer intent matter more than raw count.

    A 1000 email list can vary widely, generally ranging from $10 to $100 based on engagement quality. A list with high engagement, where recipients frequently open and interact with your emails, is far more valuable than a larger list of inactive subscribers. For more insights on this topic, check out Isazeni’s article on email list valuation.

    How I sanity-check list value (without pretending it’s a stock)

    I look at:

    • Recent open/click behavior: are people still there, or is it a graveyard?
    • Revenue per subscriber: even rough numbers help (last 30–90 days).
    • Source quality: webinar leads often behave differently than giveaway leads.

    If your 1,000 subscribers are all past buyers, that list can outperform a “10,000 leads” list collected from a random contest. I’ve seen that play out more than once.

    Conclusion

    The “best” email tool is the one you’ll use every week—and that your business can grow into without a painful rebuild. Mailchimp and HubSpot are great for getting moving fast. Brevo is a strong value pick if automation is the priority. Klaviyo is hard to beat for eCommerce targeting. ActiveCampaign fits service businesses that need email tied to a pipeline.

    Pick one, set up one welcome email, then send your first campaign this week. Momentum beats the perfect stack.

    FAQs

    Q: How do I start email marketing?

    A: Pick one platform, set up a basic signup form, and send a welcome email before you do anything fancy.

    If you want the least painful path, here’s the sequence I’ve used with small businesses that are busy (and a bit skeptical):

    1) One lead magnet or one reason to subscribe (discount, checklist, weekly tips—keep it simple).
    2) One form placed somewhere with real traffic (homepage hero, checkout, booking page).
    3) One welcome email that sets expectations: “I’ll email you every Friday” beats “stay tuned.”
    4) One broadcast per week or every two weeks so your list doesn’t forget you exist.

    Common mistake: people wait until they’ve “built the list.” That’s backwards. Start emailing at 20 subscribers, learn what they click, and let that guide what you create next.

    Q: How much is a 1000 email list worth?

    A: Roughly $10–$100 in generic valuations, but in practice it can be worth far more (or basically nothing) depending on who’s on it and how engaged they are.

    A quick, real-feeling example: I once audited a list of about 1,200 subscribers for a niche service business. The owner assumed it was “small and pointless.” Turns out most subscribers came from past consultations—so when we emailed a simple “two spots left this month” offer, they booked out in days.

    Mistake to avoid: buying a list or scraping emails. Even if you “get away with it,” deliverability tanks and you end up harming the domain you actually need.

    Q: Is email marketing still worth it in 2026?

    A: Yes—because it’s one of the few channels you can control, measure, and improve without begging a platform for reach.

    That said, it’s only “worth it” if you treat it like a product:

    • Keep acquisition permission-based.
    • Send consistently enough to stay recognized.
    • Use segmentation when it’s earned, not because it’s available.

    I’ve watched businesses go dark for 90 days, then blast a hard sell and wonder why it flops. Meanwhile, a competitor sending one helpful email every week quietly wins the mindshare.

    Q: How often should I send emails?

    A: For most small businesses, 1–2 emails per month is a safe baseline. If you can do weekly without spamming people, weekly is even better.

    Here’s the cadence I usually recommend:

    • Service business: 2x/month (one educational, one offer/case study).
    • eCommerce: weekly, plus automated flows (welcome, cart, post-purchase).
    • Local business: 1–2x/month, tied to real events (new class times, seasonal promos).

    Step-by-step: start at 2x/month for 60 days. If unsubscribes stay reasonable and clicks are healthy, increase frequency. If complaints spike, pull back and tighten targeting.

    Common mistake: sending only when you “have something to sell.” That trains your list to ignore you.

    Q: Can I use email marketing for free?

    A: Yes. Most of these platforms have free tiers, and they’re enough to validate your approach.

    Use free plans for:

    • A basic newsletter
    • A welcome email (sometimes limited)
    • Simple segmentation/tags

    Where free breaks down is usually automation depth, advanced reporting, and list size limits. My stance: start free, but set a reminder to reassess once you’re near the cap. The worst time to migrate is when you’re mid-campaign.

    Mistake I see: staying on a free plan so long that you avoid building the automations that would pay for the upgrade.

    Q: What are some examples of effective email marketing?

    A: Effective email is usually boring on purpose—clear promise, relevant timing, and one action.

    A few examples that routinely work:

    • Personalized newsletter: “3 things I learned this week” with one relevant link back to your site.
    • Behavior-based promo: cart abandonment with a reminder and a product FAQ (not just “BUY NOW”).
    • Post-purchase series: setup tips, care instructions, and a smart cross-sell.

    A mistake I’ve made myself: cramming three CTAs into one email (read blog, follow socials, buy product). Results got better when I forced myself to pick one primary action and design the email around it.

    As a founder immersed in the world of open-source development and software engineering, I recognize the significant impact email marketing can have on small businesses. Embracing the right tools and strategies will undoubtedly set you on the path to success in 2026 and beyond.

  • Top AI Content Writing Tools for Bloggers

    Top AI Content Writing Tools for Bloggers

    Discover the best AI content writing tools that can enhance your blogging experience and save time in 2026. Learn more!

    Best AI Writing Tools for Bloggers in 2026

    Picking an AI tool in 2026 is mostly about fit—your niche, your volume, your tolerance for editing, and whether you care about SEO structure or pure voice. I’ll walk through what each one is good at, where it trips people up, and how I’d use it in a real blogging workflow.

    1. Jasper AI

    Jasper AI is widely regarded as one of the best AI models for blog writing due to its advanced capabilities and user-friendly interface. That reputation didn’t come from magic. It came from being consistently “pretty good” at first drafts, which is the hard part when you publish weekly (or more).

    Where Jasper shines is speed with guardrails. You feed it a topic, angle, and a few constraints—then it gives you something you can shape. I like it when I already know what I want to say, but I don’t want to spend 45 minutes wrestling an intro.

    Here’s how I’d use it for a 1,800–2,500 word post:

    • Step 1: Lock the angle. I’ll write one sentence like: “This post is for solo bloggers trying to rank without sounding like a robot.” If you skip this, Jasper tends to default to generic.
    • Step 2: Give it my outline skeleton. H2s + H3s only. I don’t ask for a full post yet.
    • Step 3: Draft per section. One section at a time, with a word target. Otherwise you get repetition and vague filler.
    • Step 4: Add my examples manually. AI can’t pull your lived experience out of thin air, so I drop in screenshots, numbers, mistakes, and the “here’s what happened” bits.

    Common mistake I see: people prompt Jasper with “Write a blog post about X” and hit publish. That’s how you end up with the same safe advice as everyone else. If you want it to sound like you, you have to give it boundaries—tone, audience, and a few lines of your own writing to mimic.

    2. Copy.ai

    Copy.ai is the tool I reach for when I’m stuck on angles and packaging—headlines, hooks, newsletter blurbs, “how do I make this sound interesting without lying” type stuff. Bloggers underrate this step, but it’s the difference between a post that gets read and one that gets bookmarked and forgotten.

    It’s particularly beneficial for bloggers who want to generate creative content ideas or headlines. In practice, I use it like a sparring partner:

    • I paste a rough paragraph and ask for 10 alternative hooks.
    • I give it three competing titles and ask, “Which one fits a skeptical reader?”
    • I ask for meta descriptions that don’t sound like spam.

    A quick real example from a marketing blog I helped clean up: the writer kept opening posts with definitions (“Content marketing is…”). We used Copy.ai to generate hook variations based on pain instead—missed deadlines, low traffic, clients asking for “quick SEO wins.” Engagement went up because the intros finally sounded like a human who’d been burned before.

    Tradeoff: Copy.ai can drift into hype-y copy if you let it. So I always add constraints like “no buzzwords, no ‘ultimate guide,’ don’t promise results.” If you’re allergic to sales language, you’ll want those guardrails.

    3. Eesel AI Blog Writer

    Eesel AI blog writer is making waves in the blogging community for its simplicity and effectiveness, and I get why. A lot of AI writing products feel like cockpits—tabs, modes, templates, sub-templates. Eesel’s appeal is that it stays close to the actual job: draft, rewrite, organize.

    What I like most is the “less ceremony” workflow. If you live in Google Docs (many bloggers do), tools that integrate cleanly reduce friction. Less friction means you publish more, and publishing more is still the best way to get better.

    How I’d use it on a Monday content sprint:

    1. Brain dump in plain language (ugly notes are fine).
    2. Ask Eesel to turn that mess into a tight outline.
    3. Draft section-by-section, then rewrite only the parts that drag (usually intros, transitions, conclusions).
    4. Do a final pass for voice: add one opinion per major section, and one concrete example per 500–700 words.

    The main risk with “simple” tools is that they can encourage lazy prompting. If your input is thin, your output will be thin. You still have to show up with a point of view.

    4. Sudowrite

    Sudowrite has become a favorite among fiction writers but is also gaining traction among bloggers—and not just lifestyle bloggers doing personal essays. If you write case studies, founder stories, brand narratives, or any post that needs scenes (not just facts), Sudowrite can help you get out of stiff, corporate-sounding prose.

    I’ve used tools like this when a post needs to feel lived-in. For example, a travel blogger friend of mine had a draft that read like a spreadsheet: “Day 1 we did X. Day 2 we did Y.” Sudowrite-style prompts helped her add sensory detail and tension (“we almost missed the last ferry,” “my phone died halfway up the trail”). Same itinerary, totally different reading experience.

    Practical ways bloggers can use it without turning posts into purple prose:

    • Rewrite a flat paragraph into a short story beat.
    • Generate dialogue snippets for a case study (“the client said…”) then edit to truth.
    • Create metaphors when you’re explaining something abstract (like strategy).

    Mistake to avoid: letting it over-style everything. I only use it on 10–20% of a post—the parts that need emotion. If you apply it everywhere, readers feel manipulated.

    5. Grammarly

    While primarily known as a grammar-checking tool, Grammarly is one of the few AI assistants I’ll run on every post, even when I don’t feel like it. Not because I can’t write, but because I’m human—typos happen, and messy sentences sneak in when you’re tired.

    In 2026, its premium features help users refine their writing by suggesting style improvements, tone adjustments, and clarity fixes. The biggest win for bloggers isn’t “catching grammar.” It’s catching those subtle clarity issues that wreck comprehension:

    • Long sentences with three ideas jammed together
    • Random tense shifts
    • Overuse of passive voice when you’re trying to sound confident

    My workflow with Grammarly is boring on purpose:

    1. Draft fast (I ignore micro-edits).
    2. Run Grammarly once, accept only the fixes that improve clarity.
    3. Read the post out loud and undo anything that makes me sound unlike myself.

    Common mistake: accepting every suggestion. Grammarly sometimes flattens personality—especially if your brand voice is punchy or informal. Treat it like an editor you trust, not a boss.

    6. Surfer SEO

    Surfer SEO is for bloggers who care about ranking and don’t want to guess what Google “wants” this month. It combines content creation with SEO analysis, which can be useful—if you don’t let it bully you into keyword soup.

    It provides insights on what keywords to use, how to structure articles, and what topics are performing well in your niche. The good use-case is structural: it nudges you toward covering subtopics readers expect.

    Here’s how I keep Surfer helpful instead of annoying:

    • Start with search intent, not word count. If the SERP is all tutorials, don’t write a manifesto.
    • Use Surfer to find missing sections (“People also cover pricing,” “they compare alternatives,” etc.).
    • Draft in your voice first, then optimize second.

    A real scenario: I once watched a blogger chase a Surfer score from 62 to 88 by jamming in awkward phrases. Rankings didn’t improve, and the bounce rate got worse. We rolled back the spammy edits, kept the missing subtopic sections, and the post recovered. So yeah—use the tool, don’t worship it.

    7. WriteSonic

    WriteSonic is designed for speed and efficiency, and it’s solid when you need volume—product descriptions, landing page variants, quick listicles that still need to be coherent. For bloggers, it’s best when you’re running a content calendar and need drafts you can refine.

    It allows users to create articles in minutes by simply entering a few keywords. I’d translate that into a smarter use: enter keywords plus constraints:

    • audience level (beginner vs advanced)
    • tone (skeptical, friendly, blunt)
    • format (checklist, tutorial, comparison)
    • must-include examples (your tools, your process)

    WriteSonic’s ability to generate different content variations is great for A/B testing headlines and intros. If you promote posts via email or social, testing hooks can be the difference between 40 clicks and 400.

    The tradeoff is similar to other speed-first tools: it can repeat itself. When I see repeated phrases, I don’t fight it line-by-line. I cut aggressively, then rewrite transitions so it flows.

    Conclusion

    In conclusion, the best AI for blog writing in 2026 provides a combination of efficiency, creativity, and technical prowess. Tools like Jasper AI and Copy.ai are leading the way, while options like Eesel AI and Surfer SEO can tighten workflow and improve content visibility.

    If you take one thing from this section, make it this: AI drafts aren’t the product. Your judgment is. Use these tools to move faster, then earn the reader’s trust with specifics—real numbers, real mistakes, and opinions you’re willing to stand behind.

    Best Free AI Tools for Blog Writing in 2026

    Free AI tools are totally usable in 2026, but you have to be more disciplined. Paid tools often reduce friction with better controls and workflows. Free tools can still get you 80% of the way there—if you know what to ask for and you don’t treat the first output as final.

    I’m going to be blunt: the “free tier” sweet spot is ideation, outlining, rewrites, and micro-edits. Full long-form drafts are possible, but you’ll spend more time cleaning them up.

    1. ChatGPT

    ChatGPT, developed by OpenAI, remains one of the most popular free AI writing tools because it’s flexible. It can generate ideas, draft content, and answer specific queries, and that versatility matters when you’re a solo blogger doing everything.

    Here’s a step-by-step way to use ChatGPT for a blog post without getting generic sludge:

    1. Start with a reader problem. Prompt: “My reader is a freelance designer who needs more leads from blog traffic but hates SEO jargon. Give me 15 post ideas.”
    2. Pick one idea and force an angle. Prompt: “Choose the most contrarian idea and write a one-paragraph thesis.”
    3. Ask for an outline with constraints. Prompt: “Give me an outline with 6 H2s, each under 8 words. Include 2 real-world examples I can swap with my own.”
    4. Draft only the hardest section first. Usually intros, a comparison table, or a tricky explanation.
    5. Use it as a revision tool. Paste your paragraph and ask: “Make this clearer, keep my tone, don’t add new claims.”

    A real persona anecdote: I helped a food blogger who kept abandoning posts halfway through because recipes are already a lot—ingredients, steps, notes, photos. We used ChatGPT only for the “story” part: hooks, section headings, and FAQs like “can I freeze this?” She stopped dreading intros, and her output went from 1 post/month to 3. Same talent, less friction.

    Common mistakes with ChatGPT (and how to avoid them):

    • Mistake: Asking for a full post in one prompt. You’ll get repetition and weak structure. Go section-by-section.
    • Mistake: Letting it invent specifics. If it outputs stats, quotes, or product specs you didn’t provide, assume they’re wrong and remove them.
    • Mistake: No brand voice guidance. Paste a paragraph of your writing and say “match this tone.” You’ll get closer.

    2. Copy.ai Free Version

    While Copy.ai offers premium features, its free version still earns a spot for bloggers who need help with packaging: headlines, intros, CTA variations, and social captions.

    If you’re starting out, here’s how I’d use the free plan intentionally:

    • Weekly batch: Generate 25 headline variations for 3 posts. Save the best 5.
    • Hook rewrite: Take your first paragraph and ask for 10 punchier versions.
    • Clarity pass: Ask for simpler language when you feel yourself getting too “industry.”

    One practical trick: create a mini swipe file. Whenever Copy.ai spits out a headline structure that works (like “Stop doing X, do Y instead”), save it in a doc. Over a couple months, you’ll have your own set of proven formats, and you’ll rely less on the tool.

    Where people mess up: they use Copy.ai free for long-form drafts and then complain it’s shallow. It’s not really trying to be a full blog engine on the free tier. Treat it like a brainstorming room, not a ghostwriter.

    3. Writesaver

    Writesaver offers a free tier that allows users to generate short-form content and assists with editing. For bloggers, that usually means it’s best as a “clean-up and tighten” tool—especially if you’re already 70% done.

    Here’s a simple workflow that actually works:

    1. Write your draft normally (even if it’s messy).
    2. Paste one section at a time into Writesaver.
    3. Ask for three options: “tighten,” “friendlier,” and “more direct.”
    4. Merge the best parts manually.

    Why the section-by-section approach matters: if you paste a 2,000-word post into any free tool, you’re likely to get either a generic rewrite or a chopped-up version that loses your thread.

    A common mistake: using editing tools to “fix” a bad argument. If your post doesn’t have a clear point, no rewrite engine will save it. You’ll just get a better-sounding version of confusion. When I’m unsure, I go back and write one sentence: “After reading this, my reader will ____.” If I can’t fill that in, I don’t edit yet.

    Conclusion

    Many free AI tools can help bloggers enhance their writing process without stretching their budgets. ChatGPT and the free version of Copy.ai cover a lot of ground, while Writesaver can help you polish sections quickly.

    If you’re on a budget, my advice is to build a repeatable workflow first—prompts, outline habits, editing steps—then decide whether you’re paying for quality or just paying to save time.

    FAQ Section

    Picking the right model

    • Q: Which AI model is best for blog writing?
      A: Jasper AI is widely regarded as one of the best AI models for blog writing due to its advanced capabilities and user-friendly interface. That said, “best” depends on your editing tolerance. If you want clean first drafts and you publish often, Jasper tends to be the least painful. If you mostly need ideas and rewrites, a free tool can be enough.

    • Q: What is the best AI model for writing in 2026?
      A: As of 2026, Jasper AI and Copy.ai lead the market with their innovative features and versatility. I’d split them like this: Jasper for drafting and structure, Copy.ai for headlines, hooks, and repackaging. If you do both with one tool, you’ll still be fine—but you’ll usually feel one of those jobs is a bit clunky.

    Is blogging still worth it?

    • Q: Is blog writing worth it in 2026?
      A: Yes, blog writing remains valuable in 2026 as it significantly contributes to brand visibility and audience engagement—if you commit to a niche and a publishing cadence you can sustain. What changed is the bar: generic content gets ignored faster now. The posts that win are opinionated, specific, and experience-backed.

    Tool choices and tradeoffs

    • Q: Which is the best AI tool for content writing?
      A: Jasper AI is often recommended for content writing due to its robust features and performance, but I wouldn’t buy it just to “have AI.” I’d buy it when your bottleneck is drafting speed and you’re already confident you can edit for voice. If you still struggle with what to say, start with a tool that helps with ideation.

    • Q: Are there free AI tools for blog writing?
      A: Yes—ChatGPT and the free version of Copy.ai can be genuinely useful. The catch is you’ll do more manual work: more prompting, more rewriting, more fact-checking, more tightening. If that doesn’t bother you, free gets you far.

    Getting better results

    • Q: How do AI writing tools improve blogging?
      A: AI writing tools enhance blogging by automating content creation, generating ideas, and improving overall writing efficiency. In practical terms, they help you (1) get unstuck, (2) draft faster, and (3) polish more consistently. The improvement comes when you treat AI like a junior assistant: you give it clear tasks, then you review like an editor.

    Here’s a quick “do this tomorrow” checklist that makes almost any tool work better:

    • Write a one-sentence thesis before prompting.
    • Generate 2–3 outlines and pick the best one (don’t accept the first).
    • Draft the hardest section first, then fill the easy parts.
    • Add at least one real example per major section.
    • Run a final clarity pass (Grammarly-style), then read aloud.

    If you want a fast starting point for generating a full post structure, this AI blog post generator is a decent way to kick off an outline—just make sure you still bring the opinions and proof.

    Next step: pick one tool from the paid list and one from the free list, run the same topic through both this week, and track which one saves you more time after editing. That’s the only test that matters.

  • Essential Tips for Next.js Development in 2026

    Essential Tips for Next.js Development in 2026

    Explore essential tips for Next.js development in 2026, including tutorials, best practices, and tools.

    Featured image for Essential Tips for Next.js Development in 2026

    Essential Tips for Next.js Development in 2026

    Next.js isn’t “just React with routing.” It’s a set of defaults, a build pipeline, and a runtime model. Treat it like an opinionated system and you’ll ship faster.

    Understand Next.js Basics

    SSR, SSG, and ISR still matter in 2026, but the real skill is picking the right one per route, not “per app.” If you mix them randomly, you’ll end up with pages that look fast locally but behave weirdly behind a CDN.

    A mental model that’s held up well for me:

    • SSR: use it when the HTML must reflect request-time state (auth, per-user data, geo rules). Great for dashboards, account areas, and anything “logged in.”
    • SSG: use it when content changes rarely and you want the simplest possible delivery path. Marketing pages, docs, long-lived content.
    • ISR: use it when content updates, but you can tolerate it being slightly stale. Think pricing pages that change weekly, blog indexes, category pages.

    Where teams mess up: they choose SSR “because it’s dynamic,” then wonder why TTFB spikes when traffic hits. Or they choose SSG “for performance,” then bolt on client-side fetching everywhere and recreate the same performance problems—just with worse UX.

    If you’re unsure, start with SSG/ISR for public pages and SSR for authenticated pages. Then measure. Google Lighthouse can tell you what’s slow, but you’ll also want real-user monitoring later.

    Next.js Tutorial

    The fastest way to actually learn Next.js is to build something that crosses the boundary between UI and backend, because Next forces you to make architecture decisions early.

    Start with the official docs, because they’re the source of truth: Next.js Docs. Then, if you want a guided “ship a full app” path, I like following a complete walkthrough once end-to-end. This one is a solid example: Next.js Tutorial: Build a Full-Stack App in 13 Steps.

    Here’s a step-by-step learning loop I’ve used with juniors (and honestly, I still do it when a new feature lands):

    1. Create the app and run it (don’t customize anything yet). If you can’t boot cleanly, you’ll chase ghosts later.
    2. Add one route at a time and decide: SSR, SSG, or ISR. Write that decision in the PR description.
    3. Add one data source (even a fake JSON file), then swap it for a real DB/API. You’ll learn where caching really happens.
    4. Introduce one auth boundary (a protected page). That’s where people usually start leaking secrets or overfetching.
    5. Deploy early. Local success doesn’t count. Deploying exposes environment variable mistakes, Node version drift, and “works on my machine” bugs.

    A common beginner mistake: building ten pages before deployment. Then, when the first deploy fails, you’ve got too many moving parts to debug quickly.

    Utilize Next.js Bun

    Bun is worth testing, especially if your install times and dev server startup are dragging. That said, I treat it as an optimization knob—not a religion.

    Here’s how I evaluate it on a real project:

    • First I get a clean baseline with the default tooling.
    • Then I try Bun and measure three things: cold install time, dev server boot, and test run time.
    • If the win is marginal, I skip it. Tooling churn costs more than it saves.

    The docs are still your checkpoint for integration details: Next.js Bun.

    One gotcha I’ve seen: teams adopt Bun, but their CI still uses Node + npm, so lockfiles diverge and builds become flaky. If you use Bun locally, align CI, or you’re signing up for constant “why did it fail only in CI?” threads.

    Leveraging GitHub for Collaboration

    If you want your Next.js repo to stay healthy, structure your GitHub workflow like you expect new people to join mid-flight—because they will.

    The official Next.js repo is also a goldmine for patterns and examples: GitHub.

    What I enforce on collaborative teams:

    • PRs stay small. If a PR touches routing, data fetching, and UI components all at once, it’s unreviewable. Split it.
    • One decision per PR. Example: “Switch blog index to ISR” is a PR. “Switch ISR and redesign the homepage” is two PRs.
    • Preview environments. If your hosting supports preview deploys, require them. You catch layout shifts, env var bugs, and auth redirects immediately.
    • CODEOWNERS and a basic checklist. Not heavy process—just enough to avoid shipping accidental SSR pages that hammer your database.

    A real mess I’ve cleaned up: a team merged a “quick fix” that added client-side fetching to avoid an SSR bug. It worked—until SEO tanked and the page started flashing empty states on slow connections. The fix was to revert, implement proper server-side data fetching, and add an assertion in review: “No client fetch on first paint unless there’s a reason.”

    Manage Your Dependencies Wisely

    Dependencies are where Next.js projects quietly rot. You don’t feel it until audits, or until a minor upgrade breaks your build.

    I keep a boring routine:

    • Audit packages monthly.
    • Pin versions for anything that has broken us before.
    • Remove libraries we don’t use anymore (dead code is a liability).

    You can sanity-check package popularity and maintenance signals on npm. Popular doesn’t mean safe, but it does help you avoid abandoned projects.

    Common mistakes I see in Next.js apps:

    • Installing a library for every tiny UI need (date formatting, debounce, modals, you name it). Your bundle grows, and debugging gets harder.
    • Ignoring transitive dependencies. “We only added one package” can still pull in 40.
    • Upgrading everything at once. If you bump Next, React, ESLint, Tailwind, and auth libraries together, you won’t know what broke what.

    My tradeoff: I’ll accept one extra day of integration work if it avoids a dependency that drags in a ton of baggage. That’s not purity. It’s maintenance math.

    Is Next.js Better Than React?

    If you’re building a UI-only app that lives behind auth and doesn’t care about SEO, plain React can be totally fine. But when you need routing, rendering options, performance defaults, and a straightforward path to “full-stack,” Next.js earns its keep.

    The biggest practical advantage is that Next gives you a coherent story for routing + rendering + API routes. You can implement those yourself in React, but you’ll spend time assembling the pieces (and then maintaining them).

    I tend to recommend Next.js when:

    • You have public-facing pages where SEO and perceived speed matter.
    • You want SSR/SSG/ISR without inventing your own architecture.
    • You expect the app to grow (more routes, more data sources, more teams).

    For a broader comparison, this breakdown captures the common tradeoffs: this comparison.

    One caution: Next.js can encourage “magic thinking.” People assume the framework will automatically make everything fast. It won’t. If you fetch too much data on the server, or you ship huge client bundles, Next won’t save you.

    Performance Optimization

    Performance work is easier when you’re specific. “Make it faster” is how you get random micro-optimizations that don’t move the needle.

    I start with these checks:

    • Route-by-route rendering choice (again). A single SSR page that hits your database on every request can dominate your costs.
    • Image optimization. Serve correct sizes, avoid shipping 4K hero images to phones.
    • Code splitting and lazy loading. Don’t import admin-only components into public routes.
    • Caching strategy. Cache at the edge where possible, and cache server fetches where safe.

    A practical, repeatable step-by-step pass for a slow page:

    1. Run Lighthouse to get a baseline (TTFB, LCP, CLS).
    2. Check what loads on first paint. If you see a big JS chunk, inspect what pulled it in.
    3. Look for layout shifts. Usually it’s images without dimensions or late-loading fonts.
    4. Review server logs for request-time hotspots. A slow DB query will show up as TTFB pain.
    5. Fix one bottleneck, redeploy, and re-measure. If you change five things at once, you’re guessing.

    A real example: we had a product listing page that felt “fine” in the office. In the field it was rough. The issue wasn’t Next.js—it was that the page pulled in a heavy charting library via a shared component. Moving that import behind a dynamic load dropped the initial JS by a noticeable chunk, and LCP improved immediately.

    Security Best Practices

    Next.js apps are still web apps, so the classics apply: injection, auth bugs, insecure dependency chains, and misconfigured secrets.

    I keep it simple and consistent:

    • Never expose server secrets to the client. Treat anything that ships to the browser as public.
    • Lock down API routes. Validate inputs, enforce auth, and rate-limit where it matters.
    • Audit dependencies regularly. Don’t wait for a breach to care.

    If you want a practical checklist of common web app risks, the OWASP Top Ten is still the clearest overview.

    One mistake I’ve seen too often: teams add a “quick” API route for internal use, then it ships publicly with no auth because “it’s obscure.” Obscure isn’t secure. If it’s deployed, assume it will be found.

    Continuous Learning and Community Engagement

    Next.js changes fast enough that you don’t want your learning to depend on one course you bought two years ago.

    What actually helps:

    • Follow release notes and a few maintainers.
    • Read real incident postmortems when they pop up.
    • Keep a tiny sandbox repo where you test new features before you bet production on them.

    For ongoing community discussion, Twitter and Dev.to can be useful—just filter aggressively. I’m biased toward posts that include code, benchmarks, or a clear reproduction, because vibes don’t fix bugs.

    My Experience With This

    I’m Mobeen Abdullah, and I’ve used Next.js in the exact situations where the framework gets judged harshly: tight deadlines, shifting requirements, and “can we make it faster without rewriting everything?” conversations.

    One project that sticks with me was a content-heavy site that also had a logged-in customer portal. The team started with a single strategy—SSR everywhere—because it felt safe. It shipped, but two problems surfaced quickly: the marketing pages were slower than they needed to be, and the database load climbed every time we ran a campaign.

    So we did a controlled refactor, not a rewrite. Here’s the playbook we followed (and this is the part most blog posts skip):

    1. Inventory the routes. We listed every page and tagged it: public marketing, public content, authenticated, or internal admin.
    2. Pick a rendering strategy per tag. Marketing went SSG, content went ISR, portal stayed SSR.
    3. Add measurement. Before touching code, we captured baseline Lighthouse scores and server metrics (request rate + slow queries).
    4. Move one route at a time. We converted the homepage first (lowest risk), deployed, and compared metrics.
    5. Fix the “hidden” performance killers. The biggest win wasn’t rendering—it was removing a dependency that imported a whole UI library for one component.

    The result was boring in the best way: faster pages, fewer DB hits, fewer 2 a.m. alerts. And because we moved incrementally, we could always roll back.

    Common mistakes I’ve personally made (and now avoid):

    • I used to accept giant PRs that mixed refactors with feature work. Now I push back, because review quality collapses.
    • I once relied on client-side fetching to dodge an SSR bug. It “fixed” the error, but it created a worse UX and muddied SEO. Never again.
    • I underestimated how quickly a dependency graph becomes the problem. These days, I’ll spend time deleting packages as a form of performance work.

    If you’re building with Next.js in 2026, my bias is simple: optimize for clarity first, then speed. Clear code is what keeps you fast in month six.

    FAQ

    Q: What is NextJS exactly?

    A: Next.js is a powerful React framework that enables server-side rendering and static site generation, enhancing performance and SEO. [Source: nextjs.org]

    The practical way I explain it to teams: React is the UI layer, while Next.js is the app framework around it—routing, rendering modes, bundling, server features, and conventions.

    If you’re deciding whether it fits, ask yourself:

    • Do I need public pages that should load fast and rank well?
    • Do I want SSR/SSG/ISR without building a custom setup?
    • Am I okay with framework conventions (because they’re part of the deal)?

    A small “try it before you commit” exercise: build two pages. Make one a public marketing page and the other an authenticated dashboard page. If you can’t cleanly separate their concerns, you’ll feel the pain later.

    Q: Is NextJS better than React?

    A: Next.js provides additional features like built-in routing and server-side rendering, which can be beneficial for certain web projects compared to using React alone. [Source: en.wikipedia.org]

    It’s not objectively better. It’s better when the features match your needs.

    I usually steer people toward plain React when they’re building something like an internal tool that lives behind login, has minimal SEO requirements, and will be maintained by a small team. Less surface area, fewer framework-specific gotchas.

    On the other hand, I push for Next.js when the app needs:

    • Fast public landing pages (and the team actually cares about first paint)
    • A stable routing story without extra libraries
    • A “full-stack” path—API routes, server rendering, and deployment patterns that are known quantities

    A mistake I’ve watched happen: a team chooses Next.js purely because it’s popular, then fights the framework for months because they really wanted an SPA with everything client-side. If that’s your architecture, it’s not wrong—but you should be honest about it and set up the project accordingly.

    Q: What’s the most common Next.js mistake?

    A: Treating rendering as an afterthought.

    People build pages until they “work,” then later try to bolt on caching, performance, and SEO. Since Next.js decisions are often route-level, you’ll save time by choosing SSR/SSG/ISR upfront and documenting it in your repo.

    Q: How do I keep upgrades from breaking things?

    A: Upgrade in slices.

    Bump Next.js first, fix issues, deploy. Then bump React (if needed), deploy again. Keep each change reviewable, and always have a fast rollback path. This is boring, but it’s how you avoid a week-long “upgrade spiral.”

  • How to Improve Your Credit Card Score This Year

    How to Improve Your Credit Card Score This Year

    Discover effective strategies to enhance your credit card score this year and pave the way for better financial opportunities.

    Understanding Credit Card Scores

    Your credit card score (basically, your credit score) is one of the first numbers lenders use to decide how risky you look. It usually runs from 300 to 850, and higher is better.

    Generally, a good credit card score falls between 700 and 749. If your score is below 600, many lenders will treat that as poor credit, which can mean higher rates, smaller limits, or flat-out denials. Most Americans land somewhere around 600 to 750, which lines up with the “average-ish” credit picture lenders price for in the market (Average Credit Score Statistics 2026).

    What Makes a Good Credit Card Score?

    A “good” score isn’t just bragging rights—it’s usually the difference between getting the decent offer and getting the junky one.

    Here are the big ingredients lenders and scoring models typically care about:

    • Payment History (35%): Pay on time. That’s the whole game. One slip can drag you down.
    • Credit Utilization (30%): This is how much of your available credit you’re using. Keeping it low (many people aim for under 30%) tends to help (What Affects Your Credit Scores?).
    • Length of Credit History (15%): Older accounts give the system more evidence you’re stable.
    • Credit Mix (10%): A blend (cards + installment loans, for example) can help a bit.
    • New Credit (10%): Lots of new accounts can look like you’re scrambling.

    A quick reality check: you don’t need perfection. You need consistency. I’ve seen people claw back 60–100 points mainly by getting utilization under control and stacking months of clean payment history.

    How Do I Find My Credit Card Score?

    You’ve got options, and you should actually use them.

    Start with places that won’t cost you money or ding your score. Checking your own credit is generally safe because it’s not the same as a lender pulling it for an application.

    • Many banks and card issuers show a score in your dashboard.
    • You can also use third-party services (more on those below).
    • For your reports, go straight to AnnualCreditReport.com so you can see what Equifax, Experian, and TransUnion are reporting.

    If your score drops and you don’t know why, your report usually tells the story—high balances, a new inquiry, or a late payment you forgot existed.

    Tips to Enhance Your Credit Card Score

    These are the moves that tend to work in the real world—because they hit the parts of your score with the most weight.

    1. Make Timely Payments

    If you do only one thing this year, do this.

    Aim for 100% on-time payments. Set autopay for at least the minimum, then pay extra manually if you’re paying down debt. That setup has saved me more than once, because it covers you when life gets chaotic.

    Missing even one payment can hurt for a long time. Late payments can stay on your credit report for up to seven years. And yes, it can still sting even if you “only” forgot by a few days.

    One pattern I’ve seen: people pay the card, but they pay the wrong account (or the wrong month) because their issuer has multiple products. So double-check the last four digits before you hit submit.

    For score movement, people who consistently pay on time can see meaningful improvements over time—some sources cite an average increase around 50 points over a year with better habits (How to Improve Your Credit Score).

    2. Keep Balances Low

    Credit utilization is the lever you can pull fastest.

    The basic target many people use is under 30% utilization. If your total limit is $10,000, try to keep the reported balance under $3,000.

    Here’s the part most folks miss: what gets reported is often your statement balance, not what you carry after paying. So if you pay the card in full but you spend heavily and let the statement close high, it can still look like you’re “using a lot of credit.”

    Two practical fixes:
    – Make a mid-cycle payment before the statement closes.
    – Ask for a credit limit increase (only if you won’t use it as permission to spend).

    3. Limit New Credit Applications

    Every hard application can shave points off temporarily.

    Space out applications when you can. If you’re shopping for a car loan or mortgage, rate-shopping windows can work differently than random credit card sprees—but for cards, I keep it simple: don’t apply unless you have a clear reason.

    Also, those “pre-qualify” widgets can be helpful, but they aren’t approval guarantees. I’ve watched people assume they were locked in, apply anyway, then get denied and eat the inquiry.

    4. Check Your Credit Reports Regularly

    If you don’t look, you won’t catch problems.

    You can request reports from Equifax, Experian, and TransUnion. When you read them, don’t just scan the top-line score.

    What I review line by line:
    – Accounts I don’t recognize
    – Late payments I swear never happened
    – Incorrect credit limits (this can mess with utilization)
    – Old collections that should’ve aged off

    If something’s wrong, dispute it quickly and keep screenshots or PDFs of everything you send.

    5. Consider Becoming an Authorized User

    This can work, but it’s not magic.

    If someone you trust has a card with a long history and low utilization, being added as an authorized user can sometimes help your profile. It’s basically borrowing their good habits.

    The risk is obvious: if they start carrying big balances or paying late, you may feel it too. So ask first, and only do it with someone who’s boring about money.

    6. Diversify Your Credit Types

    Credit mix matters, but it’s a small slice.

    If you only have credit cards, an installment loan (like an auto loan) might help down the road. That said, I wouldn’t take on debt just to “build credit.” The interest you pay can cost more than the score bump is worth.

    If you’re already planning a purchase (and can afford it), then sure—structure it in a credit-friendly way. Otherwise, skip it.

    7. Regularly Monitor Your Credit

    Monitoring keeps you honest, and it helps you spot fraud early.

    I like tools that update frequently, because weekly or monthly updates can hide a problem until it’s already expensive.

    You can monitor for free using services like WalletHub. They advertise free daily updates, which is genuinely useful if you’re actively rebuilding or watching for sudden changes (Free Credit Scores, Updated Daily).

    How to Check Your Credit Card Score for Free

    You don’t need to pay for a score. You do need to know what you’re looking at (score vs. report), and you need a simple routine so you don’t drift.

    1. Annual Credit Report

    If I’m doing a “credit cleanup month,” this is where I start: AnnualCreditReport.com.

    A key point: this site is about your credit reports, not always a score. That’s still the gold mine, because the report shows the actual accounts, limits, balances, and payment history that feed your score.

    My step-by-step:
    1) Pull all three reports (Equifax, Experian, TransUnion).
    2) Highlight anything that differs—limits, open dates, or a late payment showing on only one bureau.
    3) Write down your utilization per card (balance ÷ limit).
    4) Dispute obvious errors right away, and set a calendar reminder to follow up.

    Common mistake I see: people check only one bureau, find nothing weird, and assume they’re done. Then they apply for a card and get denied because a different bureau had the ugly item.

    2. Credit Card Issuer Offers

    A lot of issuers show a free score inside your account.

    If you already have a card, log in and look for a “Credit Score” or “Credit Journey” style tab. The upside is convenience; you’ll actually check it.

    One caution: issuers may show different scoring models. Don’t panic if the number doesn’t match what a lender pulls later. Instead, watch the trend and the reasons listed (utilization, payment history, inquiries).

    3. Credit Monitoring Services

    If you want extra guidance, free monitoring can help.

    Services like Discover and Equifax offer ways to check a score and get educational prompts.

    A real example: a friend of mine thought his score was “stuck” in the low 600s. His monitoring tool flagged that one card was reporting at 92% utilization—because he always paid it after the statement closed. He started paying half mid-month, half after the statement, and within two statement cycles the score ticked up. Not glamorous, but it worked.

    4. Mobile Apps

    Apps like Credit Karma make checking your score frictionless.

    That convenience is the point. If you’ll open an app but you won’t log into three different bureau sites, use the app.

    Just don’t fall into the trap of treating the app like a game. The goal isn’t to refresh your score daily—it’s to use the alerts to catch problems (new accounts, weird inquiries) and to confirm your actions (paying down balances) are moving the needle.

    FAQ

    Q: What is a good credit card score?

    A: A good credit card score typically ranges from 700 to 749.

    A nuance that matters: “good” gets you approved for plenty of mainstream products, but the best rates and premium cards often want “very good” or “excellent.” So if you’re sitting at 705, you’re in a solid place—but you might still benefit from trimming utilization or cleaning up one old derogatory item before you apply.

    Q: How do I find my credit card score?

    A: You can find your credit card score through various online platforms offering free checks.

    If you want the practical route, here’s what I’d do in 15 minutes:
    1) Check your card issuer’s dashboard (fastest).
    2) Pull your reports at AnnualCreditReport.com so you can confirm the data is accurate.
    3) Use a monitoring tool if you need reminders and alerts.

    Q: How rare is an 820 credit score?

    A: An 820 score is exceptional and indicates excellent creditworthiness, achieved by only a small percentage of consumers.

    In my experience, the people who get there aren’t “credit hackers.” They’re boring: old accounts, low utilization, and years of no missed payments. If you’re chasing 820, focus on avoiding negatives and keeping balances tiny relative to limits.

    Q: Is a 450 credit score bad?

    A: Yes, a 450 credit score is considered very poor, and it will likely result in difficulties obtaining credit.

    If you’re at 450, I’d stop thinking about “which card should I get” and start thinking triage:
    – Are there recent late payments you can prevent going forward with autopay?
    – Are there collections you need to verify and resolve?
    – Is your utilization maxed, and can you make a plan to get it down?

    I’ve seen 450 turn into the 500s and 600s, but it’s usually a months-long grind, not a weekend fix.

    experts suggest numerous strategies to improve credit scores

  • Understanding Smart Home Technology: Key Terms for 2026

    Understanding Smart Home Technology: Key Terms for 2026

    Explore key terms and concepts related to smart home technology in 2026, enhancing your understanding of modern IoT and automation.

    Understanding the Concept of Category

    Categories are how you keep a smart home from turning into a junk drawer. In smart homes, a category is a practical bucket—devices, systems, or functions that share a job, a set of sensors, or a control style. Because there are thousands of products, categories help you compare “like for like” instead of getting distracted by shiny features.

    Category Meaning

    The category meaning in smart home tech usually comes down to what the device does and where it sits in the system. For example, a smart lock and a smart bulb both connect to your network, but they live in totally different risk zones and failure modes.

    Here’s how I think about it when I’m planning a setup:
    Control surface: app-only, voice, wall switch, automations, or all of the above.
    Dependencies: does it require a hub, cloud account, or a specific ecosystem?
    Blast radius: if it fails, do you lose mood lighting… or the ability to get in the front door?

    That last point matters. People often lump everything into “home automation,” but, in reality, lighting is forgiving while security is not.

    Category Examples

    To make the category idea concrete, here are a few common smart home categories—and what typically lives inside them.

    • Smart Lighting: smart bulbs, smart dimmers, smart switches, LED strips, occupancy sensors. This category is where most people start because the payoff is immediate and the downside is usually minor (worst case, you flip a dumb switch).
    • Security Systems: cameras, video doorbells, contact sensors, motion sensors, sirens, smart locks. This category tends to be more sensitive to Wi‑Fi dead zones and battery maintenance, so you plan coverage first, then buy.
    • Climate Control: smart thermostats, vents, air quality sensors, HVAC integrations. Done right, it saves energy; done wrong, it creates comfort complaints (“Why is my bedroom freezing at 2 a.m.?”).

    A quick real example: I once watched a neighbor buy four different “security” devices that didn’t share a category inside the same ecosystem. Result: four apps, four notification styles, and zero confidence when something actually happened.

    What Is the Meaning of Category Type?

    Category type is the sub-bucket that helps you narrow options inside a category. In smart homes, this often looks like:

    • Device types: sensors vs actuators (a sensor detects; an actuator does something).
    • System roles: controller/hub, endpoint device, or bridge.
    • Function types: security, energy management, health monitoring, entertainment.

    So, for example, “security” is a category, while “entry sensor” and “smart lock” are category types. Since these types behave differently, you’ll install them differently too—entry sensors want clean door alignment, while locks need stable power and a solid radio link.

    Examples and Usage of Category

    If you can say the category out loud, you can usually design the automation without guessing. That’s the real win.

    Here are a few realistic ways categories show up when you’re planning or troubleshooting:
    – “The smart lighting category is easy to automate, but only if the wall switch still has power to the bulbs.”
    – “In the security category, I’m choosing fewer devices with better placement, because false alerts train you to ignore notifications.”
    – “For the automation category, I’m starting with one routine that saves friction every day—then I’ll add more.”

    A simple step-by-step I use when someone asks, “What should I buy first?”
    1. Pick one category with a clear goal (lighting comfort, basic security, energy savings).
    2. List the category types you actually need (for security: door sensor + camera is often enough to start).
    3. Confirm dependencies (hub, subscription, or cloud requirement) before checkout.
    4. Only then compare brands and features.

    Common mistake: people shop by “Top Rated” without realizing they’re mixing categories and ecosystems, then they blame the tech when the real issue is the plan.

    Smart Home Technology Meaning

    Smart home technology meaning is broader than “things on Wi‑Fi.” It’s the combination of connected devices, software, and rules that let your home sense what’s happening and respond in a useful way.

    In practice, a smart home includes:
    Smart Devices: bulbs, thermostats, sensors, locks, cameras—endpoints that either collect data or take action.
    Automation: schedules, routines, scenes, and event-based triggers that reduce manual taps.
    IoT Integration: the connectivity and data exchange that lets devices coordinate rather than operate as islands.

    The market growth is a big reason you’re seeing more options (and more jargon). With projections indicating that the smart home market will reach $180.12 billion by 2026 (Fortune Business Insights), it’s not a niche anymore—it’s a mainstream buying decision.

    One grounded way to test whether something is truly “smart”: if the internet goes out, does the home still behave safely and predictably? If the answer is no, I treat that device as convenience-only, not core infrastructure.

    Understanding IoT in Smart Homes

    The Internet of Things (IoT) is the underlying idea that everyday devices can connect, share data, and be managed over a network. In smart homes, IoT is why a motion sensor can tell a light to turn on, or a door lock can notify you when a kid gets home.

    What IoT looks like at home

    You’ll see IoT show up as:
    Smart Thermostats: adjust heating/cooling based on schedules, geofencing, or learned patterns.
    Smart Lights: change brightness/color remotely, and slot into scenes like “Movie time.”
    Security Cameras: stream live video and send alerts when they detect motion.

    But IoT isn’t magic—it’s networking plus software. So, because everything depends on connectivity, your router and Wi‑Fi layout quietly become part of your smart home “stack.”

    A quick checklist before you add devices

    If you want fewer headaches, do this first:
    1. Walk your house and note dead zones (phone Wi‑Fi dropping is a clue).
    2. Put cameras and doorbells on the best signal, not the edge of coverage.
    3. Separate “nice to have” devices from “must work” devices.

    A mistake I see a lot: people buy an IoT camera, mount it outside, then realize the metal door frame and brick kill the signal. The device wasn’t bad; the placement was.

    Automation in Smart Homes

    Automation is where smart homes either become delightful or unbearably annoying. Good automation removes repeated decisions. Bad automation creates surprises.

    Three automation building blocks

    Most automations fall into a few patterns:
    Scheduling: “At 10:30 p.m., turn off downstairs lights.” Simple, reliable.
    Triggers: “If motion is detected, turn on the hallway light.” Great when tuned.
    Remote Control: phone app or voice commands when you’re away.

    Because triggers can misfire, I usually start with schedules and scenes, then layer sensors once the household trusts the system.

    A step-by-step automation I actually recommend

    If you want one automation that earns its keep, try a night routine:
    1. Create a scene: lock doors, turn off main lights, dim bedroom lights to 20%.
    2. Add a schedule: run at a time you’re usually winding down.
    3. Add one safety condition: only run if someone is home.
    4. Test for a week, then tweak brightness/timing.

    Common mistakes:
    – Over-automating day one, then spending weekends debugging.
    – Using motion sensors where stillness is normal (couches, desks), which leads to lights going out at the worst time.
    – Forgetting manual overrides—if a wall switch kills power to smart bulbs, automations “fail” even though the system is fine.

    Conclusion

    If you take one thing into 2026, make it this: smart home terms aren’t trivia—they’re how you avoid buying a pile of incompatible gear.

    Here’s a practical next step I give people (and it’s boring on purpose). Pick one category to improve this month, then write a tiny plan on a note:
    1) What’s the goal? (“Stop fumbling for lights at night.” “Know when the front door opens.”)
    2) Which category types do you need? (lighting: switch + sensor; security: contact sensor + camera)
    3) What dependencies are acceptable? (hub, subscription, cloud-only)
    4) What happens when Wi‑Fi is down—does it fail safe?

    A real scenario: a friend of mine installed a smart lock first because it felt “high impact.” But since their Wi‑Fi was weak at the door, the lock lagged and they started carrying keys again. We moved the router, added a mesh node, and suddenly the whole security category became reliable.

    If you want a plain-English baseline for what counts as a smart home, start with What is a Smart Home?. Then sanity-check your expectations against bigger market trends like Smart Home Statistics and Facts (2026). Finally, when you’re ready to spec features (not just devices), skim 5 Must-Have Features for a Smart Home in 2026—and keep your categories tight so the system stays livable.

  • How to Build a Creative Website in 2026

    How to Build a Creative Website in 2026

    Learn how to create a creative website from scratch with our step-by-step guide tailored for beginners and entrepreneurs in 2026.

    Featured image for How to Build a Creative Website in 2026: A Step-by-Step Guide

    Step-by-Step Guide: How to Build Creative Websites from Scratch

    Creating a creative website can feel daunting, especially if you’re just starting out. But if you work in a sensible order—strategy, structure, design, then polish—you’ll avoid the usual rework loop.

    If you want a solid “what does the whole process look like?” reference, this overview is worth skimming: Web Design Process From Start To Finish in 2026. Then come back here and build.

    Define Your Website’s Purpose

    Before you touch colors, fonts, or a builder, get painfully clear on the job your site must do. Otherwise, every design decision turns into vibes.

    Ask yourself:
    – What is the primary goal of the website? (e.g., showcase work, sell products, share information)
    – Who is your target audience—specifically? “Everyone” is how you end up with a site that helps no one.
    – What action should a visitor take in 30 seconds?

    A quick way I do this is a one-sentence homepage promise:

    “I help X do Y without Z.”

    Example: If your goal is to showcase your artwork, your website needs to highlight your portfolio, show context (materials, size, year), and provide an easy path to contact or purchase.

    Common mistake: People design for themselves, not the visitor. If your nav says “My World” and “Stuff,” you’re forcing strangers to decode you. Swap that for “Work,” “About,” and “Contact,” then get creative inside the page.

    Choose a Domain Name

    Selecting a domain name is a critical step in establishing your online presence. Aim for a name that is:
    Memorable: Short and easy to remember.
    Relevant: Reflects your brand or the content you plan to share.
    Simple to Spell: Avoid weird spelling unless you enjoy losing traffic to typos.

    There are numerous platforms where you can purchase your domain, like GoDaddy or Namecheap.

    A practical checklist before you buy:
    1. Say it out loud to a friend once. If they ask you to repeat it, it’s too complicated.
    2. Type it on mobile. If autocorrect mangles it, rethink.
    3. Avoid hyphens unless you absolutely must.
    4. If you’re a student/portfolio, your-name dot com still works. Boring wins.

    Common mistake: buying a domain after you print business cards. Secure the domain early, even if the site is a one-page “coming soon” for a week.

    Select a Website Builder or CMS

    For beginners, using a website builder can simplify the process significantly. Here are some popular options:
    Wix: Known for its drag-and-drop capabilities, making it user-friendly.
    Squarespace: Great for designs and templates focused on visual appeal.
    WordPress: Offers extensive customization options, ideal for those who might later want to scale or add functionalities.

    Here’s my opinionated take: pick based on how often you’ll update content.

    • If you’ll post regularly (projects, blogs, case studies), WordPress tends to pay off because you can grow into it.
    • If you need a clean brochure site fast, Squarespace is hard to beat.
    • If you want to experiment and iterate visually, Wix can be fast—just be careful with bloat.

    Common mistake: choosing a platform because a template looks cool, then realizing you can’t add the features you need (booking, shop, gated downloads) without rebuilding. Make a “must-have” list first.

    Design the Layout

    Once you have your website builder, it’s time to design your layout. Keep in mind the seven principles of web design:
    1. Context: Ensure your content is displayed in a way that is easy to digest.
    2. Content: Quality content is essential; it engages visitors and encourages them to explore.
    3. Community: Consider creating areas for visitors to interact, such as comment sections or forums.
    4. Customization: Allow users to personalize their experience, such as choosing themes or layouts.
    5. Communication: Ensure clear communication through navigation and content.
    6. Connection: Create connections with your audience through storytelling and personal branding.
    7. Commerce: If applicable, make it easy for users to make purchases or donations directly through the site.

    Instead of designing page-by-page, design systems:
    – A header that works on desktop and mobile
    – A repeatable section style (hero, gallery, testimonial, FAQ)
    – A button style and a link style

    Then build these core pages first:
    – Home (promise + proof + next step)
    – Work/Portfolio or Services (what you actually offer)
    – About (credibility + personality, not your life story)
    – Contact (one clear method, maybe two)

    If you want inspiration without copying, this roundup helps: 10 Personal Website Examples to Inspire Your Own in 2026.

    Common mistake: cramming everything above the fold. You don’t need five CTAs, a slider, three taglines, and a full bio at the top. Pick one action and support it.

    Optimize for SEO

    Search Engine Optimization (SEO) is crucial for ensuring that your website is discoverable on search engines. Here are some basic SEO practices to follow:
    Keyword Research: Identify keywords relevant to your content and integrate them naturally.
    Meta Tags: Use appropriate title tags, meta descriptions, and headers.
    Content Quality: Create valuable content that answers your audience’s questions.
    Mobile Responsiveness: Ensure your website performs well on mobile devices, as it is a significant ranking factor.

    A simple SEO workflow that actually works for new sites:
    1. Pick one primary topic per page. Don’t try to rank a single page for everything.
    2. Write the H1 like a human (clear), then use H2s to break down subtopics.
    3. Add internal navigation that matches what people look for (“Pricing,” “Process,” “FAQ”).
    4. Use descriptive image filenames and alt text (especially for portfolio sites).
    5. Make sure the site is fast enough on mobile—heavy video backgrounds are a classic self-own.

    If you want a reality check on what tends to work (patterns, not magic), this is interesting: I Studied 1,000 Websites, Here’s What Works in 2026.

    Common mistake: writing for Google and forgetting the visitor. If the page reads like a pile of keywords, people bounce, and you lose anyway.

    Test Your Website

    Before launching your website, conduct thorough testing:
    – Check for broken links.
    – Test navigation across different devices.
    – Confirm that all forms and CTAs (calls-to-action) work correctly.

    Here’s the quick “I’m about to launch” checklist I use:
    – Open the site on iPhone + Android (or at least Chrome responsive view).
    – Fill out your own contact form and confirm you receive it.
    – Click every nav item and footer link.
    – Check typography: headings aren’t wrapping awkwardly, line length isn’t a mile wide.
    – Run one speed test, then fix the obvious stuff (giant images are usually the culprit).

    Common mistake: testing only on your laptop, on your own Wi‑Fi. Your visitors aren’t you.

    Launch and Promote

    Once your site is polished and tested, it’s time to launch! Share your website on social media, email newsletters, and other channels to drive traffic to your new site. Consider collaborating with influencers or bloggers in your niche to reach a wider audience.

    A practical launch plan for a first-time creator:
    – Day 1: Publish, then send it to 5 people who will actually click it (friends, mentors, past clients).
    – Day 2: Post one short “what I do + link” on the platform you already use.
    – Day 3: Update your email signature and any bios (LinkedIn, Instagram, GitHub, etc.).
    – Week 1: Add one piece of content that supports your offer (a case study, a process page, or a project breakdown).

    If you want to see how someone documents the work, not just the final pretty screenshots, read: Case study: Process of designing a website from scratch.

    Regular Updates and Maintenance

    After launching, it’s essential to keep your website updated. This includes:
    – Regularly posting new content.
    – Keeping plugins and themes updated.
    – Monitoring site performance and making necessary improvements.

    Treat maintenance like brushing your teeth—small, regular, non-negotiable.

    A lightweight rhythm:
    – Weekly: scan for broken stuff (forms, checkout, key pages).
    – Monthly: update plugins/themes, add one new portfolio item or post.
    – Quarterly: refresh your homepage proof (testimonials, metrics, latest work).

    Common mistake: “set it and forget it.” A stale portfolio is worse than a small one, because it quietly signals you’re not active.


    Essential Principles of Creative Web Design

    Creative web design goes beyond aesthetics; it incorporates user experience and functionality. These principles are the difference between “nice Dribbble shot” and “site that converts.”

    If you’re tracking trends for inspiration, do it with a filter. Start here, then pick one trend—not five: Web Design Trends in 2026 and Website Design Trends for 2026.

    Start with the user journey

    • User-Centric Design: Always start with the user’s needs in mind. Understand their journey and design your website to facilitate it.

    Here’s the simple version: map 3 visitor intents.

    Example persona (realistic):
    – A recruiter wants to see your best work in 60 seconds.
    – A potential client wants pricing or at least a budget range.
    – A collaborator wants to know your tools, style, and how to reach you.

    Step-by-step, sketch the path:
    1. Entry page (often Home or a shared project link)
    2. Proof (portfolio items, testimonials, results)
    3. Trust (about, process, clients)
    4. Action (contact form, booking link, buy button)

    Common mistake: hiding the action. If someone has to hunt for your email, you’re losing opportunities for no good reason.

    Use hierarchy, not decoration

    • Visual Hierarchy: Use size, color, and layout strategically to guide users’ attention.

    I like to test hierarchy with a brutal trick: blur your page (or squint). You should still see:
    – What the page is about
    – What matters most
    – What the next step is

    If everything screams at once—big headings, loud colors, busy backgrounds—nothing stands out.

    Common mistake: using five font weights and three button styles because the template offers them. Pick a small type scale and stick to it.

    Brand consistently, page to page

    • Consistent Branding: Ensure colors, fonts, and imagery align with your brand identity across all pages.

    Consistency is what makes “creative” feel intentional instead of chaotic.

    A practical setup:
    – 1 primary font + 1 accent font (optional)
    – 2 core colors + neutrals
    – A repeatable image style (same crop ratio, similar lighting)

    Mini anecdote: I once watched a student portfolio lose an internship lead because the UI looked like three different sites stitched together—dark theme homepage, pastel project pages, then a neon contact page. The work was good. The presentation wasn’t.

    Make accessibility non-negotiable

    • Accessibility: Your website should be usable for everyone, including individuals with disabilities. This includes providing alt text for images and ensuring good color contrast.

    Accessibility also helps everyone else—especially on mobile, in sunlight, or when someone’s rushing.

    A quick checklist:
    – Use real headings (H1, H2, H3), not just bigger text.
    – Ensure contrast is readable.
    – Add alt text that describes the image’s purpose, not just “image.”
    – Make tap targets big enough (buttons shouldn’t be tiny).

    Common mistake: light gray text on a white background because it “looks minimal.” It looks minimal because it’s hard to read.

    Keep content engaging and specific

    • Engaging Content: Keep your audience engaged with high-quality content and interactive elements.

    “High-quality” doesn’t mean long. It means specific.

    Instead of “I design modern websites,” write:
    – What you design (landing pages, portfolios, ecommerce)
    – For whom (coaches, indie shops, SaaS)
    – What results you aim for (more bookings, clearer positioning)

    If you add interactivity (animations, video), make sure it supports the story. Otherwise it’s just weight.


    Conclusion

    Building a creative website in 2026 is a lot more doable than it used to be, but the same rule still applies: clarity beats clever.

    If you only do three things this week, do these:
    1. Write your homepage promise in one sentence, then delete anything that doesn’t support it.
    2. Build the four core pages (Home, Work/Services, About, Contact) before you obsess over extras.
    3. Test on mobile early—because fixing layout after you’ve poured content in is miserable.

    A real example: a small photographer I helped last year had a gorgeous site… that loaded a 14MB hero image on mobile. The work looked premium, but the experience felt broken. We compressed images, simplified the homepage, and put a clear “Book a shoot” button in the header. Bookings didn’t magically double overnight, but inquiries became consistent within two weeks because the site stopped getting in its own way.

    So take the next step: pick your platform, draft your page structure, and publish a simple version fast. You can always refine—but you can’t improve a site that isn’t live.

    FAQ

    • Q: How to create a creative website?
      A: Start by defining the purpose, choose a domain, select a builder, design the layout, and optimize for SEO. Then add personality in the details—copywriting, project storytelling, and consistent visuals.

    A quick step-by-step that keeps you honest:
    1) Draft nav labels in plain language. 2) Create one strong homepage section per idea. 3) Add 3–6 portfolio items with context. 4) Put one clear CTA on every key page.

    • Q: What are the 7 C’s of website design?
      A: Context, Content, Community, Customization, Communication, Connection, and Commerce.

    If you’re stuck, use them as a review checklist. For example, “Communication” often fails when the contact page has no CTA, or when service descriptions are vague.

    • Q: Can ChatGPT actually create a website?
      A: ChatGPT can provide guidance, tips, and code snippets, but it cannot directly build a website.

    Where it helps: drafting page copy, generating content outlines, brainstorming section ideas, and writing starter HTML/CSS. Where it doesn’t: choosing what’s strategically right for your audience, or making design taste decisions that fit your brand.

    • Q: What are the five golden rules of a website?
      A: Clear purpose, mobile responsiveness, straightforward navigation, effective SEO, and engaging content.

    One more that I’d personally add: make it maintainable. If updating your site feels like a chore, you won’t do it—and the site will quietly decay.

    Web Design Process From Start To Finish in 2026
    I Studied 1,000 Websites, Here’s What Works in 2026
    10 Personal Website Examples to Inspire Your Own in 2026
    Case study: Process of designing a website from scratch
    Web Design Trends in 2026
    Website Design Trends for 2026

  • Step-by-Step Guide to Setting Up Your Laptop for SEO

    Step-by-Step Guide to Setting Up Your Laptop for SEO

    Learn how to set up your laptop for SEO effectively with this practical guide. Discover the best laptops and tips to enhance your SEO workflow.

    Featured image for Step-by-Step Guide to Setting Up Your Laptop for SEO

    Preparing Your Laptop for SEO

    Your laptop for SEO work should feel invisible. Not in a “minimalist aesthetic” way—more like it doesn’t lag when you’re switching between a crawl, a keyword export, and a doc you’re editing live on a call.

    I’m picky here because I’ve lived the messy version: a mid-range laptop that looked great on paper, then collapsed under real-world multitasking.

    What to Look for in the Best Laptop for SEO

    Here’s what actually matters for day-to-day SEO (and why). I’m not chasing benchmarks—I’m chasing fewer slowdowns.

    • Processor: At least an Intel Core i5 or AMD Ryzen 5 so you can run crawling tools, heavy spreadsheets, and browsers without constant stutter. Faster cores help when Screaming Frog is chewing through JavaScript-heavy pages.
    • RAM: 16GB minimum, 32GB if you can. The jump from 8GB to 16GB is life-changing for SEO because Chrome alone can bully your memory. 32GB is what I recommend if you do technical audits weekly or keep multiple profiles/windows open.
    • Storage: SSD only. Aim for 512GB so you’re not playing Tetris with exports, client backups, and recordings. If you’re crawling big sites, those files add up fast.
    • Display: Full HD minimum. If you’ve ever tried comparing SERPs, GSC queries, and a content brief on a cramped low-res panel, you know why.
    • Battery Life: 8 hours real-world. “Up to 14 hours” marketing numbers don’t count if your battery drops 20% on a Zoom call.

    A quick reality check: if you’re mostly doing on-page + content, you can get away with lighter specs. If you’re doing technical SEO, running crawls, and living in sheets, you’ll feel every corner you cut.

    Some solid picks people consistently land on include the Dell XPS 15 for performance and screen quality, and the Lenovo ThinkPad X1 Carbon if you care about a keyboard that doesn’t make writing feel like punishment.

    Recommended Laptops for SEO

    I’m not going to pretend there’s one “best” laptop—your work style decides. Still, these are common winners for a reason.

    1. Dell XPS 15: The choice when you want headroom. Great for running multiple SEO tools, exporting large CSVs, and still having enough left to do light design or video work when needed.

    2. Lenovo ThinkPad X1 Carbon: My “writer-analyst” pick. If you spend hours in docs, briefs, and spreadsheets, the keyboard and build quality matter more than you think.

    3. HP Spectre x360: Useful if you like switching modes—laptop for writing, tablet-ish for reviewing pages or marking up screenshots. Not everyone needs this, but some people love the flexibility.

    4. Dell XPS 13: Portable without feeling flimsy. If you travel or work in cafés, smaller can be better—as long as you don’t cheap out on RAM.

    Here’s a mistake I see: people buy a thin laptop with 8GB RAM because “SEO is just browsing.” Then they add Ahrefs, Semrush, a crawler, a rank tracker tab, Loom recordings, and Slack. Suddenly the laptop is paging memory all day. You don’t notice it immediately, but you lose hours over a month.

    Learn About SEO

    Your hardware helps, but your workflow and sources matter more. I’d rather have a decent laptop and sharp process than a premium laptop and random tactics.

    Watch SEO Tutorial Videos

    YouTube can be a goldmine or a dumpster fire, so I’m selective. A structured starting point is the SEO Full Course 2026 by Simplilearn.

    The way I’d use a long course like that isn’t “watch it once and feel productive.” Instead:

    • Watch at 1.25x and take notes only on things you can apply this week.
    • Pause when they mention a concept (like search intent or internal linking) and test it on one page you control.
    • Build a tiny checklist from it—five items max—so you’re not drowning in theory.

    Enroll in Online Courses

    Courses work when they force you to ship something. Coursera-style structured courses can be great if you treat assignments like client work.

    A practical approach: pick one site (your own, a friend’s, or a demo project), and run the course tasks against it. Otherwise, it’s too easy to finish a course and still freeze when you face a real audit.

    Also, don’t stack three courses at once. One course + one weekly habit (like writing one brief or auditing five pages) beats “learning” for six weeks straight.

    Read SEO Blogs and Resources

    If you want to stay current, you need a couple of reliable sources you revisit. I still send people to Backlinko for clear explanations and actionable breakdowns, and Moz when you want solid fundamentals and industry context.

    A routine that’s worked for me: once a week, read one post and extract one thing you’ll test. Not “save it to bookmarks.” Actually test it.

    The common trap is doom-scrolling SEO news. If every update makes you rewrite your whole strategy, you weren’t running a strategy—you were chasing vibes.

    Preparing Your Laptop for SEO Work

    This is the part most guides skip: the small setup choices that stop your day from getting derailed. I’m going to treat this like I’m onboarding a new teammate.

    Set up your core tools

    Start with a clean, intentional baseline. Don’t install twenty extensions “just in case.” You’ll forget what half of them do, and your browser will get weird.

    1. Install a primary browser (or two): I like Chrome for compatibility, plus a second browser profile (or a second browser like Edge) for testing logged-out vs logged-in experiences.
    2. Install your SEO toolset: Google Analytics, SEMrush, Ahrefs, and Screaming Frog SEO Spider are common staples because they cover research, tracking, and crawling.
    3. Add a password manager: This isn’t optional if you work with multiple client logins. It also reduces the “where did I store that?” problem.
    4. Install a screenshot + annotation tool: You’ll communicate issues faster with marked-up screenshots than with paragraphs of explanation.

    Real example: I once watched an SEO lose 30 minutes on a client call because they couldn’t find the crawl export they promised. The issue wasn’t skill—it was a downloads folder full of “final-final(3).csv.” Tooling didn’t save them. Organization did.

    Organize files and folders (for real)

    A folder structure sounds boring until you’re under pressure. Here’s a structure that’s simple enough to stick to:

    • /Clients/ClientName/01-Discovery
    • /Clients/ClientName/02-Audits
    • /Clients/ClientName/03-Keywords
    • /Clients/ClientName/04-Content
    • /Clients/ClientName/05-Reports

    Inside each, I name files with dates: 2026-08-SEO-Audit-Export.csv. That date prefix is a cheat code. Sorting becomes automatic.

    Common mistake: storing everything in Google Drive with no local structure. It works…until you need to work offline, share a specific set of files, or compare “this month vs last month” quickly.

    Update your OS and software

    Updates aren’t just security theater. They fix bugs that break your day—Wi‑Fi drops, browser crashes, weird PDF behavior, you name it.

    My routine:

    1. Update OS.
    2. Update browser(s).
    3. Update your crawler tools.
    4. Reboot.

    Yes, reboot. People skip that step and then wonder why the laptop feels haunted.

    Back up your data

    Backups are one of those “I’ll do it later” tasks—until later becomes panic.

    At minimum:

    • Keep working docs in cloud storage (Google Drive or Dropbox).
    • Keep tool exports in a local folder that syncs.
    • Once a month, create an offline backup to an external drive.

    If you’re dealing with client data, treat your laptop like it will be stolen tomorrow. Because sometimes it is.

    How to Prep a Laptop Before Selling

    If you’re upgrading, don’t treat selling your old laptop like wiping a phone. Laptops often contain years of browser sessions, client files, saved passwords, and API keys.

    Do a clean exit checklist

    Here’s the sequence I follow, because I’ve seen people do it in the wrong order and regret it.

    1. Inventory what matters: Check your browser downloads, desktop, documents, and any “SEO Exports” folder you’ve built. These are the places people forget.
    2. Back up your data: Use a cloud service or an external drive. Then open a few files from the backup to confirm they’re real and not corrupted.
    3. Sign out everywhere: Google accounts, password managers, Slack, email clients, and any rank tracking tools.
    4. Deauthorize the device: If your password manager or security tools have device management, remove the laptop.

    Then you wipe.

    Factory reset (and do it properly)

    A basic reset is sometimes not enough, especially if you stored sensitive work locally. Microsoft’s guidance is a solid reference point for doing a full reset the right way: Microsoft’s official guide.

    Two common mistakes I’ve seen:

    • People reset, then remember they forgot to back up their browser bookmarks and saved templates. Do the inventory first.
    • People assume “Delete files” is unrecoverable. If you’re selling to a stranger, you want a reset method that actually reduces recoverability.

    If you’re not sure, ask someone technical to sanity-check the steps. This is one of those areas where confidence can be expensive.

    Clean it physically and prep it for resale

    This part is simple, but it affects value and trust.

    • Wipe the screen and keyboard (gently).
    • Remove stickers if you can without leaving goo.
    • Take clear photos in daylight.
    • Include the original charger if possible.

    Tiny anecdote: a friend of mine listed a laptop “like new” but shipped it with a grimey keyboard. The buyer returned it immediately. Ten minutes of cleaning would’ve saved the whole sale.

    Conclusion

    The right laptop setup for SEO is the one that stays fast, organized, and secure when your workload spikes. Specs matter, but your day-to-day system matters more.

    If I had to prioritize, I’d spend on RAM, SSD storage, and a screen you can stare at for hours. Then I’d set up folders, backups, and a small stack of tools you actually use. That combo is what keeps you consistent.

    Pick a laptop like the Dell XPS 15 or Lenovo ThinkPad X1 Carbon if you want reliable performance, then commit to a setup you can maintain. Your future self will thank you the next time a deadline hits.

    FAQs

    Q: Which laptop is best for SEO?
    A: A laptop with 16GB+ RAM, an SSD, and a solid CPU will handle most SEO work well. Popular options include the Dell XPS 15 and Lenovo ThinkPad X1 Carbon.

    Q: What is the 80/20 rule in SEO?
    A: It’s the idea that a small set of actions (like fixing indexation issues or improving a few high-traffic pages) often drives most of your results.

    Q: Is SEO dead or evolving in 2026?
    A: It’s evolving. The fundamentals still matter, but the tactics change—so you keep learning, testing, and measuring.

    Q: How to prep a laptop before selling?
    A: Back up your data, sign out/deauthorize accounts, do a proper factory reset, then clean the device and package it well.

    About Me

    I’m Mobeen Abdullah, the founder of Nextly, and my day job revolves around speeding up workflows—mostly for developers, but the same mindset applies to SEO. If your tools and machine get in your way, you ship less. Simple.

    A lot of this guide comes from seeing smart people get tripped up by boring stuff: no backup plan, messy exports, and laptops that look “powerful” until you run a crawler and a sheet side by side.

    My bias is toward setups that are repeatable and easy to maintain. I’d rather have five tools I trust than fifteen tools I barely understand. So if you take one thing from this, take the boring parts seriously: folders, updates, backups, and a baseline tool stack you can explain to someone else.

    If you want a next step, don’t buy anything yet—open your laptop and do the prep checklist first. You might already have what you need.

  • Best Laptops for Remote Work in 2026

    Best Laptops for Remote Work in 2026

    Discover the best laptops for remote work in 2026, featuring top brands and reliable models.

    Featured image for Best Laptops for Remote Work in 2026

    Best Laptops for Remote Work in 2026

    I’m Mobeen Abdullah, and as a founder focused on open-source development and software engineering, I’ve spent years evaluating tools that enhance productivity for remote workers, business professionals, and students. I’ve bought the “perfect on paper” laptop before, then regretted it after two weeks of video calls and daily typing—so I’m picky now, especially about keyboards, thermals (fan noise), and the stuff reviewers love to skip.

    Remote work has become intrinsic to how we operate daily. Whether you’re joining meetings, collaborating on projects, or managing tasks, the right laptop can make a significant difference in your efficiency and productivity. A remote-work laptop isn’t just CPU + RAM; it’s camera placement, mic quality, screen glare in daylight, and whether you can plug in a second monitor without a dongle circus.

    Before we get into models, here’s a quick way I sanity-check any shortlist:

    • Keyboard + trackpad: If you type for hours, this matters more than benchmark charts.
    • Webcam + mics: You can’t “upgrade” these later, and bad audio kills meetings.
    • Battery + charger: If it can’t survive a coffee shop session, it’s not remote-work friendly.
    • Ports: One USB-C port sounds fine… until you need to charge and present and use a mouse.

    Best Laptops for Personal Use in 2026

    When it comes to personal laptops, the focus is typically on versatility, performance, and user experience. I also care about “grab-and-go” reality: can you toss it in a bag, open it in a cramped seat, and not hate your life?

    Dell XPS 13

    One standout in the personal laptop category is the Dell XPS 13. It remains a favorite due to its compact design, powerful performance, and stunning display. With options for 12th Generation Intel processors, a minimum of 16GB RAM, and up to 1TB SSD, it’s perfect for multitasking. It also boasts over 10 hours of battery life, which is essential for those working from various locations throughout the day.

    What I like about the XPS line (when you get a good unit) is that it feels like a “real tool.” The chassis is tight, it travels well, and it doesn’t scream gamer laptop in a client meeting. That said, I’ve seen people buy a thin-and-light and then get surprised by heat and fan noise during long calls—especially if you’re screen-sharing while running a bunch of browser tabs. So, if you live in Zoom/Meet all day, I’d prioritize the configuration that stays cool under sustained load, not just the highest spec.

    A small workflow tip: if you’re the type who docks at home, test your monitor setup early. I’ve watched a teammate burn two weeks blaming their monitor when it was actually a flaky USB-C adapter. Remote work is full of dumb little friction points like that.

    For more on personal laptops, check out The Independent’s 2026 reviews.

    MacBook Air M5

    The MacBook Air M5 is another top contender, especially for creatives. It features Apple’s latest M5 chip and is highly praised for its exceptional battery life, often exceeding 15 hours, making it suitable for long work sessions. Its lightweight design and retina display make it attractive for those who need portability without sacrificing performance.

    If your remote work includes design tools, video editing, or you just like a machine that doesn’t turn into a space heater, this is the classic “calm laptop” choice. The big win is consistency: you unplug, you work, and you stop thinking about your battery percentage every 30 minutes.

    But I’ll be blunt about the tradeoff: macOS is incredible for many workflows, yet it can be annoying if your company lives in Windows-only tooling, legacy VPN clients, or you rely on niche hardware drivers. I’ve seen folks buy a MacBook for the battery, then spend months fighting one corporate requirement. If you’re in that boat, confirm your must-have apps first.

    Best Laptops for Business and Personal Use

    For business applications, reliability and performance take precedence. I also put “supportability” in this bucket: the laptop you can get repaired quickly beats the exotic model nobody stocks parts for.

    Lenovo ThinkPad X1 Carbon Gen 10

    The Lenovo ThinkPad X1 Carbon Gen 10 is a robust choice for professionals. Known for its durability and strong security features, it offers a long battery life and a comfortable keyboard, which is crucial for those who engage in extensive typing. With options for up to 32GB RAM and a high-resolution display, it balances performance with portability well.

    ThinkPads earn their reputation the boring way—by surviving real work. If you write proposals, do lots of email, live in spreadsheets, or code for hours, the keyboard feel is a serious advantage. I’m biased toward machines that don’t fight you, and the X1 Carbon tends to stay out of the way.

    A quick real-world story: I once helped a contractor who kept missing client call notes because their keyboard layout drove them nuts (tiny arrow keys, awkward page navigation). They thought they needed more CPU. They didn’t. They needed a keyboard they could use at speed. That’s the kind of “business laptop” detail that actually moves the needle.

    You can learn more about this model and others at RTINGS’ comprehensive reviews.

    HP OmniBook 5

    For the budget-conscious professional, the HP OmniBook 5 is an excellent option. It provides solid performance with an Intel i5 processor, 16GB RAM, and a 512GB SSD, all at a competitive price point. It’s designed for efficiency, making it a great fit for remote teams and individual business owners alike.

    Here’s what I like about sensible budget business laptops: you can spec them “good enough,” then spend the saved money on the stuff that upgrades your whole workflow—an external monitor, a decent webcam light, or a comfortable chair. Those upgrades pay rent every single day.

    The common mistake I see is going cheap on RAM or storage, then wondering why everything stutters six months later. That’s why 16GB RAM and an SSD (like 512GB) are the floor I’d aim for if you multitask at all. A remote day is never “one app at a time,” and your laptop shouldn’t pretend it is.

    Check out more budget-friendly options at CNET’s latest picks.

    Top 10 Laptops for 2026

    Here’s a curated list of the top 10 laptops for 2026 that cater to different needs and budgets:

    1. Dell XPS 13 – Best for Personal Use
    2. Apple MacBook Air M5 – Best for Creatives
    3. Lenovo ThinkPad X1 Carbon Gen 10 – Best for Business
    4. HP OmniBook 5 – Best Budget Choice
    5. Asus ZenBook 14 – Best Ultraportable
    6. Microsoft Surface Laptop 5 – Best for Students
    7. Acer Swift 5 – Best Performance for Price
    8. Razer Blade Stealth 13 – Best Gaming Ultrabook
    9. HP Spectre x360 – Best 2-in-1 Option
    10. Lenovo Yoga 7i – Best Value Convertible

    These models represent a blend of performance, reliability, and versatility—essential factors for a successful remote work setup.

    If you’re trying to pick from a list like this without overthinking it, I’d do it like this:

    • You move around a lot (coffee shops, coworking, travel): prioritize weight, battery, and screen brightness.
    • You present constantly (sales, consulting, teaching): prioritize webcam/mics and port flexibility for projectors/HDMI situations.
    • You build things (dev, design, video): prioritize sustained performance and enough RAM so the machine doesn’t choke mid-flow.

    Also, don’t ignore ergonomics. If you’re remote, you’ll end up typing more than you think—chat, docs, tickets, notes, DMs. A good keyboard isn’t a luxury; it’s injury prevention.

    Budget Laptops for 2026

    If you’re on a budget, you don’t have to compromise on quality. 2026 offers plenty of affordable options, but you do need to shop with your eyes open.

    • Acer Chromebook Plus 514 – Ideal for basic tasks and students, it’s light on the wallet and offers excellent battery life.
    • ASUS VivoBook 15 – A powerful yet affordable Windows laptop with a decent performance for everyday tasks.

    Here’s the part people gloss over: “budget” is only cheap if it doesn’t waste your time. If your laptop freezes during calls or takes forever to wake, you’ll pay in frustration. So, match the machine to the job.

    Chromebooks can be great for docs, email, and browser-based work. But if your remote setup depends on specific desktop apps, local development, or heavier multitasking, you might outgrow ChromeOS quickly. Meanwhile, a budget Windows laptop can cover more scenarios, yet it can also come with bloatware and questionable build quality. If you buy one, spend the first hour uninstalling junk and running updates—do it before you depend on it.

    For detailed insights into the best budget laptops available, refer to CNN Underscored’s reviews.

    FAQs about Laptops in 2026

    Q: Which generation of laptop is best in 2026?

    A: The 12th generation Intel and AMD Ryzen processors offer the best performance in 2026.

    One practical angle: look for performance that stays stable on battery. Some laptops feel fast plugged in, then throttle hard when unplugged. If you’re remote, you’re unplugged more than you expect.

    Q: What is the most reliable laptop brand in 2026?

    A: Brands like Dell, Apple, and Lenovo are consistently rated high for reliability.

    Reliability also includes service experience. If you’re buying for work, check warranty options and turnaround times in your region. A “reliable” laptop that takes three weeks to repair can still wreck your month.

    Q: How much RAM should a laptop have in 2026?

    A: A minimum of 16GB RAM is recommended for a smooth multitasking experience.

    I’d keep it simple: if you run video calls + browser tabs + Office apps, 16GB RAM is the baseline. If you code, run Docker, edit media, or keep everything open all day, you’ll appreciate more.

    Q: What is the best overall laptop to buy right now?

    A: The Dell XPS 13 is frequently recommended as a top choice for overall performance.

    It’s a strong default because it balances portability and power without getting weird. Still, if you’re deep in the Apple ecosystem or you type for a living, you might land elsewhere—and that’s fine.

    A Bit About My Background

    I’m Mobeen Abdullah, a founder with extensive experience in open-source development and a strong focus on improving developer productivity. Over the years, I have evaluated numerous technologies and tools to help remote workers, students, and professionals maximize their efficiency.

    The biggest lesson I’ve learned is boring: your laptop choice should reduce friction, not add new problems. That means you should think beyond the spec sheet. Plan for your peripherals, your typical day of apps, and where you’ll work (desk, couch, travel).

    If you’re stuck between two options, do this next: list your top three pain points—battery, portability, screen size, typing comfort, compatibility—then pick the laptop that removes the most pain. You’ll feel it on day one.

    Connect with Mobeen Abdullah on LinkedIn

  • Step-by-Step Guide to Creating a WordPress Website

    Step-by-Step Guide to Creating a WordPress Website

    Learn how to create a website in WordPress with this step-by-step guide aimed at beginners and intermediate users. Get started today!

    Featured image for Step-by-Step Guide to Building a WordPress Website in 2026

    Step-by-Step Guide to Building a WordPress Website for Professionals

    Creating a professional website using WordPress can feel daunting, especially if you’re just starting. But you don’t need to “learn everything WordPress” to ship something solid.

    What you do need is a sensible order of operations. If you skip around—theme first, pages later, plugins whenever—your site turns into a wobbly Jenga tower. So, below is the sequence I use when I’m building a site that has to look credible, load fast, and be easy to maintain.

    1. Choosing a Domain Name and Web Hosting

    Before you touch WordPress, lock down two things: the domain (your address) and the host (where the site lives). This part feels boring, but since it’s foundational, small choices here can save you hours later.

    • Domain Name: Keep it short, readable, and easy to say out loud. If you’re a service business, I like brandname.com over brandname-city-services.com. But if the clean brand name is gone, don’t panic—pick something you can actually put on a business card without apologizing.
    • Web Hosting: For beginners, reliable “WordPress-friendly” hosts like Bluehost or SiteGround are usually fine because setup is straightforward and support is reachable. Since you’re learning, that support matters more than shaving $2/month.

    A real example: I watched a freelance photographer friend buy a domain with hyphens, host it on the cheapest plan she could find, then wonder why her gallery pages took 8–10 seconds to load on mobile. The fix wasn’t a magical plugin—she moved to decent hosting, compressed images, and the site suddenly felt professional.

    Common mistakes I see here:
    – Buying a domain in one place, hosting in another, and losing track of logins. It’s manageable, but it gets messy fast.
    – Picking a domain that’s too clever. If you have to spell it every time, you’ll hate it.
    – Choosing hosting based only on “unlimited everything.” “Unlimited” usually comes with fine print.

    If you can, set up a dedicated email later (like hello@yourdomain.com). Even before you do, at least make sure your domain is registered in your name, with two-factor authentication turned on.

    2. Installing WordPress

    Most hosting providers offer one-click WordPress installs. That’s fine, but don’t click through on autopilot—there are a couple choices that matter.

    • Log in to your hosting account.
    • Find the option for Install WordPress (often in cPanel, or a host dashboard panel).
    • Choose the domain you want WordPress installed on (double-check you’re not installing to a temporary URL).
    • Set your admin username and password.

    A professional habit: don’t use admin as the username, and don’t reuse an old password. Since WordPress sites get constant login attempts, you want to make brute-force attacks boring for the attacker.

    After install, do two quick checks:
    1. Visit yourdomain.com and confirm the site loads.
    2. Log into yourdomain.com/wp-admin and confirm you can reach the dashboard.

    If your host offers “staging,” turn it on. It lets you test theme and plugin changes without breaking your live site. Not every beginner needs staging, but once you’ve broken a homepage five minutes before a launch, you’ll never skip it again.

    3. Selecting a Theme

    After installing WordPress, choose a theme that fits your goal and won’t fight you every time you edit.

    • Go to Appearance > Themes.
    • Click Add New and filter by popularity and last updated date.
    • Prioritize responsive layouts and solid reviews.

    Here’s my stance: pick a lightweight, well-maintained theme, then customize it. Don’t pick a “mega theme” that ships with 900 sliders, 14 page builders, and a kitchen sink. Those themes often look flashy in demos but feel sluggish and fragile once you add real content.

    Quick way to sanity-check a theme before you commit:
    – Is it updated recently?
    – Does the demo look good without motion effects?
    – Are the typography and spacing clean?

    A mistake I see a lot: people choose a theme based on the homepage demo, then realize the blog layout, contact page, and header options are limited. So, click through the theme’s templates first. If you’re building a professional site, the “boring” pages matter.

    4. Customizing Your Site

    Now you make it look like yours, not a fresh install.

    • Go to Appearance > Customize.
    • Set your Site Identity (logo, site title, favicon).
    • Pick your colors and fonts (keep it simple—two fonts max).
    • Create menus for your main navigation.

    Also, look at your site on mobile while you customize. Desktop-only design decisions are how you end up with giant headers and awkward spacing on phones.

    Widgets can still be useful (depending on your theme):
    – Add a simple footer with contact info.
    – Drop in social links if they’re relevant.
    – Avoid cramming sidebars with junk.

    A practical mini-checklist I use:
    – Header: clear logo + 4–6 nav items max.
    – Footer: contact, service area (if relevant), and one secondary menu.
    – Typography: readable body text (16px+), no ultra-light fonts.

    Common mistakes:
    – Changing ten design settings at once, then forgetting what caused what.
    – Using low-contrast colors because they “look modern.” If people can’t read it, it’s not modern—it’s broken.

    5. Installing Essential Plugins

    Plugins add functionality, but they also add risk and maintenance. So, install what you need, then stop.

    Here are useful basics:
    Yoast SEO for search optimization.
    WPForms for contact forms.
    Elementor for drag-and-drop page building (helpful if you want layout control without code).

    To install:
    – Go to Plugins > Add New.
    – Search the plugin name.
    – Click Install Now > Activate.

    My rule: if two plugins do the same job, keep one. For example, don’t run multiple page builders, multiple SEO plugins, and multiple caching plugins “just in case.” That’s how you get random layout glitches, slow admin screens, and weird conflicts.

    A real-world mistake I’ve cleaned up more than once: someone installs a security plugin, a backup plugin, and an “optimization” plugin that all try to minify scripts. Then the site’s menu stops working, and they blame WordPress. The actual fix is usually to remove the overlapping features and keep a single source of truth.

    What to consider before installing any plugin:
    – When was it last updated?
    – Does it have active installs and support activity?
    – Do you truly need it, or are you avoiding a simple setting?

    6. Adding Content to Your Website

    Content is what makes the site real. So, build the core pages first, even if they’re rough drafts.

    Start with these essentials:
    Home: who you help + what you do + a clear call-to-action.
    About: credibility, story, and what makes you different.
    Services (or Portfolio): what you offer, pricing ranges (optional), process.
    Contact: form + email + service area + hours.

    To add pages:
    – Go to Pages > Add New.
    – Use the block editor to write and structure content (headings, lists, images).
    – If you’re using Elementor, build sections intentionally: hero, proof, offer, CTA.

    Here’s a simple “professional homepage” structure that works for most small businesses:
    1. Headline that says what you do (no riddles).
    2. One paragraph explaining who it’s for.
    3. 3 service bullets.
    4. Proof: testimonials, logos, before/after, or case notes.
    5. About preview.
    6. CTA: book a call / request a quote.

    Common mistakes:
    – Writing like a brochure: “We are passionate about excellence.” That tells me nothing.
    – Hiding the contact link in the footer.
    – Uploading giant images straight from a phone (this wrecks performance).

    One quick win: name your images properly and add alt text. If you add an image of your office or portfolio work, describe it clearly. It’s better for accessibility, and it helps search engines understand the page.

    7. Launching Your Website

    Launching is not “hit publish and pray.” It’s a checklist.

    Before you go live:
    – Go to Settings > General and confirm your site title/tagline.
    – Check Settings > Reading to ensure you’re not accidentally blocking search engines.
    – Click through every menu item and button on mobile.
    – Test your contact form (submit it and confirm you receive the email).

    I also do a fast “professionalism sweep”:
    – Is there placeholder text anywhere?
    – Do your pages have consistent headings?
    – Do you have a privacy policy page (especially if you use forms/analytics)?

    Then, announce it:
    – Post on social media, sure—but also send it to a few people who will actually click and give feedback.
    – If you have an email list, send a simple “we’re live” email with one clear next action.

    If you want another walkthrough, these two guides cover similar launch steps from different angles: How to Build a WordPress Website in 2026 – GoDaddy Blog and The Ultimate WordPress for Beginners Guide for 2026.

    8. Regular Maintenance and Updates

    Running your website doesn’t stop at launch. In fact, the sites that get “mysteriously slow” or “randomly hacked” are usually the ones that never got maintained.

    Your maintenance rhythm can be simple:
    – Weekly (or biweekly): update WordPress core, themes, and plugins.
    – Monthly: review plugins and remove anything you don’t use.
    – Ongoing: keep backups.

    Backing up matters. Use a tool like UpdraftPlus, and store backups off-site (not only on the same server). Because if the server dies, so do your backups.

    A mistake I’ve seen: someone updates five plugins at once, something breaks, and they have no backup. If you do nothing else, set up backups first, then update.

    Also, keep a tiny change log. Nothing fancy—just a note in a doc: “Updated theme + plugin X on Aug 7.” When something goes sideways, those notes save time.

    By following these steps, you’ll be well on your way to creating a WordPress site that looks professional and stays maintainable. Build the basics, ship it, then improve it in small rounds—you’ll get further than the people who chase perfection for three months.

    FAQs

    • Is WordPress outdated in 2026?
      No. WordPress is still actively maintained and widely used, so it’s a practical choice for many site types.
    • Can a tool write my WordPress content for me?
      Tools can help draft and brainstorm, but you still need to edit for accuracy, tone, and real-world specifics.
    • Why are people moving away from WordPress?
      Some people want simpler site builders or don’t want to handle updates and plugins. That tradeoff can be fair, but WordPress still wins on flexibility.
    • Do professional websites use WordPress?
      Yes. Professionals use WordPress all the time, especially when they need custom layouts, strong SEO control, and ownership of the site.